
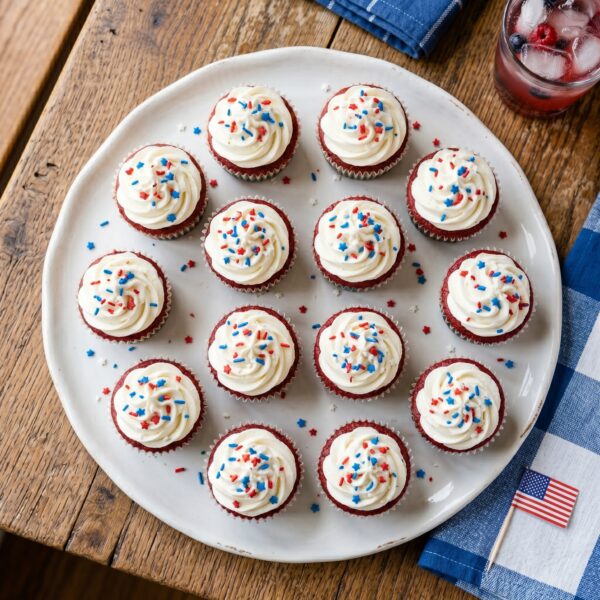
No summer holiday feels complete without a festive dessert, and these little cheesecakes are my answer for the Fourth of July. They’re smooth, creamy, and have red, white, and blue layers tucked right inside, so they’re a fun surprise when you take a bite. The first batch I made, I cracked the oven door open too soon to peek at them, and the sudden temperature change left the tops all cracked. Turns out cheesecake, even the mini kind, likes to cool down slow.
What I love is that they bake right in a cupcake pan, so they’re already portioned and easy to grab. They’re the perfect size for sharing and a breeze to carry to a party. They’re vanilla flavored, but you can swap in another extract if you like. Coconut or almond would both be lovely. And once the batter’s made, you just split it into bowls, color two of them, and layer them up.
Here’s the kitchen tip that keeps them smooth. Mix the filling on low speed, not high. Beating cream cheese on high whips a bunch of air into the batter, and that air is what causes those cracks as the cheesecakes bake and cool. Keep the mixer slow, scrape the bowl often, and add the eggs one at a time. A gentle hand here gives you that creamy, smooth texture.
And don’t rush the cooling, which is where I went wrong. After they bake, turn off the oven and leave the door closed for ten minutes, then crack it open and let them cool slowly before they go in the fridge. That slow cooldown is what keeps the tops from cracking. You’ll have smooth little cheesecakes ready to top with whipped cream and sprinkles, and they look so festive on a platter.
Why You’ll Love This Recipe
The texture is smooth and creamy. Mixing the filling gently keeps it silky and crack-free, with a buttery vanilla wafer crust underneath.
The colors are a fun surprise. Red, white, and blue layers hidden inside make each bite festive, topped with whipped cream and sprinkles.
They’re already portioned. Baking them in a cupcake pan gives you perfect single servings that are easy to share and carry.
They’re make-ahead friendly. They keep for a couple days in the fridge, so you can bake them before the party and relax.
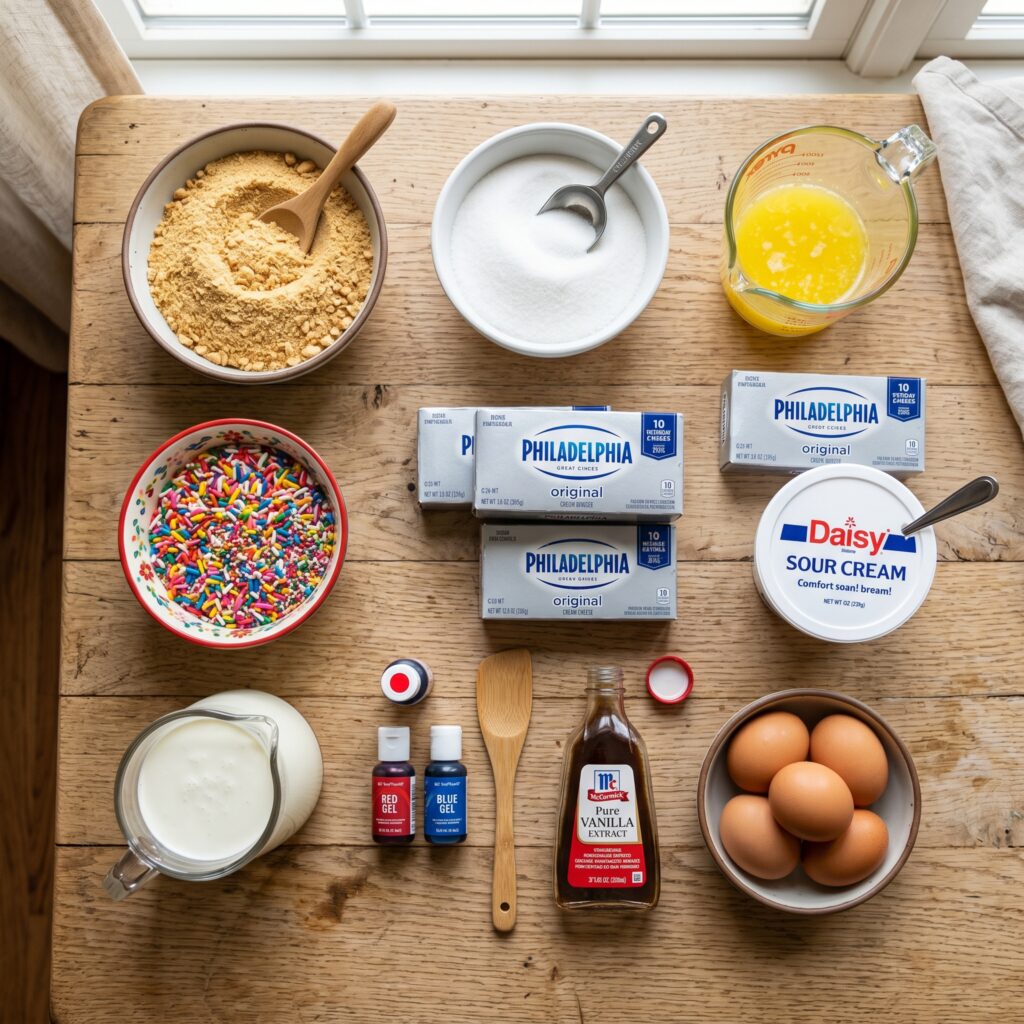
Ingredients
Here’s everything you’ll need:
For the crust:
- 1 cup (134g) vanilla wafer cookie crumbs
- 2 tbsp (26g) sugar
- 4 tbsp (56g) butter, melted
For the filling:
- 12 ounces (339g) cream cheese, room temperature
- 1/2 cup (104g) sugar
- 3 tbsp (24g) flour
- 1/2 cup (115g) sour cream
- 1 1/2 tsp vanilla extract
- 2 eggs
- Blue gel icing color
- Red gel icing color
For the topping:
- 1/2 cup (120ml) heavy whipping cream, cold
- 5 tbsp (36g) powdered sugar
- 1/2 tsp vanilla extract
- Sprinkles
How to Make Red, White and Blue Mini Cheesecakes

1. Make the Crust
Heat the oven to 325 and line a cupcake pan with liners. Combine the vanilla wafer crumbs, sugar, and melted butter, then press about two tablespoons into the bottom of each cup. Bake five minutes and let them cool.
2. Start the Filling
Reduce the oven to 300. Mix the cream cheese, sugar, and flour on low speed until combined. Keeping the speed low keeps air out of the batter, which is what prevents cracks. Scrape down the bowl.
3. Add the Rest
Beat in the sour cream and vanilla on low until well combined. Add the eggs one at a time, mixing slowly and scraping the bowl after each. A gentle hand keeps the texture smooth.
4. Color the Batter
Divide the batter evenly into three bowls. Leave one white, color one red, and color one blue with the gel icing colors. Gel works best since it won’t thin out the batter.
5. Layer and Bake
Layer the batter into the crusts, starting with a tablespoon of white, then red, then blue, until the cups are mostly full. Bake 18 to 20 minutes, then turn off the oven and leave the door closed for ten minutes.
6. Cool and Top
Crack the oven door and cool the cheesecakes 15 to 20 minutes, then chill them in the fridge. Once cold, whip the cream with powdered sugar and vanilla to stiff peaks, pipe it on top, and add sprinkles.
Expert Tips
Mix the filling on low speed. High speed whips in air, which is what causes cracks as the cheesecakes bake.
Use room-temperature cream cheese. It blends smooth without lumps, so the batter comes together easily.
Cool them slowly in the oven. Leaving the door closed, then cracked, keeps the tops from cracking.
Use gel icing colors, not liquid. Gel colors the batter without thinning it out or changing the texture.
Chill them fully before topping. Cold cheesecakes hold the whipped cream better and slice cleaner.
Recipe Variations and Add-ins
You can swap the vanilla extract for coconut or almond for a different flavor.
Use chocolate wafer or graham cracker crumbs in place of the vanilla wafers for the crust.
You can serve them with fresh strawberries and blueberries on the side for more patriotic color.
Add a few sprinkles into the batter for a confetti look inside.
You can skip the layering and swirl the colors together for a tie-dye effect instead.
What to Serve With This Recipe
Set them out on a white platter at a cookout. The colors stand out. They make an easy grab-and-go treat.
Serve them with fresh berries on the side. The fruit keeps the dessert table colorful. The two round out the spread.
Pair them with lemonade or iced tea. The cold drinks suit the rich cheesecake. It’s a festive combo for a hot day.
How to Store This Recipe
Keep the cheesecakes in an airtight container in the fridge until you’re ready to serve. The creamy texture holds best when they’re kept cold, and they’re at their best for two to three days.
You can make them ahead for a party, which takes the pressure off the day of. Wait to add the whipped cream topping and sprinkles until closer to serving so they look fresh.

Leave a Comment