

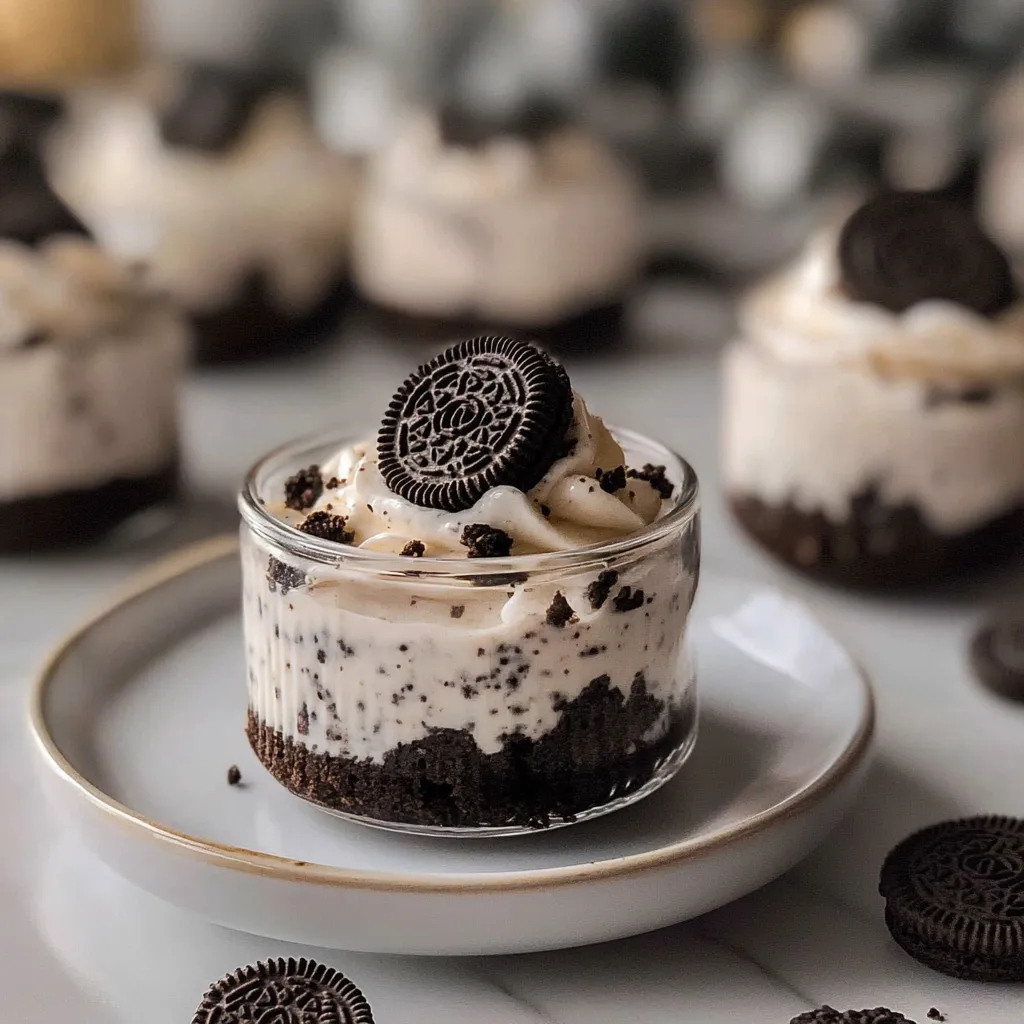
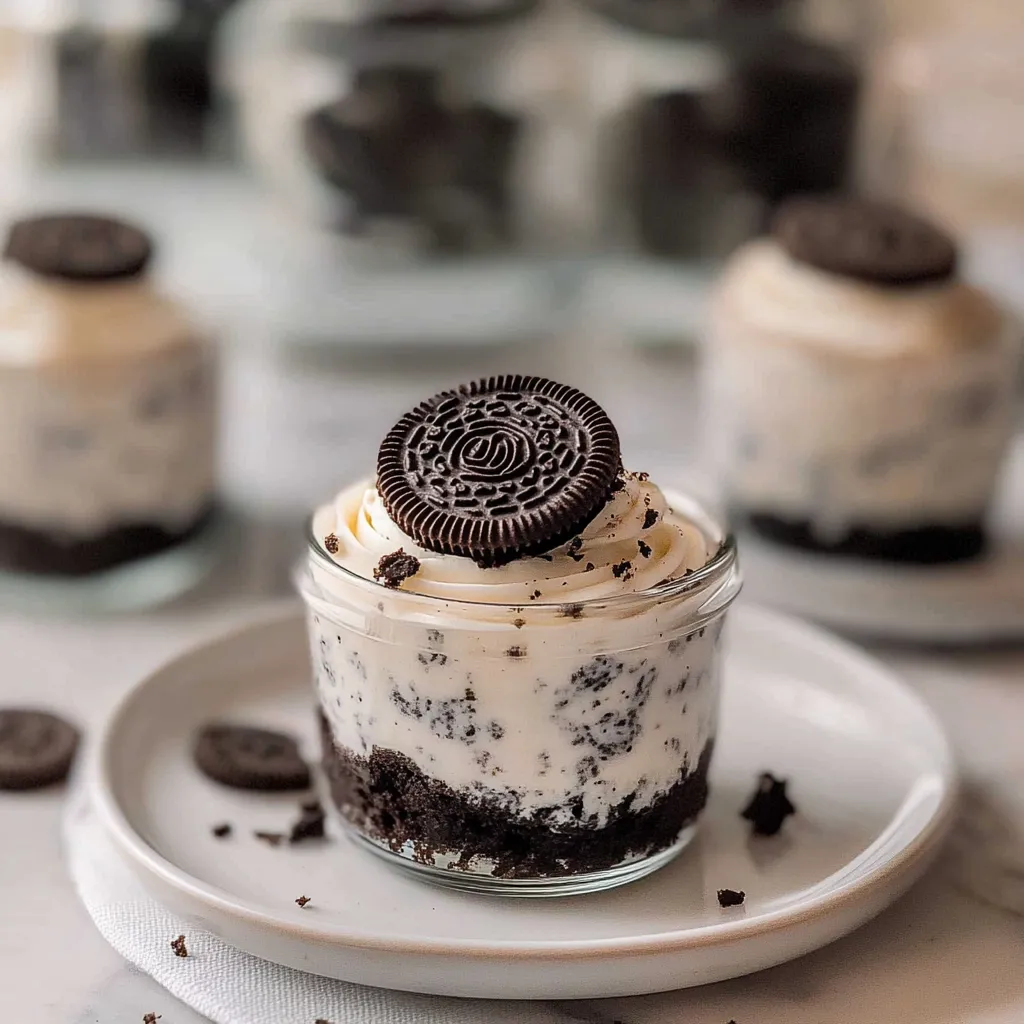
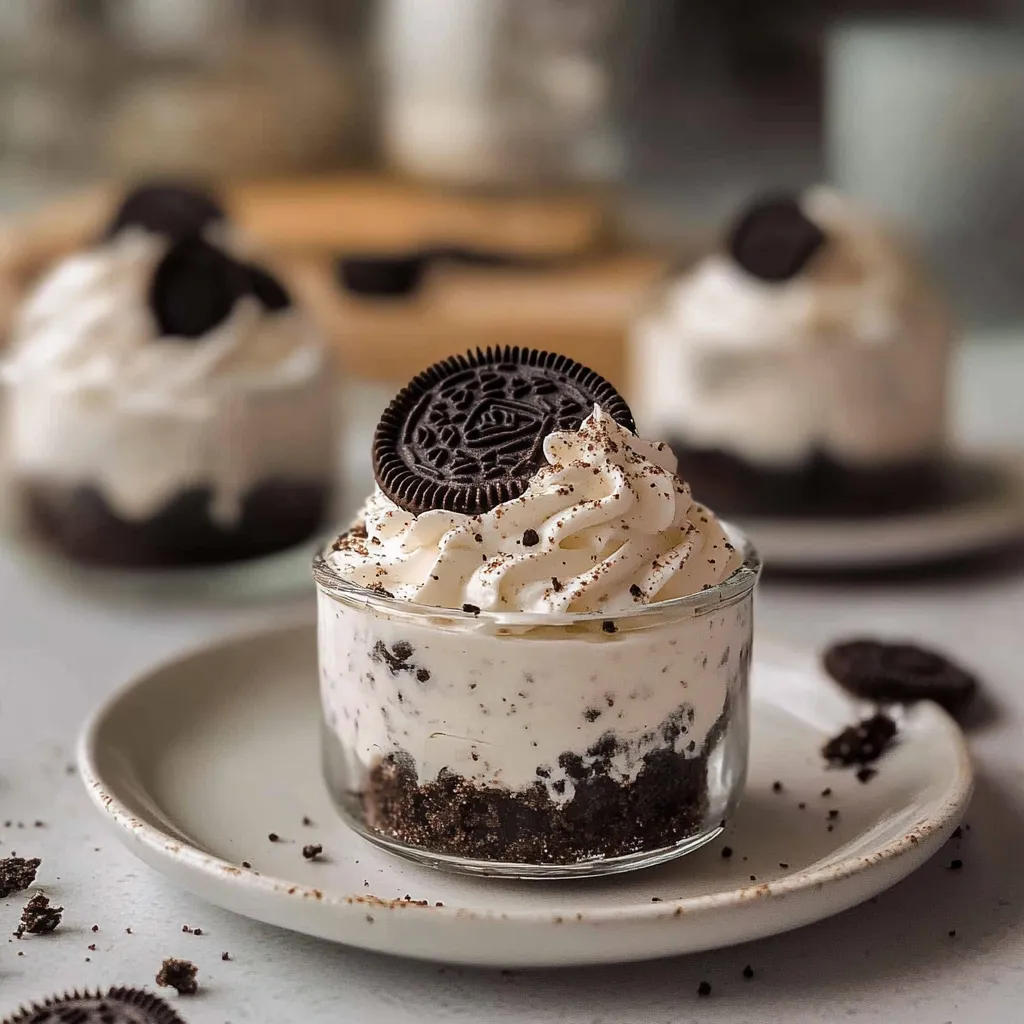
NO-BAKE OREO CHEESECAKE CUPS
Introduction
Hey there, fellow dessert enthusiasts! You know those days when you crave something sweet but also want to skip the whole baking ordeal? Well, let me tell you about my absolute favorite treat that has saved my sweet tooth more than a few times: No-Bake Oreo Cheesecake Cups! These little beauties remind me of indulgent summer afternoons spent lounging in the sun, dessert in hand, with laughter echoing around me.
There’s something so delightfully satisfying about digging into a creamy cheesecake layered with the classic taste of Oreo cookies. Whether you’re hosting a gathering, celebrating a special moment, or just treating yourself (because you deserve it!), these cheesecake cups are a simple and elegant solution. So, let’s roll up our sleeves and get ready to whip up something scrumptiously delicious!
Why You’ll Love This Recipe
- Quick and Easy: No baking means less mess and more time to enjoy!
- Decadent Flavor: The combination of rich cream cheese and crunchy Oreos will leave you wanting more.
- Versatile: Perfect for parties, movie nights, or just a quiet night at home with a spoon.
- Customizable: You can easily adapt these cups for different occasions or dietary needs.
Ingredients
Here’s what you’ll need to create your No-Bake Oreo Cheesecake Cups:
- 24 Oreo cookies, crushed (plus a few extra for garnish)
- 4 tablespoons unsalted butter, melted
- 16 ounces cream cheese, softened (room temperature for easier mixing)
- 1 cup powdered sugar
- 1 teaspoon vanilla extract
- 1 cup heavy whipping cream (chilled for better whipping)
- 1/2 cup mini chocolate chips (optional, because who doesn’t love a little extra chocolate?)
Note: Using room temperature cream cheese ensures a smooth, creamy texture. Remember, nobody likes lumps in their cheesecake!
Step-by-Step Instructions
Let’s dive into the blissful world of cheesecake making! Follow these simple steps:
- Prepare the Oreo Crust: In a mixing bowl, combine the crushed Oreos and melted butter. Stir until it resembles a wet sand consistency. This is going to be the most scrumptious base!
- Assemble the Cups: Evenly distribute the Oreo mixture into your serving cups or glasses. Press down gently with the back of a spoon to form a solid base.
- Make the Cheesecake Filling: In a large bowl, beat the softened cream cheese with an electric mixer until smooth. Gradually add the powdered sugar and vanilla extract, mixing until well combined.
- Whip the Cream: In a separate bowl, whip the heavy cream until stiff peaks form. This step adds that fabulous lightness to our cheesecake, so don’t skip it!
- Fold it Together: Gently fold the whipped cream into the cream cheese mixture, being careful not to deflate the fluffy goodness. Remember, we want it light and airy!
- Add the Chocolate Chips: If you’re feeling extra indulgent, fold in those mini chocolate chips now. They add a delightful surprise!
- Layer the Cheesecake: Spoon the cheesecake mixture over the Oreo crust in your cups, smoothing it out with a spatula. Don’t be stingy—add a hearty layer!
- Chill: Cover and refrigerate the cups for at least 2 hours, or until set. The waiting is the hardest part, but trust me, it’s worth it!
- Garnish: When you’re ready to serve, crush a few additional Oreos and sprinkle them on top of each cheesecake cup for that gorgeous finishing touch. Feel free to add whipped cream if you want.
Watch-out: Don’t overmix when combining the whipped cream with the cream cheese. We want to keep that delightful fluffiness that makes this dessert so dreamy!
Pro Tips & Variations
Now that you’re a pro at making these cheesecake cups, let’s talk about some fun twists you can try:
- Fruit Twist: Add some pureed fruit like strawberries or raspberries to the cheesecake mixture for a fruity flavor. It’s a great way to mix things up!
- Vegan Option: Substitute cream cheese with a dairy-free alternative and use coconut whipped cream for a delicious vegan version.
- Flavor Extracts: Try adding a splash of almond extract for a unique flavor or lemon zest for a bit of zing!
- Layer it Up: Get creative with the layers! Add a layer of chocolate ganache or even caramel sauce in between the crust and cheesecake layers.
These variations can keep your dessert game exciting and cater to different preferences and dietary needs!
Serving Suggestions
These No-Bake Oreo Cheesecake Cups are perfect on their own, but here’s how I love to serve them:
- Chilled to Perfection: Always serve these cups chilled – that’s where the magic happens! Paired with a hot cup of coffee or a chilled glass of milk, they’re simply irresistible.
- Perfect for Entertaining: Arrange the cups on a beautiful platter with decorative touches like fresh mint leaves or colorful fruit slices for a pop of color. Your guests will be in awe!
- Movie Night Treat: Grab a few for your next movie night, set them beside a cozy blanket, and get ready to indulge while you cheer for your favorite characters!
Just imagine that first creamy bite melting in your mouth! It’s a sweet moment you’ll want to savor and share.
Storage Tips
After enjoying your delicious cheesecake cups, you might be tempted to save some for later (I know I always am!). Here’s how to do it:
- Refrigerating: Store any leftovers in an airtight container in the fridge for up to 3 days. The flavors will deepen, making your dessert even more delectable!
- Freezing: You can also freeze these cups! Just make sure to freeze them before adding any toppings. When ready to enjoy, let them thaw in the fridge overnight.
- Reheating: There’s no need to reheat – these cheesecake cups are best enjoyed cold. Just grab a spoon and dig in directly from the fridge!
FAQs
Can I use regular cream cheese instead of low-fat?
Absolutely! Using regular cream cheese will give you that rich, decadent flavor. If you’re looking for a lighter option, low-fat can work, but keep in mind that the texture might be a bit different.
What can I use if I don’t have heavy cream?
If you don’t have heavy cream, you can substitute with whipped topping or coconut cream for a dairy-free option. The texture will be different, but still delicious!
How long do these cheesecake cups last?
The No-Bake Oreo Cheesecake Cups will last up to 3 days in the fridge. Just make sure they’re well covered to keep that delightful creaminess intact!
Can I make these in advance?
Yes! These are perfect for making ahead of time. You can prepare them a day or two in advance and let them chill until you’re ready to serve. They’re even better when the flavors have had time to meld together!
Can I mix in other cookies or toppings?
Definitely! Feel free to experiment with different cookies or toppings. Chocolate sandwich cookies, peanut butter cups, or even pie fillings can be delicious additions!
Conclusion
And there you have it—your own No-Bake Oreo Cheesecake Cups, ready to bring smiles, delights, and oh-so-sweet moments to any occasion! I hope you find yourself as enchanted by these treats as I have. Sometimes, the simplest recipes make the biggest impact.
If you give this a try (and you absolutely should), I’d love to hear how it turned out for you! Share your experiences or any fun twists you came up with. Happy indulging, my friend!
Leave a Comment