

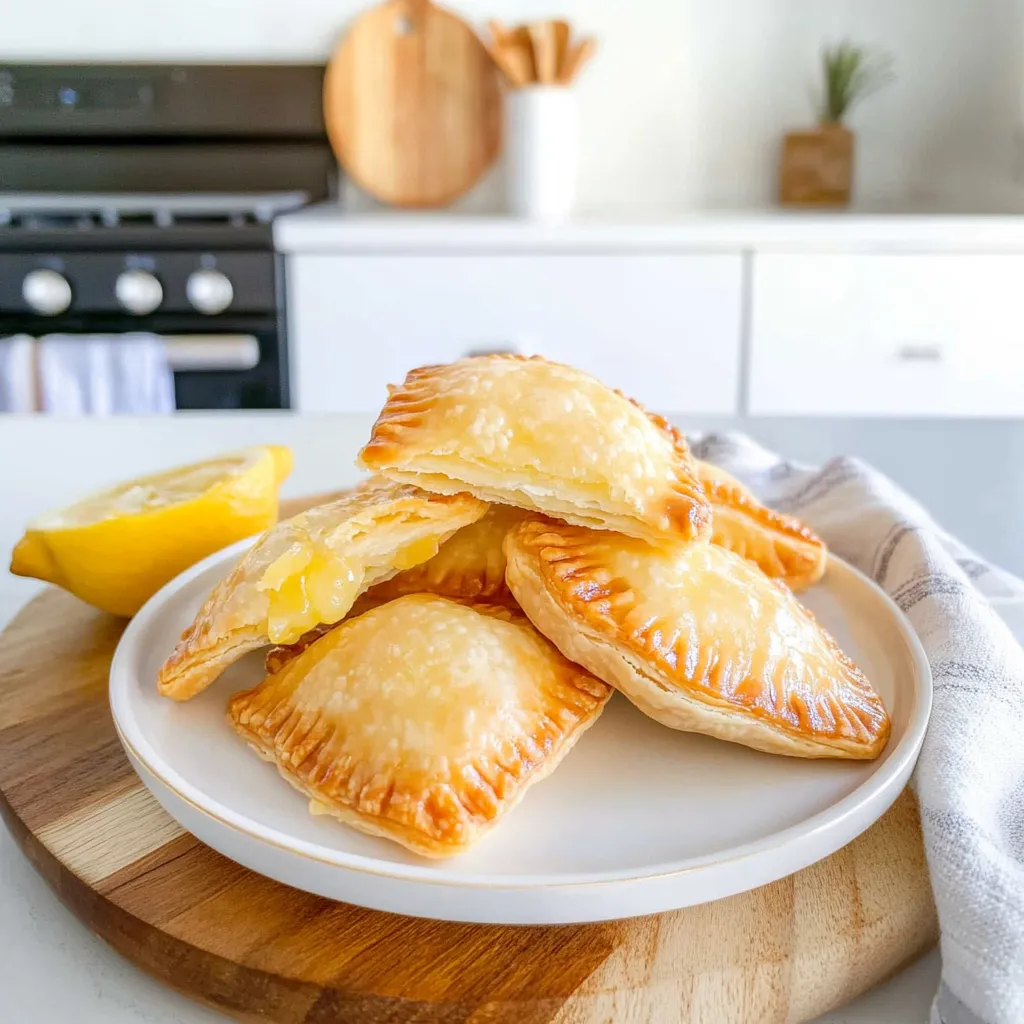
Lemon Hand Pies (Air Fryer or Baked)
Whenever I think of lemon hand pies, I’m transported back to sunny afternoons at my Grandma Ruth’s cozy kitchen, where the zest of the lemons and warm buttery aroma danced in the air. She’d pull out a slightly worn recipe card, its edges crinkled, and start gathering ingredients with a twinkle in her eye. Lemon hand pies became our little project; we’d fill the air with laughter and the sweet scent of baking while wrapping our stories in flaky crust. It’s these delightful pastries that I want to share with you today, bringing a little sunshine to your kitchen! Whether you’re making them in the air fryer or the oven, trust me, each bite is like a hug from Grandma herself.
Why You’ll Love This Recipe
- ✨ Versatile: Make them in an air fryer for a quick treat or bake them in the oven for a more traditional approach.
- 🍋 Zesty Goodness: The bright flavor of lemons uplifts your spirits, making them perfect year-round.
- 👐 Simple to Create: With just a few steps, you’ll be on your way to deliciousness.
- 🌱 Flexible: You can adjust sugar levels or go for whichever crust fits your dietary needs.
- 🍰 Kid-friendly: These are great to make with little ones, too. They’ll love helping to fill and seal the pies!
Ingredients
Let’s gather all the goodies for these delightful lemon hand pies!
- 1 package refrigerated pie crust (or homemade, if you feel ambitious!)
- 1 cup lemon curd (store-bought or homemade)
- 1 egg (beaten, for egg wash)
- 2 tablespoons sugar (granulated, for sprinkling)
- Zest of 1 lemon (for extra zing)
- Pinch of salt (to balance sweetness)
- Optional: powdered sugar (for dusting before serving)
Helpful Tip: If you’re in a time crunch, don’t hesitate to use store-bought lemon curd. But if you have the time, try making your own—it’s surprisingly easy and so satisfying!
Step-by-Step Instructions
Ready to transform your kitchen into a little lemon-scented haven? Follow along!
- Preheat your oven or air fryer: If you’re baking, preheat your oven to 400°F (200°C). For the air fryer, no need to preheat—just set it to 325°F (160°C).
- Prepare the pie crust: Roll out your pie crust on a floured surface. If you’re using refrigerated crust, let it sit at room temperature for about 10 minutes to make it easier to handle.
- Cut out circles: Use a 4-inch round cutter (or a small bowl) to cut circles from the dough. Just place them close together to use as much dough as possible!
- Fill the circles: Place a small spoonful of lemon curd in the center of each circle, about a tablespoon or so. Be careful not to overfill—you’ll want to seal them properly!
- Seal them up: Moisten the edges of each circle with a little water, fold them over, and press the edges with a fork to seal. This is where you can get creative—crimp, twist, or even use your fingers for fancy edges!
- Egg wash time: Brush the tops with the beaten egg. This helps get that golden, shiny finish!
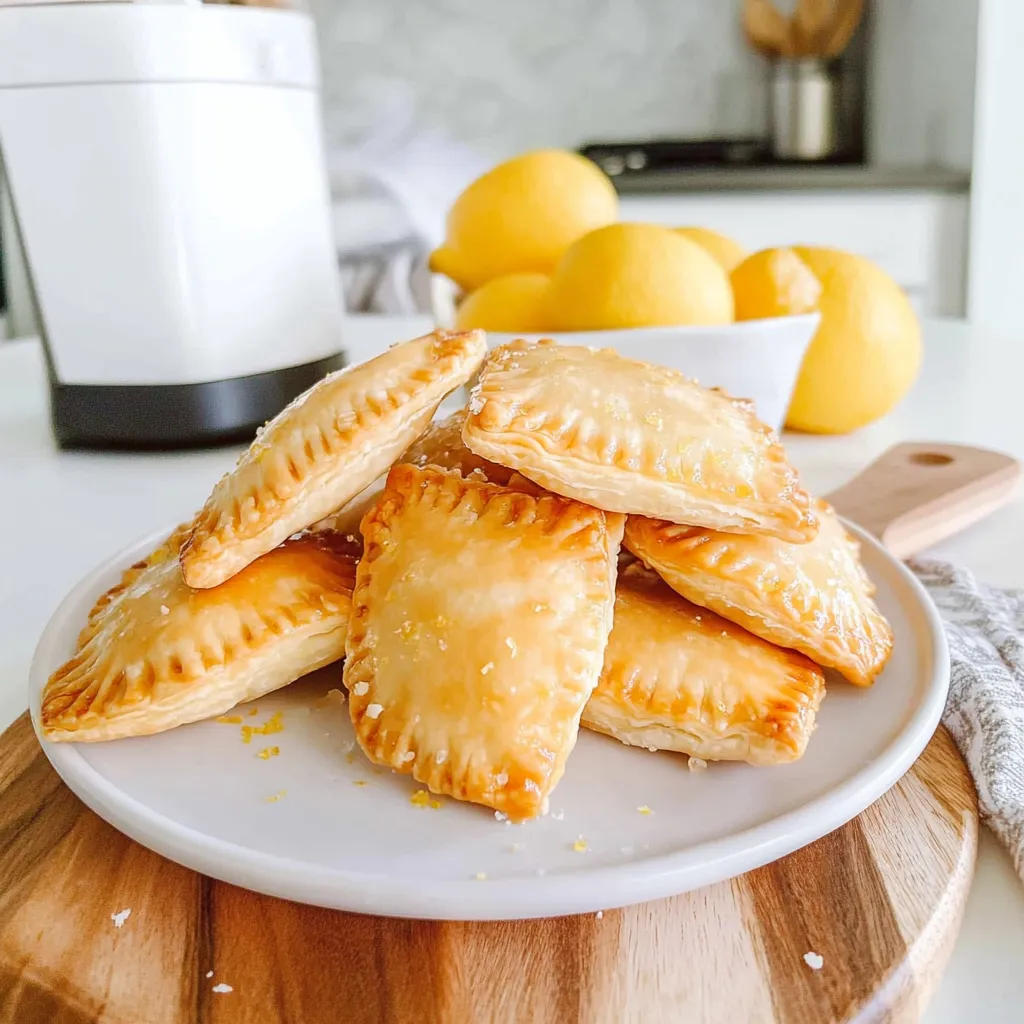
- Sprinkle with sugar: Just a light sprinkle of granulated sugar on top adds an extra crunch when baked.
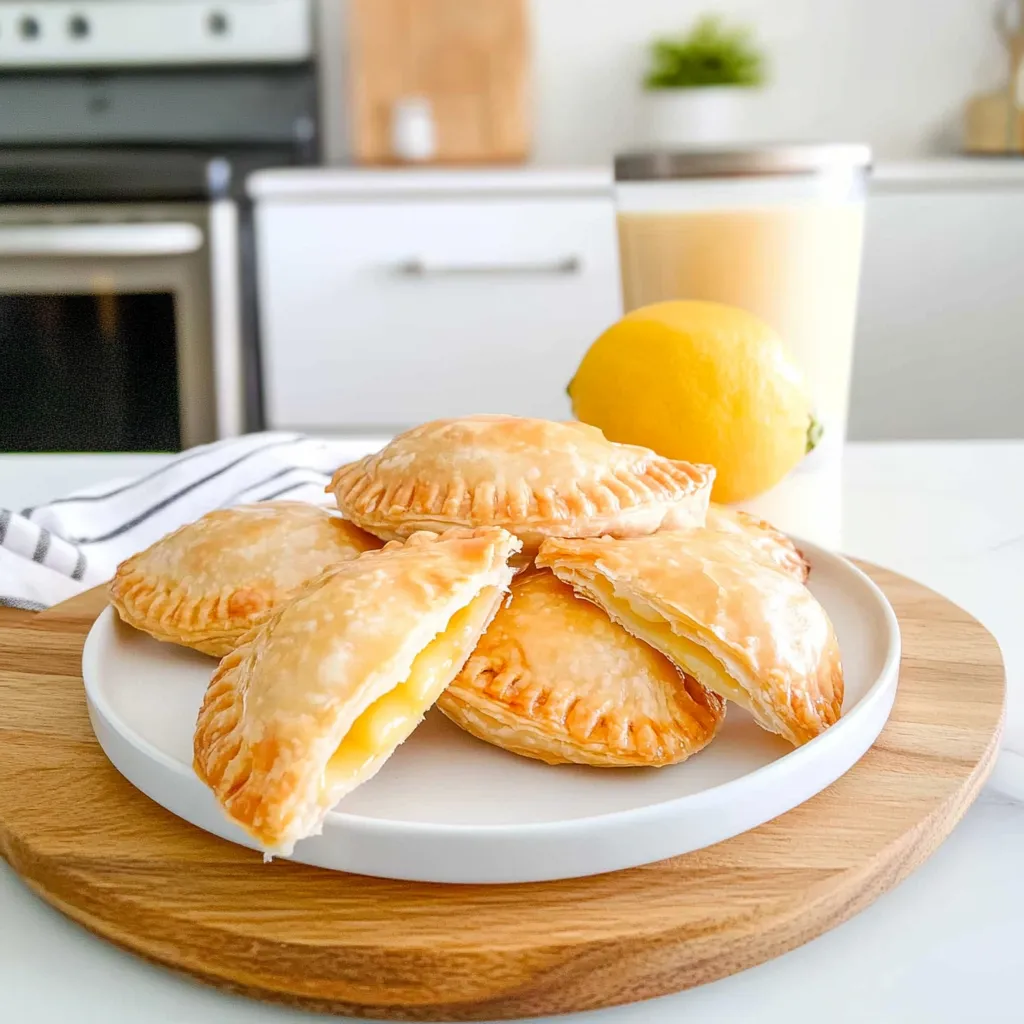
- Bake/Airt Fry: If you’re baking, pop them onto a parchment-lined baking sheet and bake for 15-20 minutes or until golden brown. For the air fryer, cook for about 10-12 minutes, checking for that lovely golden hue.
- Cool & Serve: Allow them to cool slightly before serving. If desired, dust them with powdered sugar right before serving for a cute finish.
Pro Tip: Keep an eye on them as baking times can vary based on your oven or air fryer—take them out as soon as they’re brown and delicious!
Pro Tips & Variations
Let’s get a little playful with this recipe:
- Flavor Twist! Feeling adventurous? Add some fresh berries or a dollop of cream cheese to the lemon curd for a delightful surprise.
- Swap the zest: Try different citrus fruits like lime or orange for a unique twist.
- Make it gluten-free: Use gluten-free pie crust, and you’re good to go!
- Maple Sugar: If you want a deeper sweetness, substitute half of the granulated sugar with maple sugar for a lovely fall flavor.
Serving Suggestions
Serve these little treasures warm, with a cup of your favorite tea or a scoop of vanilla ice cream on the side. Imagine the cozy vibes as you sit with a sweet, flaky hand pie in one hand and a warm drink in the other—it’s simply perfection! These lemon hand pies are also perfect for picnics or as a delightful after-school snack. If you’re feeling fancy, add a dollop of whipped cream on top when serving, and watch the smiles appear.
Storage Tips
Don’t worry if you have leftovers (if that’s even possible)—they’ll keep well! Here’s how:
- Refrigerate: Place cooled hand pies in an airtight container in the fridge for up to 3 days.
- Freeze: You can freeze unbaked hand pies. Just wrap them tightly in plastic wrap and place them in a freezer bag. They’ll be good for up to 3 months. Bake them straight from the freezer, adding a couple more minutes to the baking time.
- Reheat: To reheat baked hand pies, pop them in a 350°F (175°C) oven for about 10-15 minutes or the air fryer for 5-7 minutes until warmed through and crispy again. Microwave if you’re in a rush, but they won’t be as crispy.
FAQs
Can I use homemade lemon curd?
Absolutely! Homemade lemon curd can take your hand pies to the next level with its fresh, vibrant flavor. Just make sure it’s chilled before you use it to fill the pies.
What if I don’t have a round cutter?
No worries at all! You can use any round object that’s around 4 inches—like the rim of a glass or even a bowl. Just be creative!
Can I make these savory?
Sure! Swap out the lemon curd for a savory filling like cheese and spinach, or sautéed mushrooms. Just make sure to adjust the seasoning to your taste.
How do I know when the pies are done?
Look for a beautiful golden brown color on the crust! They should also puff up a bit, giving you a charming little hand pie. If they’re golden, they’re ready to shine on your plate!
Conclusion
I hope you give these lemon hand pies a try! They are a delightful treat, perfect for any occasion or just any sunny kitchen afternoon when you want something special—because you deserve a little indulgence! I’d love to hear your thoughts and any variations you come up with. Share your experiences and sentiments about this recipe in the comments below; let’s keep the baking love alive!


Leave a Comment