
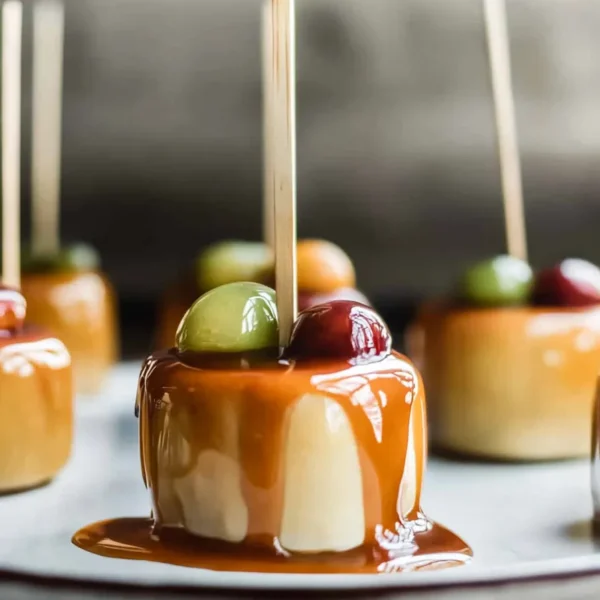
There’s something undeniably magical about homemade caramel apples that makes them a beloved treat, especially during the fall season. The crisp bite of a fresh apple coated in rich, velvety caramel is simply irresistible. With their glossy sheen and mouthwatering taste, these delightful confections are perfect for gatherings, parties, or just satisfying your sweet tooth. Moreover, crafting them at home adds a personal touch, letting you customize flavors and toppings to match your preferences.
Additionally, the process of making caramel apples can be a fun activity to enjoy with family or friends. Imagine dipping the apples into a bubbling pot of homemade caramel, then decorating them with sprinkles, nuts, or drizzles of chocolate. It’s a delightful way to connect and celebrate the season. So, whether you’re seeking a scrumptious snack or a festive dessert, this quintessential fall treat is sure to bring joy to your table. Let’s dive into the delightful world of these delectable caramel-coated apples and discover how easy it is to make them at home!
Essential Ingredients for Homemade Caramel Apples:
When ready to indulge in the sweet fall tradition of Homemade Caramel Apples, gathering the right ingredients is essential. Below are the necessary components you’ll need for creating this delightful treat, perfect for family gatherings or simply a special snack.
Fresh & Crisp Apples:
– 8–9 cold apples: Choose your favorite variety such as Granny Smith, Fuji, or Honeycrisp. The tartness of Granny Smith pairs exceptionally well with caramel’s sweetness, creating a delightful flavor balance.
Rich Caramel Mixture:
– 1 and 3/4 cups (420ml) heavy cream: This will provide the creamy base for your caramel.
– 1 cup (240ml) light corn syrup: Corn syrup helps keep the caramel smooth and prevents crystallization.
– 2 cups (400g) packed light or dark brown sugar: Depending on your taste preference, light brown sugar gives a mild sweetness while dark brown sugar offers deeper, richer notes.
– 1/4 cup (4 Tbsp; 56g) unsalted butter, at room temperature: The butter adds creaminess and ensures a smooth texture.
– 1/2 teaspoon salt: This enhances the flavors dramatically, creating a balance with the sweetness.
– 1/2 teaspoon pure vanilla extract: A splash of vanilla adds a wonderful aroma and depth to the caramel.
Now that you have all the components, the next step is easy and enjoyable. Simply combine the heavy cream, corn syrup, and brown sugar in a saucepan, and cook them over medium heat while stirring until the mixture reaches a rich, golden-brown color. Then, stir in the butter, salt, and vanilla extract, allowing everything to melt and blend harmoniously.
After preparing the caramel sauce, dip your prepped apples (which should have wooden sticks inserted for easy handling) into the mixture. Let any excess caramel drip off, and then place them on wax paper to cool and set.
If you’re craving another amazing way to enjoy the flavors of caramel and apple, check out my recipe for Caramel Apple Nachos. This sweet treat is equally delightful and an excellent option for gatherings!
Overall, Homemade Caramel Apples are not only tasty but also a nostalgic dessert that everyone can enjoy. Happy caramel-apple crafting!
Step-by-Step Guide on How to Prepare:
Creating delightful homemade caramel apples doesn’t require culinary expertise; it’s simple and enjoyable. You’ll need 8 to 9 cold apples, which serve as the perfect base for the thick, gooey caramel that will crown them. Begin by washing the apples thoroughly, ensuring they are free from wax or residue. This will help the caramel stick more effectively. Once washed, dry them with a clean towel and insert a sturdy stick into the top of each apple for easy dipping.
Making the Perfect Caramel Coating
Now, let’s create that luscious caramel sauce. In a saucepan, combine 1 and 3/4 cups of heavy cream, 1 cup of light corn syrup, 2 cups of packed brown sugar, 1/4 cup of unsalted butter (at room temperature), 1/2 teaspoon of salt, and 1/2 teaspoon of pure vanilla extract. Stir these ingredients over medium heat until they are well mixed. Continue to cook until the mixture boils, then reduce the temperature to low, allowing it to simmer. Stir frequently to prevent burning, and keep cooking until the caramel has thickened; this should take about 10-15 minutes.
Dipping Your Apples
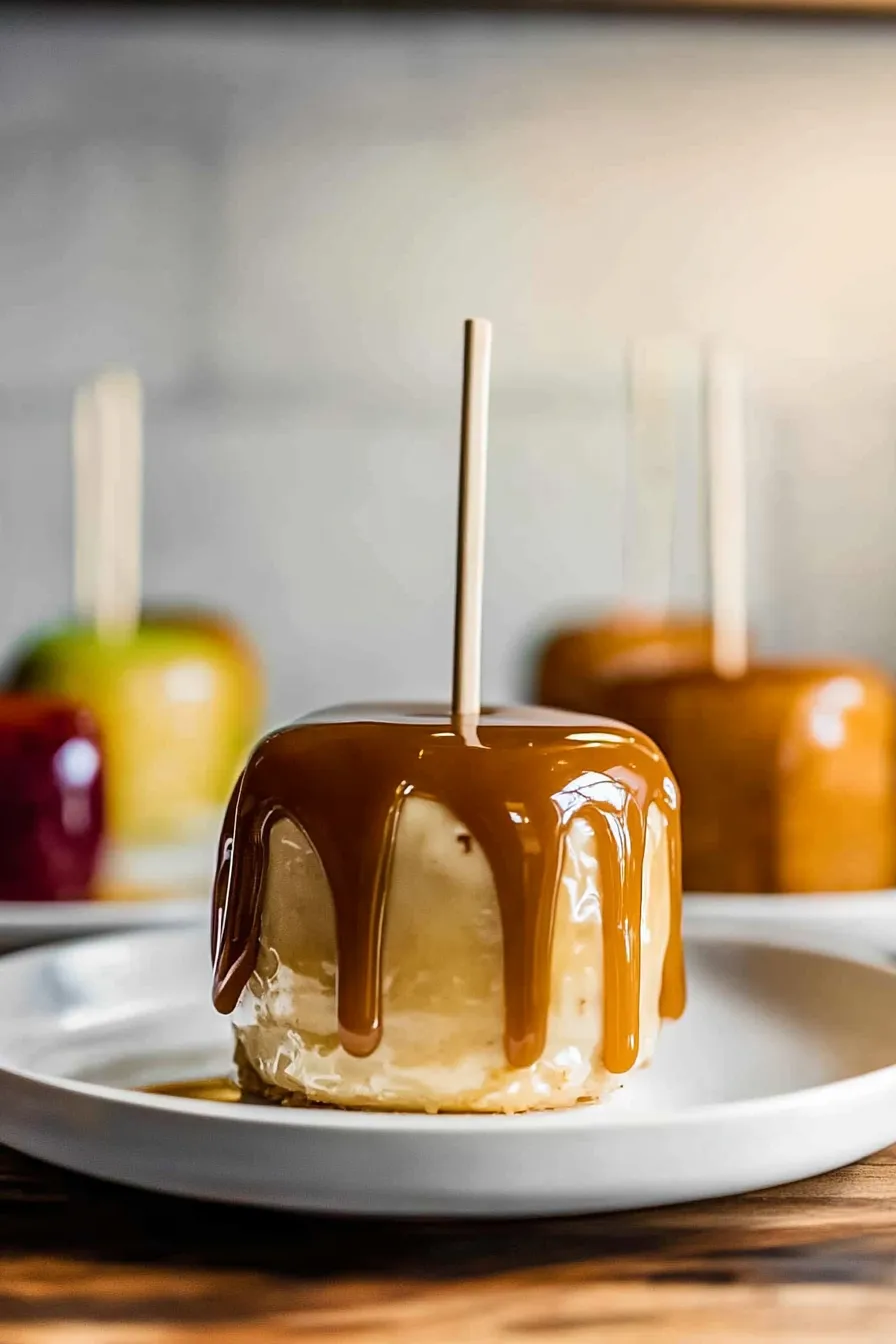
Once your caramel reaches the desired consistency, it’s time to dip the apples. Hold each apple by the stick and dip it into the caramel, twirling it gently to coat all sides. Make sure to allow excess caramel to drip back into the pot before placing the apple on a parchment-lined baking sheet.
Chilling for Perfection
After all apples are dipped, refrigerate them for about 30 minutes to allow the caramel to set properly. Once they are firm, you can enjoy your homemade caramel apples as a sweet treat or share them with friends. If you’re looking to experiment further with apple recipes, you might find caramel apple nachos to be a delightful twist!
These decadent homemade caramel apples are perfect for autumn celebrations, Halloween parties, or as a simple yet satisfying dessert. They embody the sweet taste of fall, making them a cherished favorite among all age groups. So, gather your ingredients today and embark on the sweet adventure of creating this timeless treat!
Tips for Perfecting Homemade Caramel Apples:
Creating the ultimate homemade caramel apples is a delightful process that transforms simple ingredients into a festive favorite. Whether for a fall celebration or a special treat, following some essential tips can elevate your experience.
Choose the Right Apples
First, selecting the right type of apple is crucial. Firm varieties, like Granny Smith, Honeycrisp, and Fuji, make excellent choices. They hold their shape well and offer a nice contrast to the sweet caramel. Make sure to wash the apples thoroughly to remove any wax or residue, which helps the caramel adhere better.
Prepare Your Workspace
Before you start making caramel, get your workspace ready. Lay out all your tools and ingredients. Place a sheet of parchment paper on a baking tray to set the coated apples. If you want extra flavor, try adding toppings like crushed nuts, sprinkles, or sea salt once the caramel is applied.
Make Velvety Caramel
For that perfect homemade caramel, you can use a simple recipe or follow an expert method. One great source for a reliable caramel recipe is Sally’s Baking Addiction, which offers a easy-to-follow guide. Remember to allow the caramel to reach the soft ball stage for the ideal consistency.
Dip with Precision
When it comes to dipping, do it quickly but carefully. Insert a sturdy stick into the apple, ensuring it’s well-placed, then dip it fully into the caramel. Allow the excess caramel to drip off, creating a smooth, even surface. A good tip is to rotate the apple in the caramel to ensure complete coverage.
Cool and Set
After the caramel-coated apples are made, place them on the prepared parchment paper. Allow them to cool completely until the caramel sets. This is the moment to drizzle additional toppings or flavorings like melted chocolate for a unique treat!
By following these tips, your homemade caramel apples will not only look delicious but taste amazing as well. For those who enjoy variations, consider checking out some fun takes like caramel apple nachos or caramel apple upside-down cake for new ways to enjoy this classic fall treat.
Delicious Variations of Homemade Caramel Apples:
Creating delightful variations of your basic homemade caramel apples can make this classic treat even more exciting. While the traditional caramel-coated apple is undeniably delicious, exploring different flavors and textures can elevate your autumn experience. Here are some creative suggestions to inspire your next batch of caramel-covered delights.
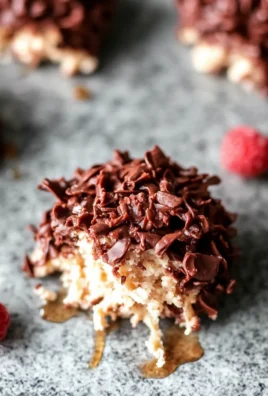
Chocolate-Covered Caramel Apples
Start by melting some high-quality chocolate. After coating your apple in caramel, dip it into the melted chocolate for an indulgent twist. For added flavor, sprinkle crushed nuts or colorful sprinkles on the chocolate layer. This combination creates a luscious bite that has both sweetness from the caramel and richness from the chocolate.
Nutty Luxe Delight
Enhance your homemade caramel apples with a variety of nuts. Consider rolling the caramel-coated apples in crushed almonds, pecans, or walnuts. This not only adds a delicious crunch but also introduces a nutty essence that pairs beautifully with the sweet caramel. Dusting your apples with sea salt can amplify the flavors, producing a lovely sweet-and-salty harmony.
Caramel Apple Nachos
Transform your homemade caramel apples into a shareable platter by turning them into caramel apple nachos. Slice your apples thinly and layer them on a baking sheet. Drizzle warm caramel sauce over the slices and sprinkle with mini marshmallows, chocolate chips, and chopped nuts. This innovative twist offers a fun and interactive way to enjoy caramel apples and can be perfect for gatherings. For an easy recipe, check out Caramel Apple Nachos: A Sweet Fall Treat You’ll Love.
Spiced Caramel Apples
Infuse a little warmth into your treats by adding spices to your caramel. Incorporating cinnamon or nutmeg into the caramel mixture provides a cozy flavor that complements the tartness of the apple. These spiced homemade caramel apples are perfect for chilly fall evenings and can evoke the comforting essence of autumn.
In conclusion, utilizing creative variations of homemade caramel apples can unlock a world of flavor possibilities. Whether you opt for a chocolatey twist or shareable nachos, the variations are endless. Experiment with different toppings and flavors to discover your favorite combination, ensuring that your taste buds will be delighted with every bite.
Storage Tips for Homemade Caramel Apples:
Storing your delicious homemade caramel apples properly is key to ensuring they remain fresh and flavorful. These sweet treats not only bring joy to your gatherings but are also delightful snacks to savor anytime. Follow these storage tips to maintain the taste and quality of your caramel-covered apples.
Keep Them Cool
After making your homemade caramel apples, let them sit at room temperature for about 30 minutes. This resting period allows the caramel to harden slightly, creating that iconic chewy texture we all love. Once they’re set, it’s best to store them in a cool place. Avoid direct sunlight or heat sources, as these conditions can cause the caramel to melt or become too soft.
Choose the Right Containers
When it comes to food storage, using containers plays a crucial role. Store your caramel apples in an airtight container. This will prevent them from drying out and keep moisture at bay. If you have multiple apples, separate them with parchment paper. This way, they won’t stick to each other, preserving that perfect bite.
Refrigeration or Freezing
Refrigerating your homemade caramel apples can extend their life up to a week. However, if you plan to keep them longer, consider freezing. To freeze, wrap each apple tightly in plastic wrap, followed by aluminum foil, to prevent freezer burn. They can last up to three months in the freezer. Just remember, when you’re ready to enjoy them again, let them thaw in the refrigerator overnight rather than at room temperature. This will help keep the caramel from becoming too runny.
Explore Creative Uses
If you have leftover caramel or apples, get creative! You can try making delicious caramel apple nachos—a fun twist on the traditional treat. Just slice some apples, drizzle melted caramel, and add toppings like nuts or chocolate. For more inspiring ideas, check out this delightful caramel apple upside-down cake.
In summary, by following these storage tips, you can enjoy your homemade caramel apples for days. Each bite will be as delicious as the first, making them a perfect treat for any occasion.
Serving Suggestions for Homemade Caramel Apples:
Indulging in homemade caramel apples is a delightful experience, and there are plenty of ways to serve them. Consider placing them on a festive platter at gatherings, drizzling with additional caramel or chocolate for extra flair. For an exciting twist, you can slice the apples and transform them into caramel apple nachos, where drizzled chocolate and sprinkled nuts add layers of flavor. Pair these treats with a warm drink, like a homemade caramel latte, to enhance the cozy feel of autumn. Whether enjoyed as a simple dessert or a fun party snack, these sweet apple confections are sure to impress. For more delicious variations, check out our caramel apple nachos.
Frequently Asked Questions (FAQs):
What ingredients do I need to make homemade caramel apples?
To create these yummy treats, you will need simple ingredients: fresh apples, sugar, butter, corn syrup, and vanilla extract. Optionally, you can include salt for a salted caramel twist or add toppings like nuts or sprinkles to enhance flavor and texture.
Can I use different types of apples for caramel apples?
Absolutely! While tart apples like Granny Smith offer a delightful contrast to the sweet caramel, other varieties such as Fuji or Honeycrisp can bring a sweeter element. Explore different flavors to find your favorite balance.
How can I keep the caramel from sliding off the apples?
For a better caramel adhesion, make sure to wash and dry the apples thoroughly. A light coating of melted chocolate or a quick dip in boiling water can also help create a better surface for the caramel to stick.
Can I make caramel apples in advance?
Yes, homemade caramel apples can be prepared a day or two before enjoying. Just wrap them tightly in wax paper to avoid sticking and store them in a cool, dry place. For an alternative treat, consider trying caramel apple nachos for an easy party snack.
What toppings can I add to homemade caramel apples?
In addition to classic toppings like crushed nuts or sprinkles, you can drizzle melted chocolate or even dip them in various candies. The possibilities are endless, and it’s a great way to customize each apple.
How do I make the caramel smooth and glossy?
To achieve a smooth and glossy caramel finish, cook the sugar mixture at the right temperature, usually around 240°F (soft ball stage). Stirring constantly while cooking helps to keep the texture even and prevents burning.
[tasty-recipe id=”6970″]
Leave a Comment