

HAM AND CHEESE SLIDERS
Hook / Introduction
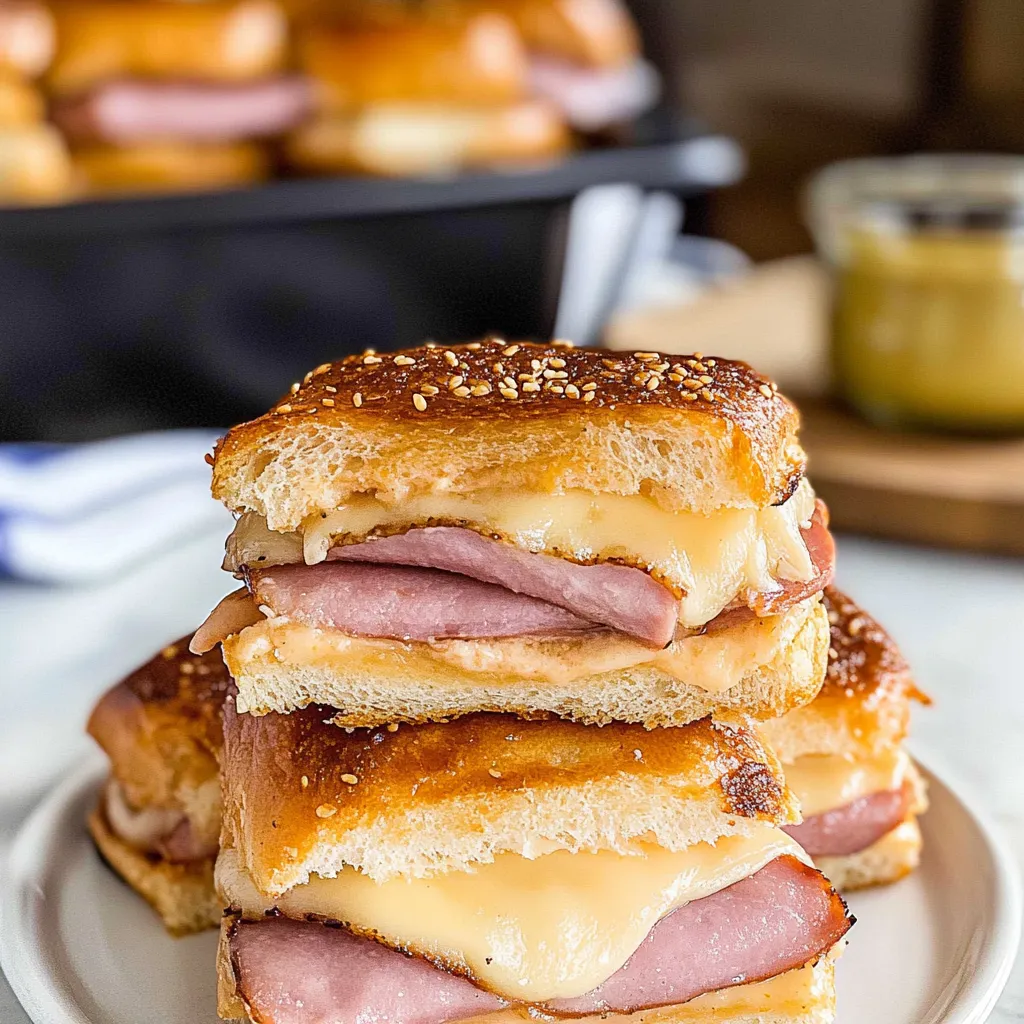
As the buttery aroma wafts through the kitchen, I can barely contain my excitement while pulling the golden-brown sliders out of the oven. The warm bread gives way to a melty layer of gooey cheese and savory ham, creating an irresistible combination that beckons to be savored immediately. I take a bite, and the crunch of the toasted bun contrasts beautifully with the soft, cheesy filling, making each mouthful a delight. These ham and cheese sliders are a timeless favorite in my household, perfect for parties, game days, or simply a cozy family dinner. The best part? They’re easy to whip up, making them a go-to recipe for any occasion.
What Is This Recipe?
Ham and cheese sliders are a delightful sandwich made with soft rolls filled with layers of savory ham and flavorful cheese, often baked until golden and melty. Originating from the classic American party appetizer, this version elevates the traditional slider by using a mix of cheeses and a zesty topping for an added punch of flavor. This recipe is not only quick to prepare but can be customized to suit your taste, making it a versatile choice for both casual snacking and entertaining. Perfectly portioned, they’re bite-sized yet satisfying, ensuring that they will be the star of your next gathering!
Ingredients
This recipe gives you a scrumptious slider with fewer steps without compromising flavor. Here’s what you’ll need:
- 12 dinner rolls (slider buns) – fluffy and soft, these serve as a perfect base.
- ½ pound sliced ham – feel free to use honey-baked or smoked for added sweetness.
- ½ pound sliced cheese (Swiss, cheddar, or a mix) – choose your favorite for a personal twist.
- ¼ cup unsalted butter, melted – this adds a delectable richness.
- 1 tablespoon Dijon mustard – for a hint of tang.
- 1 tablespoon poppy seeds – optional, for a nice garnish and crunch.

Step-by-Step Instructions
- Preheat your oven to 350°F (175°C).
- Prepare a 9×13-inch baking dish by greasing it lightly.
- Carefully slice the dinner rolls in half, keeping the tops and bottoms attached.
- Place the bottom halves of the rolls in the baking dish.
- Layer the sliced ham evenly over the roll bottoms, followed by the cheese.
- Top with the roll tops, then in a small bowl, mix the melted butter and Dijon mustard together and brush it generously over the tops of the rolls.
- Sprinkle poppy seeds on top if desired.
- Bake in the preheated oven for 15-20 minutes, or until the cheese is melted and the rolls are golden brown.
- Remove from the oven, let cool slightly, and slice the sliders apart. Serve warm!
Pro Tip
For an extra kick, add a layer of pickles or spicy mustard between the ham and cheese. You can also swap out the ham for turkey or roast beef for a different flavor profile!
Ingredient Deep Dive
The star of this dish is, of course, the ham. You can use various types, such as honey-baked, smoked, or even deli-style ham. Fresh ham will have a more intense flavor, while processed ham offers convenience and a milder taste. If you’re opting for a health-conscious approach, look for leaner varieties or organic options. Prepare your chosen ham by simply slicing it thin if not pre-sliced, and layering it within the buns as directed.

Ways to Serve
- Tailgate treat: Serve them as finger food alongside chips and veggie trays.
- Light lunch: Pair with a simple side salad for a fulfilling meal.
- Game night snack: Cut into bite-sized pieces and serve with dipping sauces for added fun.
- Picnic favorite: Pack them in a cooler for your next outdoor adventure.
Storage Instructions
Leftover sliders can be stored in an airtight container in the refrigerator for up to 3 days. To make ahead, assemble the sliders and wrap them tightly in foil, storing them in the fridge. You can bake them fresh in about 20 minutes straight from the refrigerator when you’re ready to enjoy again!
Related Recipes
- Cheesy Garlic Bread
- BBQ Chicken Sliders
- Meatball Sub Sandwiches
- Caprese Sliders
- Pesto Grilled Cheese
Leave a Rating
If you loved making these ham and cheese sliders, please leave us a rating! We’d also love to hear your thoughts in the comments below. Share how your sliders turned out or any creative twists you added to the recipe. Happy cooking!


Leave a Comment