
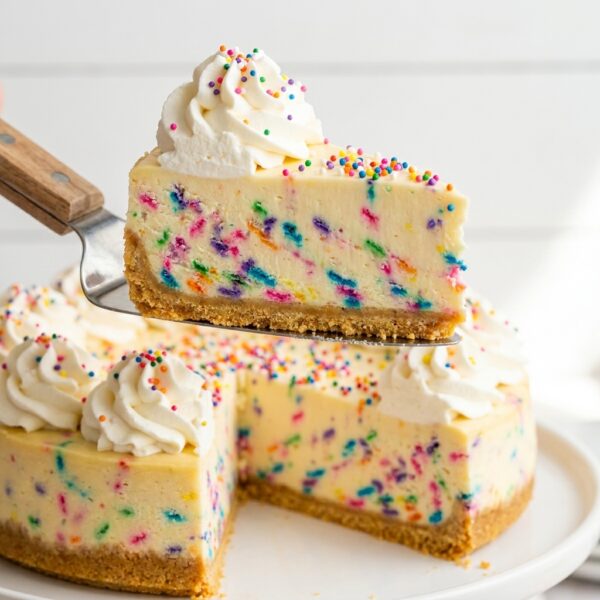
My niece’s birthday was coming up, and she requested something with sprinkles. Lots of sprinkles. She’s seven and pretty firm about her opinions, so I knew I had to deliver. I didn’t want to mess with a regular cake in the middle of July heat, and the thought of turning my oven on for a cheesecake sounded miserable. So I started looking around for a no-bake option that still had that birthday party feel.
That’s when I stumbled onto this funfetti no-bake cheesecake. The whole thing comes together without ever turning on the oven. The crust is made from crushed golden Oreos and melted butter, pressed into a springform pan. And the filling? It’s a fluffy mix of cream cheese, white chocolate, dry cake mix, and Cool Whip, all loaded with rainbow sprinkles. It tastes exactly like birthday cake batter in cheesecake form.
My first try, I stirred the sprinkles in way too much, and they bled all their colors into the filling. The whole thing turned a weird grayish-pink color, which definitely wasn’t the vibe I was going for. So here’s my tip: fold the sprinkles in really gently and only stir as many times as you need to spread them around. The fewer strokes, the better. Pick rainbow nonpareils or jimmies since those hold their color way better than other types.
The smell of vanilla and white chocolate while I was mixing the filling honestly reminded me of being a kid at a birthday party. And the best part? You mix everything up, press it into a pan, and stick it in the fridge. The fridge does all the real work while you go about your day. Just give it at least four hours to set, but overnight is way better if you can wait that long.
Why You’ll Love This Recipe
Smooth, mousse-like texture. The Cool Whip keeps the filling light and fluffy instead of heavy. The cookie crust adds a nice crunch underneath every bite.
Tastes just like birthday cake. The cake mix and white chocolate give the filling that classic funfetti taste. Sprinkles add little pops of color throughout.
No oven needed. You skip baking entirely. Just mix, press, chill, and you’re done. The fridge does all the hard work for you.
Holds up really well in the fridge. It stays fresh for about five days when covered tightly. The texture stays just as creamy on day two and three.
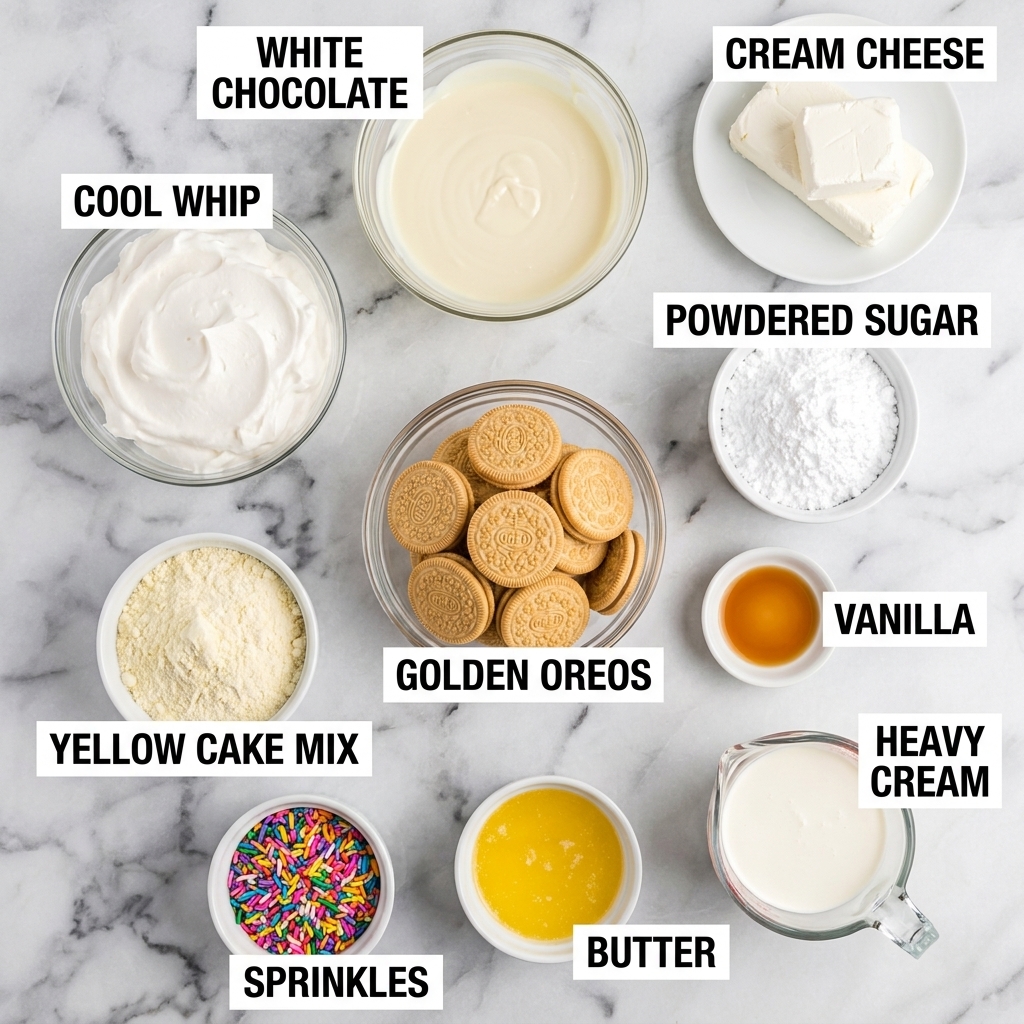
Ingredients You’ll Need
Golden Oreos. These sweet, buttery cookies make the best crust here. You can swap in regular chocolate Oreos, Nilla wafers, or graham crackers if that’s what you’ve got on hand.
Unsalted Butter. Melted butter holds the cookie crust together. It cools into a firm base that doesn’t crumble when you slice the cheesecake.
Cream Cheese. Use the full-fat brick kind, not the spreadable tub. Let it sit on the counter for about 30 minutes so it softens up. Cold cream cheese leaves you with lumps no matter how long you mix.
Powdered Sugar. Sweetens the filling without leaving any grainy texture behind. Granulated sugar won’t dissolve properly in a no-bake recipe.
Pure Vanilla Extract. Gives the filling that warm, classic taste. The real stuff tastes way better than imitation, especially since there’s no baking to mellow out the flavor.
Heavy Whipping Cream. Keep it cold straight from the fridge until you’re ready to use it. Cold cream whips up faster and holds its shape better.
Yellow Cake Mix. This is what gives the filling that birthday cake taste. Heat treat it first by spreading it on a baking sheet at 350°F for five minutes to make it safe to eat raw.
White Chocolate. Melted white chocolate adds richness and helps the filling set up firm. Pick a good quality brand since you’ll really taste it.
Cool Whip. The whipped topping keeps the filling light and fluffy. Homemade stabilized whipped cream works too if you don’t want the store-bought version.
Rainbow Sprinkles. Nonpareils or jimmies hold their color the best. Skip the cheap kind that bleed colors and turn your filling weird shades of pink and gray.
STEP BY STEP
1. Heat-treat the cake mix
Spread your dry yellow cake mix on a baking sheet in a thin layer. Pop it in a 350°F oven for about five minutes, then let it cool completely. This step kills off any bacteria in the raw flour so it’s safe to eat. Skip this and the rest is still risky.
2. Crush the cookies
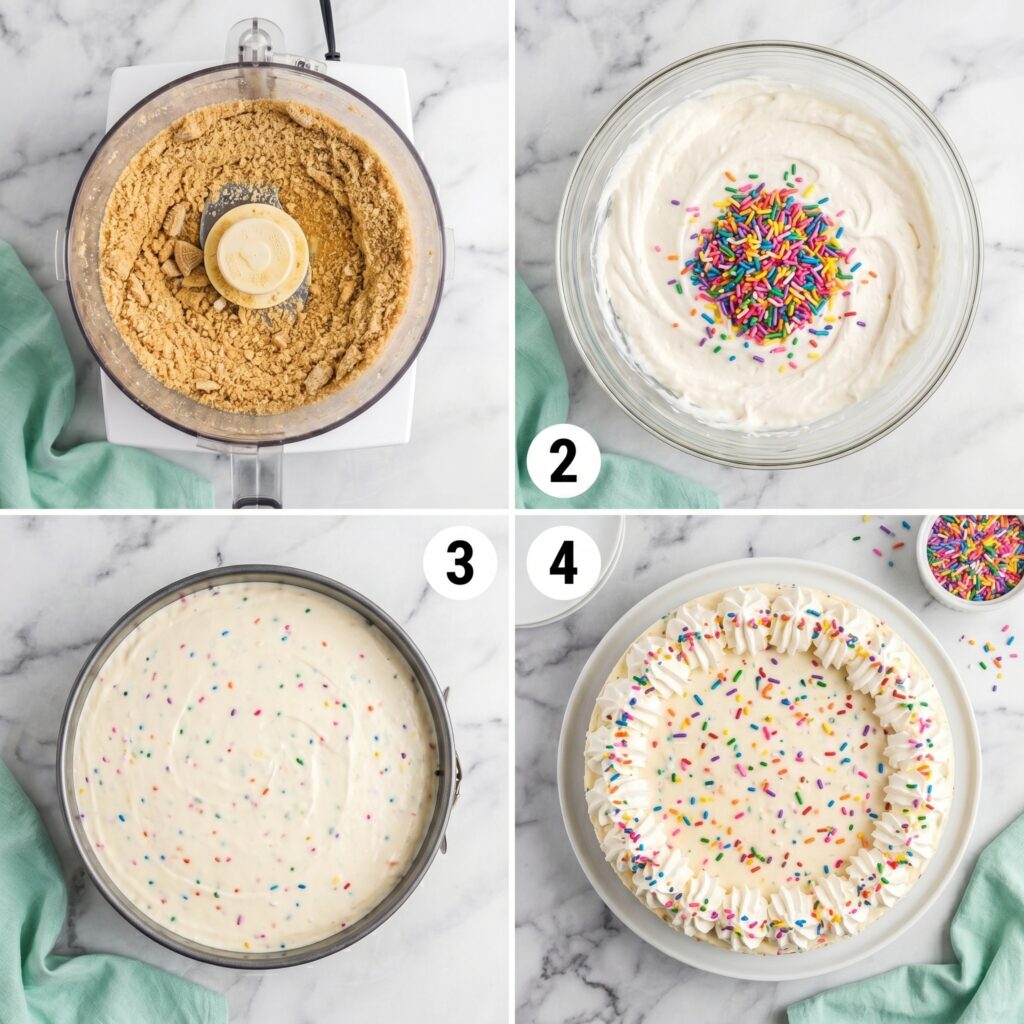
Toss your golden Oreos into a food processor and pulse them until they look like fine sand. No food processor? Stick them in a zip-top bag and crush them with a rolling pin. Try to break up any big chunks so the crust packs together tight.
3. Make the crust
Pour the melted butter over your cookie crumbs and stir until everything looks evenly damp. Dump the mixture into a 9-inch springform pan and press it firmly into the bottom with the back of a spoon or your fingers. Stick the pan in the freezer to firm up.
4. Beat the cream cheese
In a large mixing bowl, beat the softened cream cheese, powdered sugar, vanilla extract, and heavy whipping cream with a hand mixer until it looks smooth and creamy. Scrape down the sides of the bowl as you go so you don’t miss any chunks of cream cheese stuck to the edges.
5. Add cake mix
Pour in your cooled, heat-treated cake mix and mix on low speed until it disappears into the filling. Then drizzle in the melted white chocolate and keep mixing until everything looks thick, smooth, and glossy. Don’t rush this part since the white chocolate helps it set up.
6. Fold in extras
Take the Cool Whip and gently fold it into the cream cheese mixture with a spatula. Use slow, sweeping motions from the bottom up so you don’t deflate the air. Then sprinkle in your rainbow nonpareils and fold them in with as few strokes as possible so they don’t bleed colors.
7. Fill the pan
Take the chilled crust out of the freezer and scoop your filling on top. Spread it out evenly with the back of a spoon or an offset spatula. Smooth the top so it looks clean, and tap the pan gently on the counter to settle out any air pockets.
8. Chill until firm
Cover the pan loosely with plastic wrap and stick it in the fridge for at least four hours. Overnight is way better if you can wait. The longer it chills, the cleaner your slices come out when you cut into it.
9. Garnish and serve
Once it’s fully chilled, run a thin knife around the edge before unlocking the springform pan. Pipe extra whipped cream around the top and shower it with more sprinkles for that party look. Slice with a clean, warm knife for the prettiest pieces.
EXPERT TIPS:
Stick the springform pan in the freezer while you mix the filling. A firm crust holds up way better than a soft one.
Heat-treat the cake mix in a 350°F oven for five minutes. Raw flour can carry bacteria, and this quick step makes it safe.
Fold the sprinkles in with as few strokes as possible. The more you mix, the more they bleed colors into the filling.
Warm your knife in hot water and wipe it dry between cuts. Clean slices look prettier and don’t drag the filling around.
Let the cheesecake chill overnight if you can wait. Four hours works in a pinch, but the texture turns out way better with extra time.
WHAT TO SERVE WITH THIS RECIPE
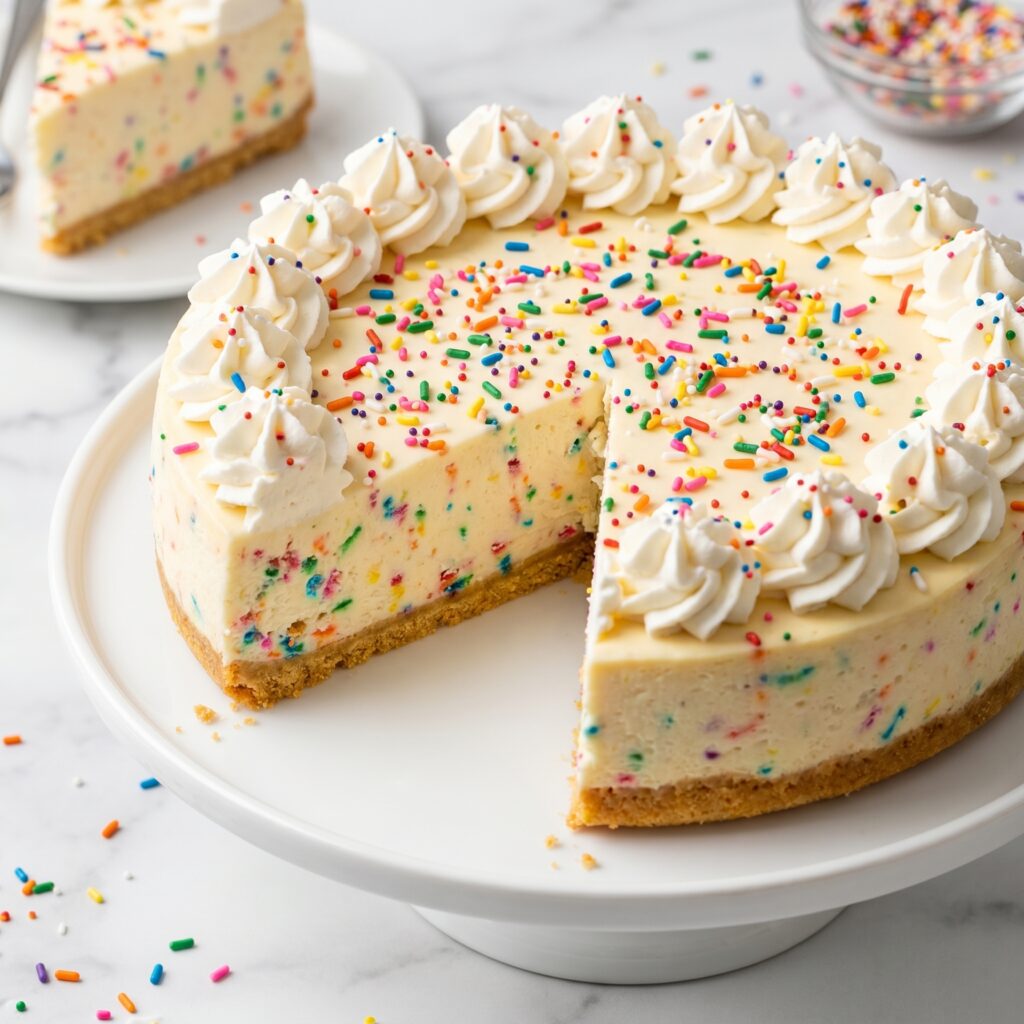
Pile each slice high with whipped cream and extra rainbow sprinkles. Fresh strawberries, raspberries, or blueberries work really well on the side.
Pour a tall glass of cold milk or hot coffee alongside the dessert. Iced coffee and sweet tea pair beautifully too.
Serve after pizza, burgers, BBQ chicken, or pasta dinners. Round out the meal with fruit salad or vanilla ice cream alongside.
HOW TO STORE THIS RECIPE
Cover the cheesecake with plastic wrap or pop it in an airtight container. Stick it in the fridge and it stays fresh for about five days. Press the plastic right against the surface so it doesn’t dry out or pick up other smells from the fridge.
Want to make slices ahead? Cut the cheesecake into pieces and place them in a flat container with parchment paper between each slice. The parchment keeps them from sticking together when you grab one.
Freezing works really well for this one. Wrap the whole cheesecake or individual slices tightly in plastic wrap, then again in foil. Slide everything into a freezer-safe bag and seal it up. It holds for about two months.
Thaw frozen slices in the fridge overnight. Don’t try to speed things up by leaving them on the counter, since the filling turns soft and loses that smooth texture.
Skip the microwave when reheating leftovers. The whole point is that cool, creamy bite, and zapping it just melts everything into a mess.
VARIATIONS:
Graham Cracker Crust. Swap the golden Oreos with 1½ cups of graham cracker crumbs mixed with 2 tablespoons of sugar. You get a more traditional cheesecake base.
Chocolate Oreo Crust. Use regular chocolate Oreos instead of the golden kind. The chocolate crust pairs really well with the sweet vanilla filling and makes the colors pop more.
Nilla Wafer Crust. Crush 2 cups of Nilla wafers for the base. The buttery vanilla taste of these cookies blends right into the filling for a softer, mellower crust.
Chocolate Cake Mix. Replace the yellow cake mix with chocolate cake mix and use chocolate chips instead of white. You get a chocolate funfetti cheesecake with a whole different vibe.
Strawberry Twist. Stir ½ cup of finely chopped fresh strawberries into the filling along with the sprinkles. Top each slice with extra berries before serving.
Lemon Burst. Add 2 tablespoons of fresh lemon juice and the zest of 1 lemon to the filling. The citrus cuts through the sweetness and brightens up the cheesecake.
Cookies and Cream. Skip the sprinkles and fold 1 cup of crushed Oreo cookies into the filling instead. The Oreo bits give you a cookies-and-cream version that kids go crazy for.
Sprinkle Crust Border. Press ¼ cup of sprinkles into the sides of the cookie crust before adding the filling. You get a fun colorful border around every slice.
Chocolate Drizzle. Drizzle 3 tablespoons of melted chocolate or white chocolate across the top after chilling. Add it just before serving so it stays glossy.
Cake Batter Frosting Top. Pipe a ring of cake batter buttercream around the edge of the cheesecake. It doubles down on that birthday cake taste and looks really fancy.
Holiday Color Swap. Use red and green sprinkles for Christmas, pastels for Easter, or red, white, and blue for Fourth of July. Same recipe with seasonal flair.

Leave a Comment