
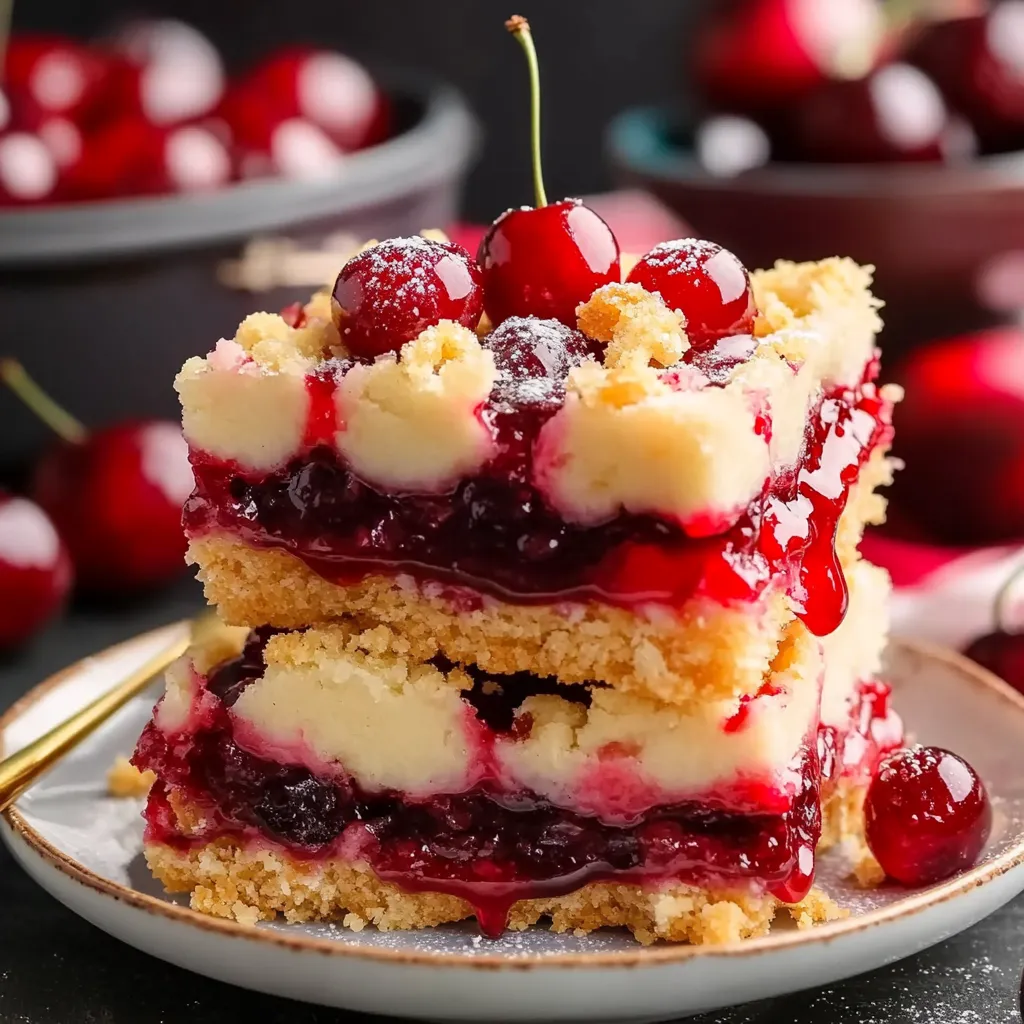
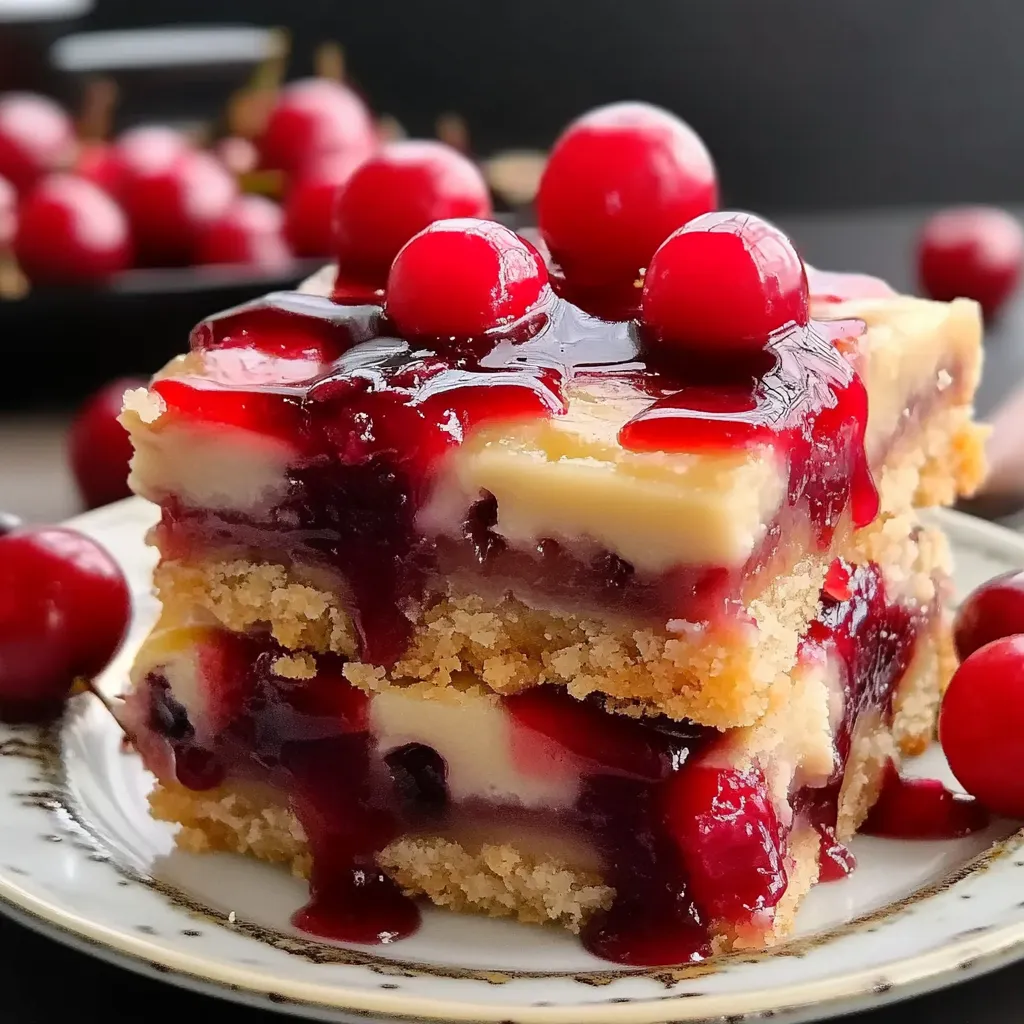
Gather ’round the holiday spirit with the delightful charm of Christmas Cherry Bars! These treats meld the sweetness of cherries with a buttery, crumbly texture, making them a festive favorite for gatherings and gift exchanges alike. The vibrant red hue adds a splash of color to your dessert table, while the aroma—bursting with warming spices—will wrap your home in coziness.
One of the joys of these bars lies in their versatility. Consider experimenting with different types of fruit, such as cranberries or raspberries, to put a twist on the traditional recipe. You can also explore variations by adding spices like cinnamon or nutmeg to the base for an extra flavor profile that complements the season perfectly.
For the best results, ensure that your butter is at room temperature before mixing, as this can significantly influence texture. So, roll up your sleeves and get ready to create a holiday treat that promises to enchant family and friends this festive season!
Ingredients for Christmas Cherry Bars:
These delightful festive bars are perfect for holiday gatherings, and they are sure to please a crowd of 8–10 people. Below are the precise measurements for each ingredient you’ll need to prepare these scrumptious treats:
For the Base and Topping:
- 1 cup (2 sticks) unsalted butter, softened
- 1 cup granulated sugar
- 2 large eggs
- 1 teaspoon vanilla extract
- 1 teaspoon almond extract (optional, for added flavor)
- 2 cups all-purpose flour
- 1 teaspoon baking powder
- 1/2 teaspoon salt
For the Cherry Filling:
- 1 can (21 ounces) cherry pie filling (or about 2 cups homemade cherry filling)
- 1 tablespoon cornstarch (this helps to thicken the filling)
- 1 tablespoon lemon juice (to enhance the cherry flavor)
For the Icing (Optional but Recommended):
- 1 cup powdered sugar
- 2 tablespoons milk (or cream for a richer icing)
- 1 teaspoon vanilla extract
Variations and Alternative Ingredients:
- For a twist on the classic flavor, substitute the cherry filling with your favorite fruit fillings such as raspberry or mixed berries.
- Enhance the base with a sprinkle of cinnamon (about 1/2 teaspoon) or nutmeg for a warming spice profile.
- Add nuts like chopped walnuts or pecans (1/2 cup) into the base for added crunch and flavor.
- For a festive touch, swirl in some cream cheese (1/2 cup softened) mixed with a bit of powdered sugar into the filling before baking.
Preparing these ingredients ahead of your holiday festivities will ensure a seamless baking experience, allowing you to spread cheer through delicious treats!
How to prepare Christmas Cherry Bars:
Making Christmas Cherry Bars is a delightful and straightforward process. Follow these step-by-step instructions to create a festive dessert that will wow your family and friends.
Gather Ingredients
Start by gathering all your ingredients. You will need:
- 1 cup unsalted butter, softened
- 1 cup granulated sugar
- 2 large eggs
- 1 teaspoon vanilla extract
- 2 cups all-purpose flour
- 1 teaspoon baking powder
- 1/2 teaspoon salt
- 1 1/2 cups cherry pie filling
- Powdered sugar for dusting (optional)
Preheat the Oven
Preheat your oven to 350°F (175°C). This ensures that your cherry bars bake evenly.
Prepare the Baking Pan
Grease a 9×13-inch baking dish with butter or cooking spray. This helps prevent sticking.
Cream Butter and Sugar
In a large mixing bowl, cream together the softened butter and granulated sugar using a hand mixer. Beat until the mixture becomes light and fluffy.
Add Eggs and Vanilla
Next, add the eggs one at a time, mixing well after each addition. Then stir in the vanilla extract to enhance the flavor.
Combine Dry Ingredients
In a separate bowl, whisk together the flour, baking powder, and salt. This step ensures all the dry components are evenly distributed.
Blend Mixtures
Gradually add the dry ingredient mixture to the wet ingredients. Mix slowly until just combined to avoid overmixing, which can make the bars tough.
Layer the Batter
Spread half of the batter evenly in the prepared baking dish. Use a spatula to smooth it out into a uniform layer.
Add Cherry Filling
Spoon the cherry pie filling over the layer of batter. Evenly distribute the cherries to ensure every bite is delicious.
Top with Remaining Batter
Dot the remaining batter over the cherry filling. It doesn’t have to be perfect; a rustic look adds charm.
Bake the Bars
Place the baking dish in the preheated oven and bake for 30-35 minutes. The bars should be golden brown, and a toothpick should come out clean when inserted in the center.
Cool and Serve
Once baked, remove the dish from the oven and allow it to cool completely. Optionally dust with powdered sugar before slicing into squares. Enjoy these festive treats!
Tips for the Perfect Christmas Cherry Bars
Maintain the Right Temperature
To achieve a perfect set for your cherry bars, maintaining the right baking temperature is essential. Preheat your oven to 350°F (175°C) before placing your bars inside. An accurate oven thermometer can ensure even heating. Remember, if the temperature is too low, your bars may become soggy. On the other hand, if it’s too high, they may burn or dry out. Always use the middle rack for even baking.
Quality Ingredients Matter
Using high-quality ingredients makes a significant difference in flavor and texture. Opt for fresh cherries or high-quality cherry preserves. Fresh cherries should be pitted and chopped, while preserves can add a lovely sweetness. For the crust, choose real butter instead of margarine for a richer taste. The same goes for your flour; all-purpose flour works best, but you can experiment with whole wheat for a heartier flavor.
Make Suitable Substitutions for Dietary Restrictions
If you have dietary restrictions, there are several substitutions you can make without compromising on taste. For a gluten-free option, use a gluten-free all-purpose flour blend. When it comes to butter, coconut oil or applesauce can serve as effective dairy-free substitutes. You can also replace the sugar with a sugar alternative like honey or maple syrup, adjusting the quantity to taste, as these substitutes often have different sweetening strengths.
Enhance Flavor with Variations
To elevate your cherry bars, consider adding a few extras. A hint of almond extract pairs beautifully with cherries, enhancing their natural flavor. If you enjoy nuts, chopped walnuts or almonds can add crunch. For a festive twist, sprinkle some cinnamon or nutmeg into the batter. This will add warmth to your holiday treat and make your baking aroma inviting.
Let Them Cool Properly
Patience is key after baking. Allow your cherry bars to cool completely before cutting them into squares. This helps them set better and prevents crumbling. For an elegant finish, dust with powdered sugar just before serving or drizzle with a thin layer of icing for a decorative touch.
By using these simple tips, your dessert will impress everyone at your holiday gathering and set the tone for a wonderful festive season.
Storage Tips for Christmas Cherry Bars:
Storing your Christmas Cherry Bars correctly can help maintain their freshness and flavor. Follow these guidelines to ensure your treats stay delicious for as long as possible.
Optimal Storage Conditions
First, make sure to let your cherry bars cool completely. Placing warm bars in storage can create condensation, leading to sogginess. Once cool, cut the bars into squares, if you haven’t already, for easier serving.
Next, choose the right container. Use an airtight container to keep your bars fresh. A glass or plastic container with a tight lid works well. You can also use heavy-duty aluminum foil or plastic wrap if you don’t have a suitable container.
Short-Term Storage
If you plan to eat the bars within a few days, simply leave them out at room temperature. Store them in an airtight container and place them in a cool, dry area away from sunlight. They will stay delicious for about 3 to 5 days this way.
Long-Term Storage
For longer preservation, freeze your bars. Wrap them individually in plastic wrap to prevent them from sticking together. After wrapping, place them in a freezer-safe container or a zip-top bag. Properly stored, they can last up to three months in the freezer.
Thawing and Serving Tips
When you’re ready to enjoy your frozen cherry bars, take them out of the freezer and remove the plastic wrap. Let them thaw in the refrigerator for a few hours or on the counter for about 30 minutes. This gradual thawing helps retain their texture and flavor. Avoid using a microwave for thawing, as this can make them too warm and change their consistency.
Signs of Spoilage
Lastly, keep an eye out for any signs of spoilage. If you notice an off smell or unusual texture, it’s better to discard the bars. Taste can also help you identify if they are still fresh. Ensure you enjoy your Christmas Cherry Bars at their best!
Related Recipes to Enhance Your Holiday Baking
If you enjoyed making Christmas Cherry Bars, you might like these complementary treats that capture the festive spirit. Each recipe shares joyful flavors and delightful textures, making them perfect for your holiday gatherings.
1. Peppermint Bark
This holiday favorite features layers of creamy white chocolate and rich dark chocolate, topped with crushed candy canes. Peppermint Bark adds a refreshing minty contrast to the tart sweetness of cherry bars while providing a visually stunning presentation. Its easy preparation and no-bake nature make it a convenient companion for your cherry bars.
2. Gingerbread Cookies
Crafting gingerbread cookies invites warm spices like ginger, cinnamon, and nutmeg into your kitchen. These cookies offer a contrasting spice profile to the sweet cherries in your bars, enhancing your holiday spread. Decorate them with royal icing for a festive touch that pairs well with the bright flavors of the cherry bars.
3. Pecan Pie Bars
Pecan Pie Bars bring a nutty richness to the dessert table. The crispy crust and gooey filling perfectly complement the chewy texture of cherry bars. Both recipes provide satisfying bites that celebrate the holiday season with their wonderful flavors and textures.
4. Cranberry Orange Muffins
Bright and zesty, these muffins feature tart cranberries and fragrant orange zest. Their subtle tartness mirrors the cherry flavor, while the soft, airy texture offers a delightful contrast. Serve these muffins as part of your holiday brunch alongside Christmas Cherry Bars for a well-rounded festive experience.
These recipes not only resonate with the spirit of holiday baking but also bring variety to your dessert selection. Together, they can create a memorable occasion filled with cherished flavors and festive joy.
Frequently Asked Questions:
What ingredients are needed to make festive cherry bars?
To create delightful festive cherry bars, you’ll require a variety of ingredients that come together beautifully. Start with a buttery base using all-purpose flour, sugar, and butter, which provides the deliciously crumbly texture. You will also need cherries, which can be fresh or canned, along with eggs, vanilla extract, and baking powder. For added flavor, consider incorporating nutmeg or cinnamon. These ingredients harmoniously blend to evoke the holiday spirit in every bite.
Can I substitute cherries with another fruit?
Absolutely! While traditional cherry bars are centered around cherries, feel free to substitute them with your favorite fruits. Raspberries, blueberries, or even cranberries can work wonderfully, depending on your preference. Keep in mind that different fruits may bring varying levels of sweetness and tartness, which may affect the overall flavor profile of your holiday treat.
How should I store Christmas Cherry Bars for freshness?
To maintain the freshness of your holiday treat, store them in an airtight container at room temperature for up to a week. If you’d like to keep them longer, you can refrigerate them, as this helps extend their shelf life. Alternatively, consider freezing them for up to three months. Just be sure to wrap them tightly in plastic wrap or aluminum foil before placing them in a freezer-safe container.
What is the best way to serve these cherry desserts?
Christmas cherry bars can be served in various delightful ways. For a classic touch, cut them into squares and dust with powdered sugar right before serving. Enhance the experience by pairing them with whipped cream or a scoop of vanilla ice cream for an indulgent treat. They can also be enjoyed warm, straight from the oven, making them a heavenly addition to your holiday dessert table.
Can I make these cherry bars ahead of time?
Yes, you can definitely prepare cherry bars ahead of time! In fact, allowing them to sit for a day enhances their flavors. Simply bake them, let them cool completely, and then wrap them tightly before storing them. It’s a perfect solution for holiday gatherings, as you can spend more time with your loved ones and less in the kitchen.
What variations can I try for a unique twist on traditional cherry bars?
There are countless ways to put a unique spin on traditional holiday cherry bars. Consider adding chocolate chips or nuts for extra texture and flavor. For a tangy twist, mix in a little lemon or orange zest. You could also experiment with different extracts, like almond or coconut, to elevate the taste. The possibilities are endless, so feel free to get creative and tailor the recipe to your liking.
Conclusion:
In summary, Christmas Cherry Bars offer a delightful and festive treat that is both simple to prepare and flexible in its ingredient options. Whether you prefer to use fresh cherries, dried fruits, or a combination of both, this recipe adapts easily to your taste. The base is straightforward, allowing for customization with spices or nuts to enhance flavor. A key tip is to let the bars cool completely before cutting, ensuring clean slices that showcase their vibrant colors. This dessert not only looks beautiful on any holiday table but also brings a comforting taste of the season. By experimenting with different fillings or toppings, you can create your own signature version of these bars. Enjoy the process and make this recipe a cherished tradition in your holiday baking lineup!
[tasty-recipe id=”2812″]


Leave a Comment