
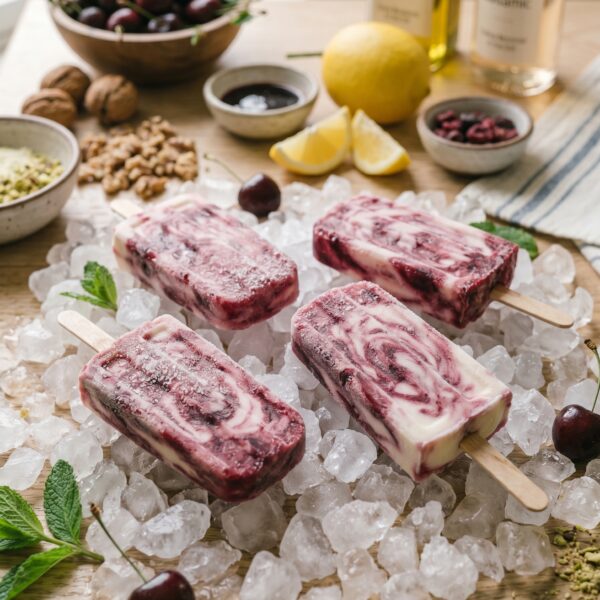
These cherry creamsicles take that nostalgic ice cream truck treat and make it with simple, real ingredients. Creamy vanilla swirled with sweet, icy cherry, all marbled together in popsicle form. The first time I made marbled pops, I dumped all the cherry puree in first and then the cream on top, and they came out in two flat blocks instead of pretty swirls. Alternating the two layers a spoonful at a time is what gives you that marbled look.
What I love is that there’s nothing fake in here. The boxed versions most of us grew up with are loaded with food coloring and corn syrup, but these use whole cherries, a little raw honey, vanilla, and fresh whipped cream. That’s it. Just real food, and they taste even better than the originals. My family gobbles them up so fast they barely last in the freezer.
Here’s the kitchen tip that gets the cream right. Chill your mixing bowl before whipping the cream. A cold bowl helps the cream whip up thick and fluffy faster, so it holds its shape when you layer it into the molds. Pop the bowl in the fridge the night before if you can, and make sure the cream is very cold too.
And here’s the marbling trick. Alternate the whipped cream and cherry puree a spoonful at a time. Add about a tablespoon of whipped cream to a mold, then some cherry, tap the mold on the counter so it settles, and keep going until the mold is full. It sounds fussy but it takes less than five minutes for all of them. You’ll get those pretty red-and-white swirls. Then freeze them at least six to eight hours, overnight if you can.
Why You’ll Love This Recipe
They’re made with real food. Whole cherries, honey, vanilla, and fresh cream mean no food coloring or corn syrup.
The marbled look is pretty. Swirls of red cherry and white cream make these as nice to look at as they are to eat.
They taste like nostalgia. That classic creamy vanilla and icy cherry combo brings back the ice cream truck days.
They’re cool and refreshing. A perfect frozen treat for hot summer days, and the kids love them.
Ingredients
Here’s everything you’ll need:
- 10 oz (about 2 cups) pitted fresh or thawed frozen cherries
- 1/4 cup coconut water or filtered water
- 1 cup raw cream or organic whipping cream
- 1 teaspoon vanilla extract
- 3 to 4 tablespoons raw light-colored honey
How to Make Cherry Creamsicles
1. Chill the Bowl
Place a large mixing bowl in the fridge to chill, ideally the night before. A cold bowl helps the cream whip up thick and fluffy. Make sure your cream is very cold too.
2. Puree the Cherries
Add the cherries and the coconut or filtered water to a blender and blend until smooth with no chunks remaining. Set this cherry puree aside.
3. Whip the Cream
Take the chilled bowl out and whip the cream, vanilla, and honey on low for about 30 seconds, then medium for a minute or so, until it’s thick and fluffy like whipped cream.
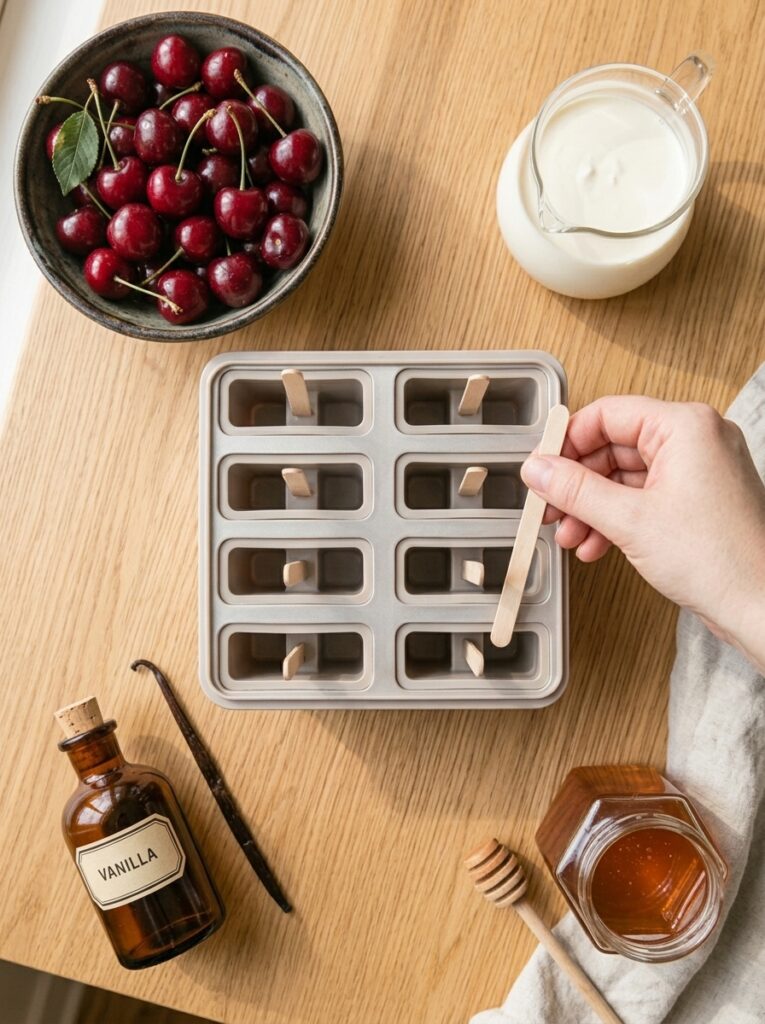
4. Layer the Molds
To get the marbled effect, alternate the two mixtures. Add about a tablespoon of whipped cream to a mold, then some cherry puree, and tap the mold on the counter to settle it. Keep alternating until each mold is full.
5. Freeze Them
Place the filled molds in the freezer for at least 6 to 8 hours, or overnight, until completely frozen solid.
6. Release and Serve
When frozen, briefly run the mold under warm water for a second or two to help release the popsicles, then pull them free and enjoy.
Expert Tips
Chill the mixing bowl first. A cold bowl helps the cream whip up thick and hold its shape in the molds.
Alternate the layers a spoonful at a time. That’s what gives you the pretty marbled swirl effect.
Tap the molds on the counter. It settles each layer so the popsicles fill in evenly.
Blend the cherries until totally smooth. No chunks means a smoother cherry layer.
Run the mold under warm water briefly to release. Just a second or two for stainless, a bit longer for plastic.
Recipe Variations and Add-ins
You can use coconut cream from chilled full-fat coconut milk in place of the cream for a dairy-free version.
Swap the cherries for strawberries or raspberries for a different fruit creamsicle.
You can adjust the honey to taste depending on how sweet your cherries are.
Add a splash of almond extract along with the vanilla for a cherry-almond flavor.
You can use little paper cups and popsicle sticks if you don’t have molds.
What to Serve With This Recipe
Hand them out on a hot summer day. The cold pops cool everyone down. They make an easy treat.
Pair them with fresh cherries on the side. The fruit echoes the flavor. The two suit a summer snack.
Serve them after a barbecue. The refreshing pops follow the meal. They end things on a sweet note.
How to Store This Recipe
Keep the popsicles frozen in their molds until you’re ready to serve, where they hold well for a couple of weeks.
You can also pop them out and wrap them individually or store them in a freezer-safe bag, which frees up your molds for the next batch. Just run the mold under warm water briefly to release them first.
Leave a Comment