
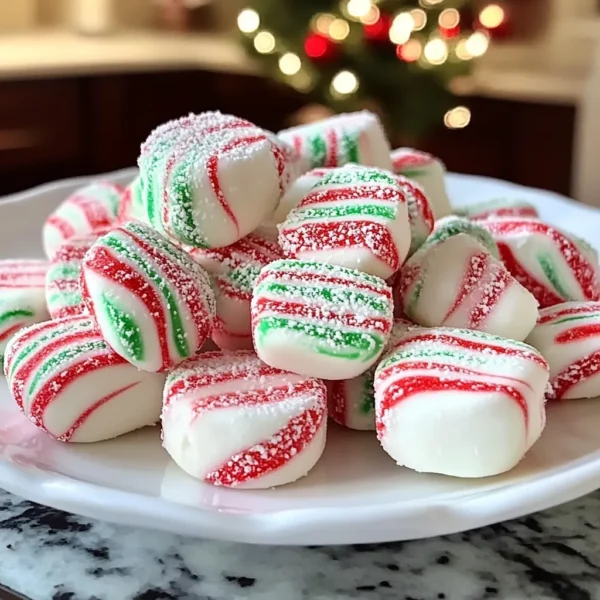
Ah, the holidays! There’s something truly magical about this time of year, isn’t there? The chill in the air, the twinkling lights, and the tantalizing aroma of freshly baked goods wafting through the house. One of my favorite holiday memories is gathering around the kitchen table with my family, rolling out dough and shaping treats that would fill our candy jars. And, of course, those soft, melt-in-your-mouth Christmas peppermints! There’s nothing quite like the way these delightful little candies bring the sweet spirit of Christmas to life. Soft Christmas peppermints are like little bites of joy, contrasting their cool minty flavor with a soft, pillowy texture. Today, I’m excited to share with you my go-to recipe for these holiday classics!
Why You’ll Love This Recipe
- Quick and easy to make—perfect for last-minute holiday treats!
- Soft, melt-in-your-mouth texture that’s simply irresistible.
- Customizable flavor options make them fun for everyone.
- No baking required—just mix, shape, and enjoy!
- A delightful way to fill your home with the scents of the season.
Ingredients
Let’s gather our ingredients for these delightful treats! You probably already have most of these in your pantry. Here’s what you’ll need:
- 2 cups powdered sugar, plus more for dusting
- 1 cup sweetened condensed milk
- 1 teaspoon pure peppermint extract (for that refreshing holiday flavor)
- 1 teaspoon vanilla extract (to balance out the mint)
- ½ teaspoon food coloring (red or green, or one drop of each for a swirled effect)
- Extra powdered sugar for dusting your work surface
- Optional: crushed candy canes for garnish
Note: Using pure extracts gives these peppermints a vibrant flavor that imitation extracts can’t quite match. Trust me on this one!
Step-by-Step Instructions
Now, let’s dive into the fun part—making these peppermints! It’s easy, and I promise you’ll love every step of it.
- Combine the wet ingredients: In a medium bowl, mix together the sweetened condensed milk, peppermint extract, and vanilla extract. Stir until well combined.
- Incorporate the dry ingredients: Gradually add in 2 cups of powdered sugar to your wet mixture. Start with half a cup at a time, mixing well after each addition—you want a soft dough that’s easy to handle but not sticky. If it feels too sticky, add in more powdered sugar, one tablespoon at a time.
- Add color: Once your dough is combined, it’s time to add the food coloring! Divide the dough in half. Leave one half white, and add food coloring to the other half. You can use your hands to knead the color in; just remember to wear gloves if you don’t want your fingers tinted!
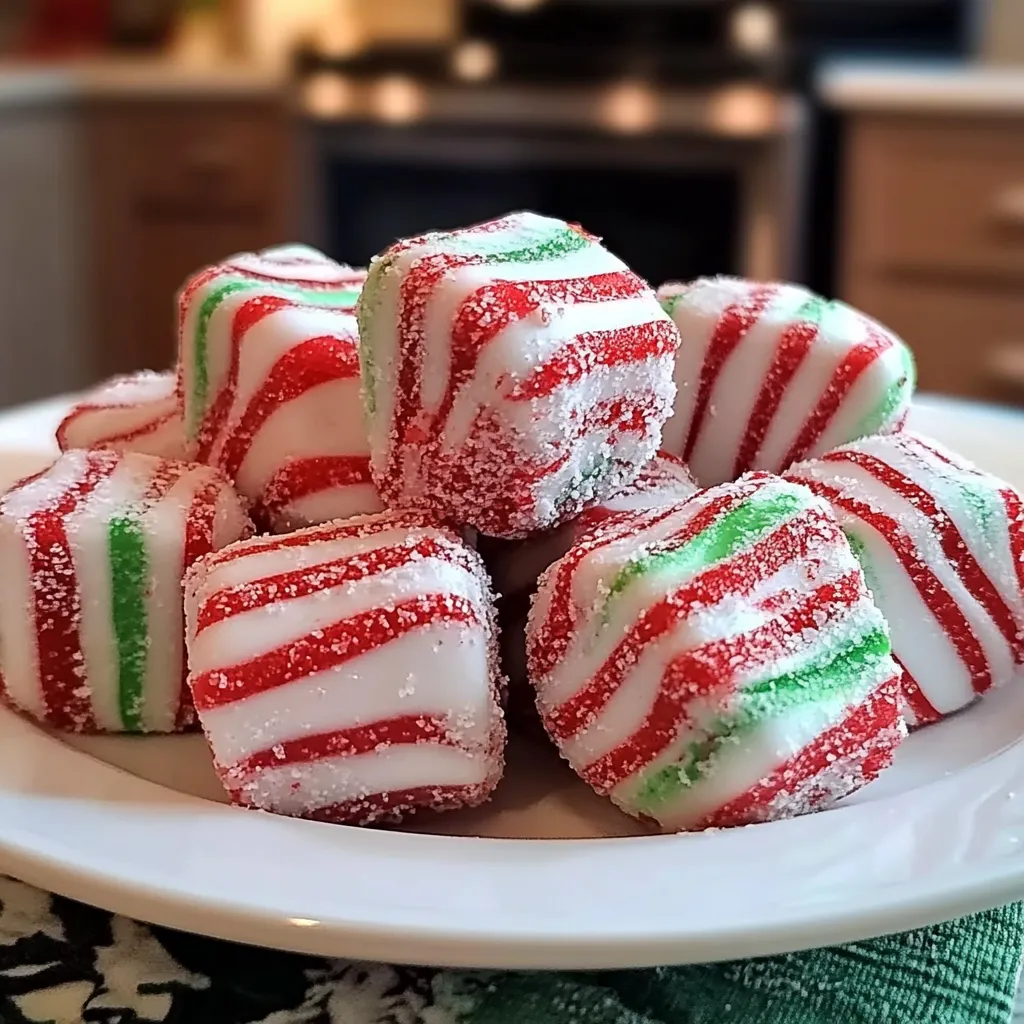
- Shape the dough: Dust your work surface with powdered sugar. Roll small pieces of each colored dough into ropes about ¼ inch thick. Then, twist the ropes together to create a fun, swirled effect. Don’t worry about perfection; a little variation adds charm!
- Cut and form the mints: Use scissors or a sharp knife to cut the twisted ropes into bite-sized pieces—about 1 inch. Pinch each piece at the ends to form a rounded shape. Place them on a baking sheet lined with parchment paper.
- Let them set: Now, let the peppermints sit for a couple of hours or overnight. This allows them to firm up a bit. As they dry, your kitchen will smell heavenly!
Personal tip: Don’t rush this step! Allowing them to set really enhances the texture. You’ll be glad you did.
Pro Tips & Variations
Feeling creative? Here are some fun twists and variations to try with your soft Christmas peppermints:
- Spice it up: Add a pinch of cinnamon or nutmeg to the dough for a warm, spicy kick.
- Flavor swap: Try experimenting with different extracts like orange, almond, or chocolate for unique flavors.
- Make it festive: Roll the finished peppermint pieces in crushed candy canes or colorful sprinkles to make them extra festive.
- Diet-friendly version: Swap the sweetened condensed milk for a vegan alternative made from coconuts or soy for a dairy-free treat.
Whatever you choose, just have fun with it! The best part of making these treats is adding your personal touch.
Serving Suggestions
These soft Christmas peppermints are fabulous on their own, but if you’re looking to create a delightful holiday spread, consider serving them alongside:
- A steaming cup of hot cocoa topped with whipped cream
- Your favorite spiced tea for a cozy afternoon treat
- Beautifully arranged on a festive platter alongside other holiday treats and cookies
- Packaged in adorable gift bags for friends and family—they make wonderful homemade gifts!
Picture this: a cozy gathering with candles flickering, laughter filling the air, and a platter of these colorful candies enticing everyone to take a bite. What a perfect way to celebrate the season!

Storage Tips
Planning to savor these treats over time? Here’s how to keep them fresh:
- Room temperature: Store them in an airtight container at room temperature for up to two weeks. They’ll keep their soft texture and wonderful flavor.
- Refrigerator: You can refrigerate them for longer storage, but they may firm up a bit. Just let them sit at room temperature for a few minutes before enjoying.
- Freezing: You can also freeze them! Place them in a freezer-safe container or bag, and they’ll keep for up to three months. When you’re ready to enjoy them, simply let them thaw in the fridge or at room temperature.
FAQs
Can I use a different flavor besides peppermint?
Absolutely! Feel free to switch things up with different extracts like orange or even almond. Each will give a delightful twist to the classic peppermint flavor.
How do I know if my dough is too sticky?
If your dough feels sticky and doesn’t hold its shape, add a bit more powdered sugar, a tablespoon at a time. You want it to be soft and pliable but not sticky to the touch.
Can I make these peppermints ahead of time?
You can! These candies store beautifully, so you can make them a week or so in advance. Just be sure to store them properly in an airtight container.
Why did my peppermints not hold their shape?
If they didn’t hold their shape, it could be due to the dough being too soft. Make sure to let them set for a little longer. Also, the humidity levels in your kitchen can affect the moisture in the dough, so that might be a factor, too!
What if I want to use less sugar?
Reducing sugar can change the texture, since sugar helps to bind and create that melt-in-your-mouth softness. If you’re looking to cut sugar, try using sugar alternatives specifically designed for baking.
Conclusion
So there you have it—my cherished recipe for soft Christmas peppermints! I hope you feel inspired to whip up a batch of these delightful candies, transforming your kitchen into a warm and inviting holiday haven. Remember, it’s not just about the treats; it’s about the memories we create while making them. I’d love to hear how your peppermints turn out, so please share your experiences in the comments below. Happy holidays, and happy candy-making!

Leave a Comment