
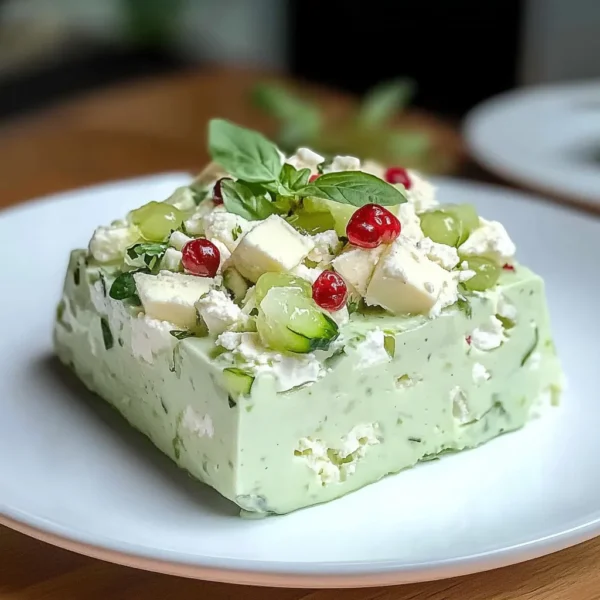
Ah, the summer days of my childhood—days spent soaking up the sun, running through sprinklers, and indulging in the coolest treats my mom could whip up. One recipe that always brought a smile to my face was the delightful lime gelatin and cottage cheese salad. It’s an intriguing combination of flavors and textures that might surprise you with how effortlessly refreshing it is. As I prepare this dish today, I’m reminded of family picnics where this salad would sit proudly among a spread of colorful dishes, catching the sunlight and drawing everyone in with its vibrant glow. Trust me, this Refreshing Lime Gelatin and Cottage Cheese Salad Recipe isn’t just a dish; it’s a cherished piece of nostalgia on a plate!
Why You’ll Love This Recipe
- Super easy to make—perfect for busy weeknights!
- Budget-friendly ingredients that are often staples in your pantry.
- Refreshing and light, it’s the ideal side for BBQs or family gatherings.
- Can be made ahead of time, saving you cooking time on the day of serving.
- Balances sweet and tangy flavors, all while being irresistibly creamy.
Ingredients
Let’s gather what we need! Here’s a simple list to get you started:
- 1 package (6 oz) lime gelatin (Jell-O works great!)
- 1 cup boiling water
- 1 can (20 oz) crushed pineapple, drained
- 1 cup cottage cheese (I prefer small curds for texture)
- 1/2 cup whipped topping (like Cool Whip)
- 1/2 cup chopped pecans (optional, but adds a fantastic crunch!)
- Fresh lime wedges for garnish (optional)
Note: For a more natural approach, use unflavored gelatin and fresh lime juice instead of the boxed version. This can tone down the sweetness a tad and enhance the zestiness!
Step-by-Step Instructions
Alright! Let’s get cooking! Follow these simple steps for a joyful and refreshing treat:
- Mix the Gelatin: In a medium bowl, dissolve the lime gelatin into 1 cup of boiling water. Stir it until fully dissolved. This should take about 2 minutes. The aroma? Pure heaven!
- Chill Out: Cover the bowl and pop it in the fridge for about 30 minutes. We want it cool, but not fully set. Think of it as a warm hug waiting to cool down.
- Add Pineapple: Once cooled, remove the bowl from the fridge. Stir in the drained crushed pineapple. The juicy sweetness blends so nicely with that zesty lime flavor—it’s a match made in heaven!
- Fold in Cottage Cheese: Gently fold in the cottage cheese and whipped topping. Careful not to overmix; we want that light, airy feel that whipped topping provides. A good tip is to use a spatula and fold it rather than stir—this keeps the texture lovely.
- Nutty Crunch: If you’re adding the pecans, now’s the time! Fold them in carefully. They’ll add a wonderful crunch to this creamy delight.
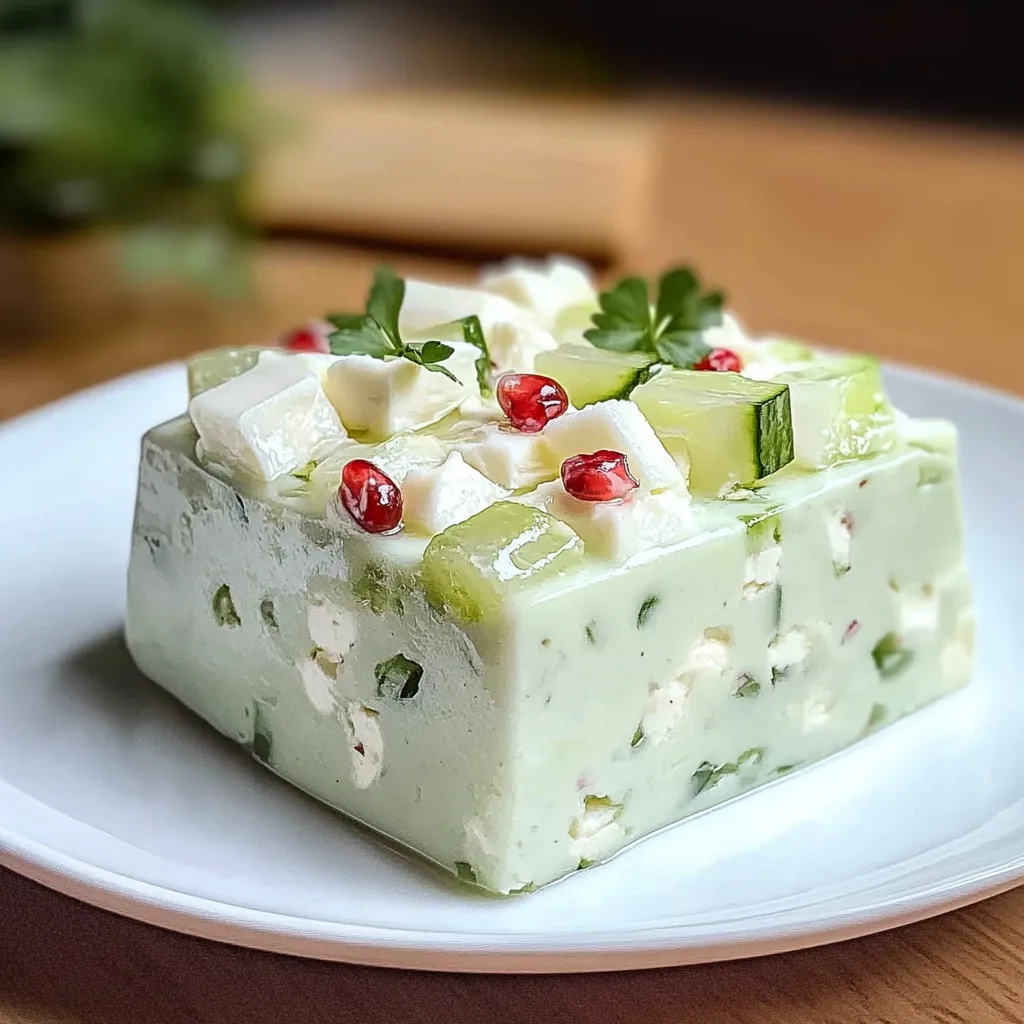
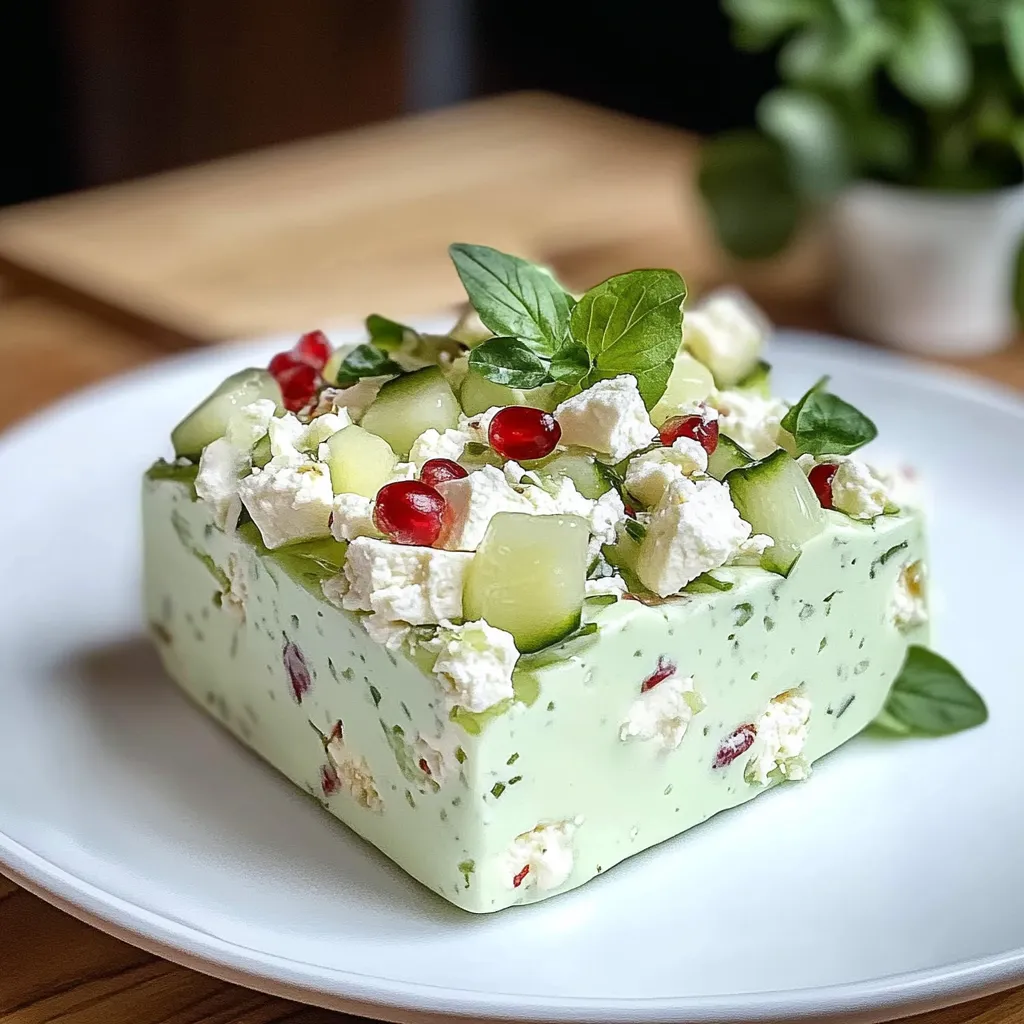
- Pour and Chill: Pour the mixture into a 9-inch square dish or any serving dish you have on hand. Cover it and let it chill in the fridge for at least 2-4 hours, or until it’s set firmly. The anticipation is half the fun!
Pro Tips & Variations
Now that you’ve mastered the basic recipe, let’s play with it a bit! Here are some fun twists and pro tips to make this salad truly your own:
- Fruit Variations: Swap out the pineapple for peaches or mandarin oranges for a different fruity twist!
- Add Some Heat: If you enjoy a bit of spice, a pinch of cayenne or even jalapeño jelly can add an exciting zing.
- Make it Tropical: Add shredded coconut for that extra island flair—totally elevating the salad to a new level!
- For a Health Kick: Replace whipped topping with plain Greek yogurt for a healthier version; it adds a nice tang too.
Just remember, as with any recipe, don’t be afraid to experiment and make it your own! The kitchen is your playground, and every dish tells a story.
Serving Suggestions
Now comes the best part—serving it up! This salad is perfect on its own, but here’s how I like to present it:
- Serve chilled in small, clear dessert cups; it makes it so inviting and beautiful!
- Top with additional whipped cream and a sprinkle of nuts right before serving for that extra flair.
- Pair it with grilled chicken or fish for a delightful summer dinner—trust me!
- It’s also a stunning addition to a potluck or picnic spread—everyone will be asking for the recipe!
And don’t forget a squeeze of fresh lime over it right before serving for that final touch of freshness! You won’t regret it.
Storage Tips
You’ve made a beautiful salad, and now you might be wondering how to store it:
- Refrigerate: Keep any leftovers in an airtight container in the fridge. It should last you about 3-5 days.
- Don’t Freeze: I don’t recommend freezing this salad as it may affect the texture of the cottage cheese and whipped topping.
- Reheat Option: Nope! This salad is best enjoyed chilled. Just take it straight from the fridge when ready to serve.
FAQs
Can I use sugar-free gelatin for this recipe?
Absolutely! Sugar-free gelatin works just as well and is a fantastic option for those watching their sugar intake. Just make sure to adjust any sweetness if you’re adding additional ingredients!
Can I add other fruits to this salad?
You most certainly can! The more, the merrier! Just make sure to adjust the texture accordingly by not overwhelming it with too much liquid fruit. Chopped strawberries or blueberries would be delicious additions!
How do I make this recipe vegan?
For a vegan version, you can substitute the cottage cheese with a coconut yogurt or a silken tofu blended until smooth. You can also swap out the whipped topping with coconut cream whipped up to a nice fluff!
Is this salad gluten-free?
Yes, it is! All the ingredients in this refreshing salad are naturally gluten-free, making it a safe option for anyone with gluten sensitivities.
How can I make this salad more festive?
For holiday gatherings, consider using a mix of colorful gelatin flavors and layer them in a clear dish for a rainbow effect. Top with edible flowers for a show-stopping presentation!
Conclusion
I hope this Refreshing Lime Gelatin and Cottage Cheese Salad Recipe becomes a staple in your kitchen, just like it has in mine. It’s simple, delightful, and brings back those warm memories of sunny days spent with loved ones. If you try it out, I’d love to hear how you enjoyed it! Did you add your twist, or did you keep it classic? Share your thoughts in the comments below and happy cooking!


Leave a Comment