

There’s something truly magical about a dessert that feels light as air but tastes oh-so-decadent. I remember the first time I tried a Japanese cheesecake; it was during a lovely summer afternoon at a quaint little café, a hidden gem with delicate treats. The moment I took my first bite, the fluffy texture melted in my mouth like a soft cloud of sweetness. It was an experience that lingered long after the last bite. That’s exactly the feeling I wanted to replicate with my Irresistible Two-Ingredient Japanese Cheesecake Cups.
This recipe is not only incredibly simple but also allows you to whip up a sophisticated dessert that’s perfect for any occasion. Trust me, once you try these, you’ll understand why they’re so irresistibly delightful. The beauty of it lies in its minimal ingredients while still packing a punch of flavor and texture. Ready to dive in? Let’s create something truly delicious together!
Why You’ll Love This Recipe
- Quick and Easy: With just two ingredients, you can have these ready in no time!
- Light and Fluffy: The texture is ethereal, making each bite a little piece of heaven.
- Budget-Friendly: Only two ingredients mean you won’t break the bank!
- Customizable: Feel free to add your favorite flavors or toppings.
- Perfect for Any Occasion: Whether it’s a casual family gathering or a fancy dinner party, these cheesecake cups fit right in.
Ingredients
For our Irresistible Two-Ingredient Japanese Cheesecake Cups, you’ll need the following:
- 8 oz cream cheese (room temperature is best for easy mixing)
- 1/2 cup white chocolate chips (you can use milk chocolate for a sweeter touch)
💡 Note: Make sure the cream cheese is at room temperature; this helps create that smooth and silky texture!
Step-by-Step Instructions
Let’s get our hands a little messy (in the best way possible) and make these cheesecake cups!
- Prep the Ingredients: Start by gathering your cream cheese and white chocolate chips, and make sure your tools are ready to go. You’ll need a mixing bowl and an electric mixer or a whisk (if you’re feeling adventurous).
- Melt the Chocolate: In a microwave-safe bowl, melt your white chocolate chips. Heat them in short bursts of 20 seconds in the microwave, stirring in between, until smooth. Keep an eye on them; burnt chocolate isn’t fun!
- Mix the Cream Cheese: In your mixing bowl, beat the cream cheese until it’s smooth and fluffy, with no lumps—this will give you that divine texture!
- Combine: Slowly pour the melted white chocolate into the cream cheese while continuing to mix. Don’t rush this part; it’s important to incorporate them fully to achieve that velvety texture!
- Chill: Once combined, cover your mixture and pop it into the refrigerator for at least an hour. This helps it set and enhances the flavors.
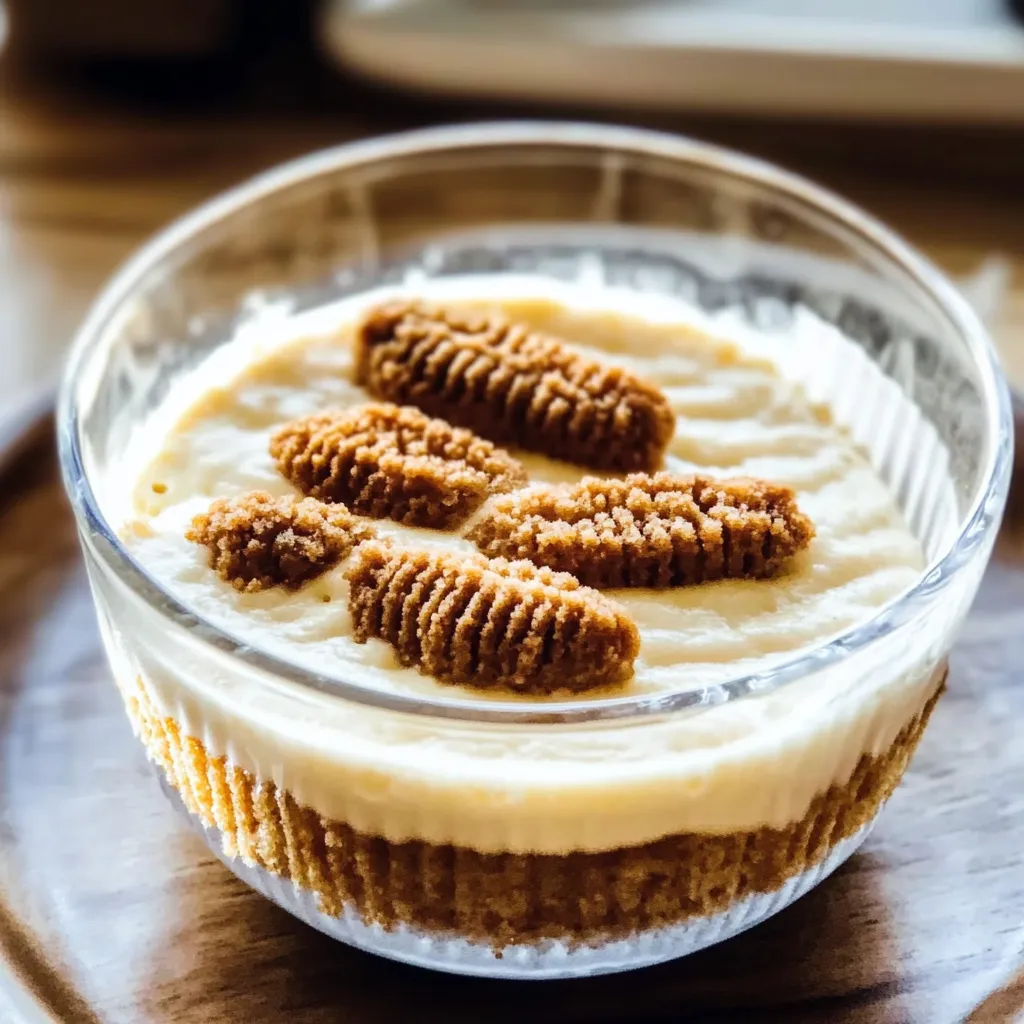
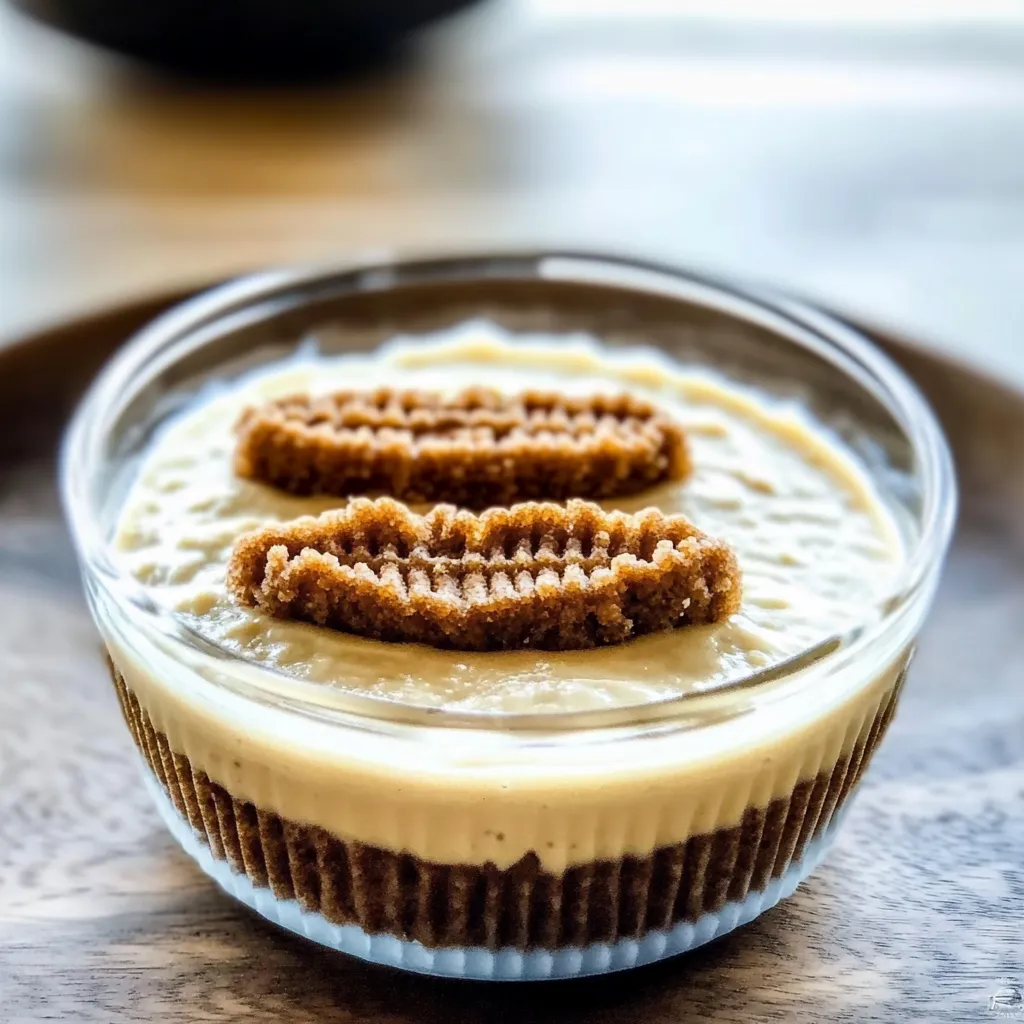
- Serve: Once chilled, spoon the creamy mixture into small cups or ramekins. You can use clear cups for an elegant presentation that shows off that divine texture!
💡 Tip: Be careful not to overmix after adding the chocolate, or you might lose that airy texture we’re going for!
Pro Tips & Variations
Want to jazz it up a bit? Here are some fun twists and pro tips to elevate your cheesecake cups:
- Add Subtle Flavors: Mix in a splash of vanilla extract for warmth, or try a tablespoon of lemon juice for a zesty kick.
- Try Different Chocolates: Dark chocolate gives a richer flavor, while milk chocolate sweetens the deal.
- Top with Fresh Fruits: Berries or sliced kiwi not only add color but also a refreshing contrast to the sweetness. A sprinkle of cocoa powder or powdered sugar on top can make for a stunning presentation.
- Make it Gluten-Free: This recipe is naturally gluten-free, perfect for those dietary needs!
Serving Suggestions
Now that you have your delightful cheesecake cups ready, let’s talk about how to serve them! These little beauties would be a perfect end to a meal, especially paired with a cup of freshly brewed coffee or tea. Imagine sitting around a cozy table, warmed by laughter and conversations, as you take a moment to indulge in these delicate dessert cups.
You could also serve them at a gathering, perhaps alongside a light fruit salad or some biscotti for a fun texture contrast. The cheesecake cups are perfect for both entertaining guests or enjoying a quiet night in. Just grab a spoon and enjoy every creamy, dreamy bite!
Storage Tips
Don’t worry if you have leftovers—although, let’s be real, they’re hard to resist! Here’s how to store them:
- Refrigerate: Store in an airtight container in the fridge for up to 3 days. Just be sure to cover them to keep that freshness!
- Freeze: If you want to save them further, these cheesecake cups can be frozen for up to 2 months. Just thaw in the fridge overnight when you’re ready to enjoy them again!
- Reheat: These are best served cold, so we recommend skipping the microwave altogether. Just let them sit at room temperature for a few minutes if you need to soften them up a bit.
FAQs
Can I use low-fat cream cheese?
Absolutely! Low-fat cream cheese works just fine, although it might slightly alter the creaminess. The texture should still be lovely and smooth!
Can I use other toppings besides fruit?
You bet! Consider crushed cookies, a drizzle of caramel or chocolate sauce, or even whipped cream for added decadence.
How can I make this dairy-free?
For a dairy-free option, try using a dairy-free cream cheese alternative and a vegan chocolate. Keep an eye on the flavor—some brands may have a distinct taste compared to regular cream cheese.
What if I want to make a larger batch?
Great question! You can easily double or triple the recipe, just keep the same 2:1 ratio of cream cheese to chocolate. Make sure to adjust the mixing time accordingly as well!
Conclusion
I hope this recipe for Irresistible Two-Ingredient Japanese Cheesecake Cups brings a touch of joy and sweetness to your day. There’s something about a simple treat that connects us, and I can’t wait for you to share it with your loved ones. Whether it’s a warm evening on the patio or a cozy family dinner, these cheesecake cups are sure to impress.
Feel free to drop a comment below and let me know how yours turned out! Happy baking, my friend!

Leave a Comment