
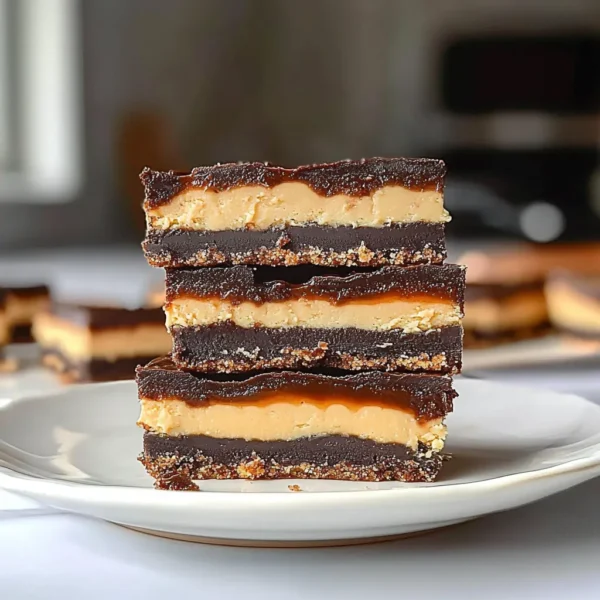
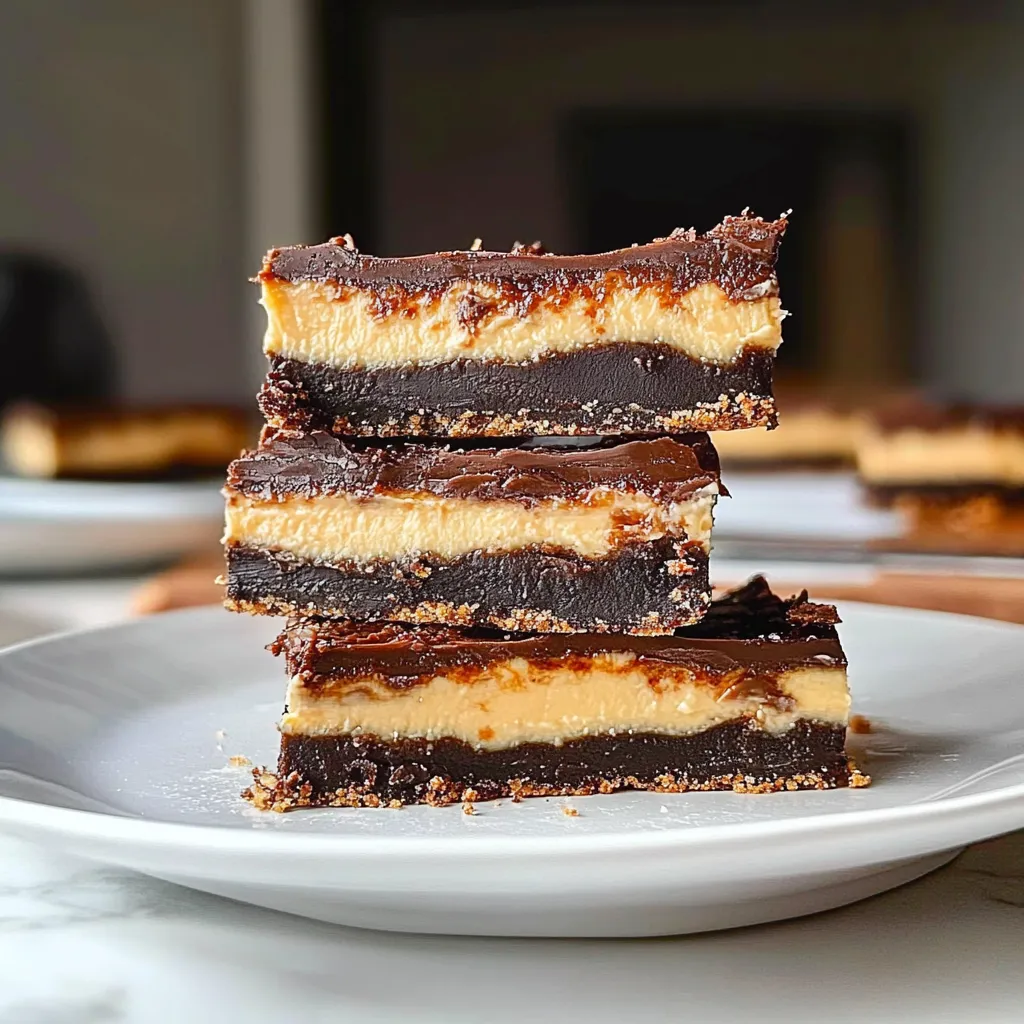
There’s something magical about a homemade treat that transports you back to happy moments, isn’t there? For me, Nanaimo Bars are those little squares of bliss that evoke a warm nostalgia. Growing up, my grandma would whip up a batch for every family gathering, and their presence was almost ritualistic. The creamy custard layer, the crunchy nut base, and that decadent chocolate topping? It’s pure joy on a plate! These bars are not just desserts; they are memories wrapped in sweet layers. Today, I’m thrilled to share my take on Irresistible Nanaimo Bars with you!
Why You’ll Love This Recipe
- Quick and No-Bake: These bars come together without ever needing the oven. Perfect for warm days!
- Layered Delight: With a nutty base, smooth custard filling, and rich chocolate topping, it’s an explosion of flavors and textures.
- Make Ahead: They store beautifully in the fridge, making them ideal for prepping in advance for parties or bake sales.
- Customizable: You can always switch up the nuts or add a hint of your favorite flavor extract for a personal twist.
Ingredients
Gathering ingredients is half the fun! Here’s what you’ll need:
- For the Base:
- ½ cup unsalted butter, softened
- ½ cup granulated sugar
- 1 large egg, beaten
- 1 cup graham cracker crumbs
- ½ cup unsweetened cocoa powder
- 1 cup shredded coconut
- ½ cup chopped walnuts or pecans (optional)
- For the Custard Layer:
- ½ cup unsalted butter, softened
- 2 cups powdered sugar
- 2 tablespoons vanilla custard powder (or vanilla pudding mix)
- 2 tablespoons milk
- For the Chocolate Topping:
- 4 ounces semi-sweet chocolate, chopped
- 2 tablespoons unsalted butter
Note: Make sure to use custard powder, as it truly gives that authentic Nanaimo essence!
Step-by-Step Instructions
Let’s get our hands a little sweet and dive into this delicious recipe! Follow these steps:
- Prepare Your Baking Dish: Start by greasing an 8-inch square baking dish. You can also line it with parchment paper for easy removal later!
- Make the Base: In a mixing bowl, cream together the softened butter and granulated sugar until it’s light and fluffy. Add the beaten egg and mix well.
- Combine the Dry Ingredients: In a separate bowl, stir together the graham cracker crumbs, cocoa powder, shredded coconut, and nuts (if using). Gradually add this mixture to the wet ingredients, mixing until everything is well combined.
- Press and Chill: Pour the base mixture into your prepared dish and press it down firmly and evenly. Pop it into the refrigerator while you whip up the custard layer.
- Craft the Custard Layer: In a clean bowl, beat the softened butter with the powdered sugar and custard powder until creamy. Add the milk a little at a time until you reach a smooth and spreadable consistency.
- Spread It Out: Retrieve the chilled base from the fridge and spread the custard mixture over the top. Use a spatula to make it as neat and even as possible. Chill again for about 30 minutes.
- Make the Chocolate Topping: In a heatproof bowl over simmering water (or in the microwave), melt the chopped chocolate with the butter until smooth. Stir until it’s glossy. Be patient—it’s worth the wait!
- Top It Off: Carefully pour the melted chocolate over the chilled custard layer. Spread it gently with a spatula to cover completely.
- Final Chill: Return the bars to the fridge one last time. Allow them to set for at least 1-2 hours (or overnight!).
Tip: Slice them with a hot knife (run it under hot water!) for cleaner cuts. They’ll look stunning! Plus, you get to show off those beautiful layers!
Pro Tips & Variations
Feel like mixing things up? Here are some fun ideas to make these Nanaimo Bars your own:
- Flavor Infusion: Try adding a teaspoon of almond or mint extract to the custard layer for an exciting twist.
- Nuts Galore: Swap the walnuts or pecans for hazelnuts or almonds to complement the chocolate tastes.
- Chocolate Options: For an extra decadent treat, use dark chocolate or even a chocolate blend for the topping!
- Make it Vegan: Replace the butter with coconut oil or vegan margarine and use a flax egg instead of the chicken egg.
Serving Suggestions
These bars are delightful on their own, but to elevate your treat game, serve them with:
- A cup of rich coffee or creamy tea.
- A scoop of vanilla ice cream for a dessert that sings of nostalgia.
- Fresh fruit like strawberries or raspberries to brighten the plate.
Imagine presenting these bars on a charming platter, perhaps garnished with a sprinkle of coconut or a few fresh berries. Your friends and family will be in awe!

Storage Tips
Storing these beauties properly will ensure they remain as delicious as the day they were made:
- Refrigerate: Keep the Nanaimo Bars in an airtight container in the fridge for up to a week. Perfect for those sweet cravings!
- Freeze: You can freeze them for up to 3 months. Just wrap individual bars in plastic wrap, then place them in a freezer-safe container.
- Reheat: No need! Just defrost them in the fridge overnight, and they’ll be ready to enjoy without losing a bit of flavor.
FAQs
Can I use different types of nuts in the base?
Absolutely! If walnuts or pecans aren’t your thing, try hazelnuts, almonds, or even sunflower seeds for a nut-free version. Just keep in mind the flavor profile you want!
Can I make these bars gluten-free?
Of course! Just use gluten-free graham cracker crumbs or crushed gluten-free cookies for the base. They will still be delicious!
What can I use if I can’t find custard powder?
If you can’t find custard powder, instant vanilla pudding mix works just fine. The flavor will slightly differ, but they’ll still be yummy!
How do I cut them without making a mess?
A hot knife is the trick! Dip your knife in hot water, wipe it dry, and it’ll slice through the layers easily, preventing them from squishing out!
Conclusion
I absolutely love sharing this Irresistible Nanaimo Bars recipe with you! I hope you’re inspired to recreate this classic treat that’s just waiting to be enjoyed with friends and family. If you give it a try, please let me know how it turns out—I’d love to hear your stories and variations! Happy baking, and may your kitchen be filled with warmth and sweetness!

Leave a Comment