
Hey there, friend! 🌼 Do you ever crave something sweet but need a little something that’s also healthy? I mean, who doesn’t! Well, I’ve got just the thing to satisfy that sweet tooth and provide a little guilt-free joy. Allow me to introduce you to my Creamy Frozen Peanut Butter Yogurt Bites. This delightfully simple snack has been a staple in my kitchen for years, stemming from those lazy summer afternoons when the sun was blazing, and I needed a cool treat without too much fuss. Every time I pop one of these into my mouth, I’m reminded of my childhood days spent with a spoonful of peanut butter and yogurt – two of my all-time faves! Not to mention, they are perfect for meal prep, after-school snacks, or simply when you’re snuggling up on the couch and want something to nibble on.
Why You’ll Love This Recipe
- Quick and easy to whip up – no baking required!
- Healthy ingredients that pack a flavorful punch.
- Customizable with your favorite toppings.
- Perfect for summer or anytime you need a creamy, frozen treat.
Ingredients
Here’s what you’ll need to get started on this delicious journey:
- 1 cup plain Greek yogurt (feel free to use nonfat or full-fat, depending on your preference)
- 1/2 cup creamy peanut butter (the good stuff!)
- 1/4 cup honey or maple syrup (adjust sweetness to taste)
- 1 teaspoon vanilla extract
- A pinch of sea salt
- Optional toppings: crushed nuts, mini chocolate chips, or sliced fruit
Quick tip: Using natural peanut butter, with just peanuts and salt, gives you a richer flavor than the processed stuff with added sugars and oils. Trust me; you won’t regret it!
Step-by-Step Instructions
Let’s dive into making these delightful frozen bites!
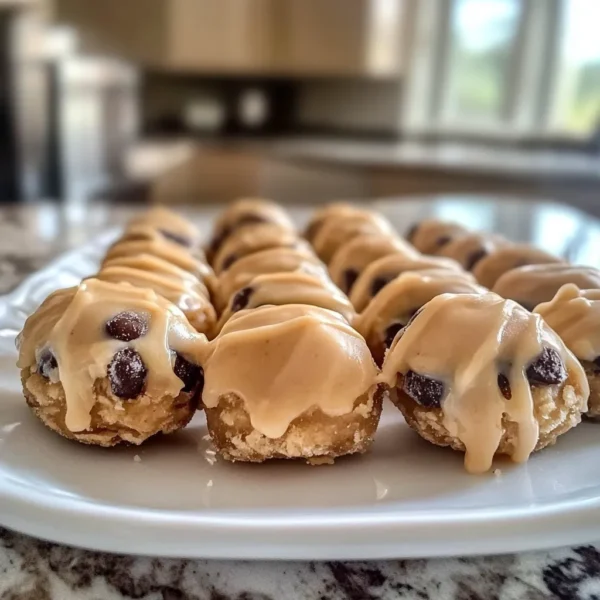
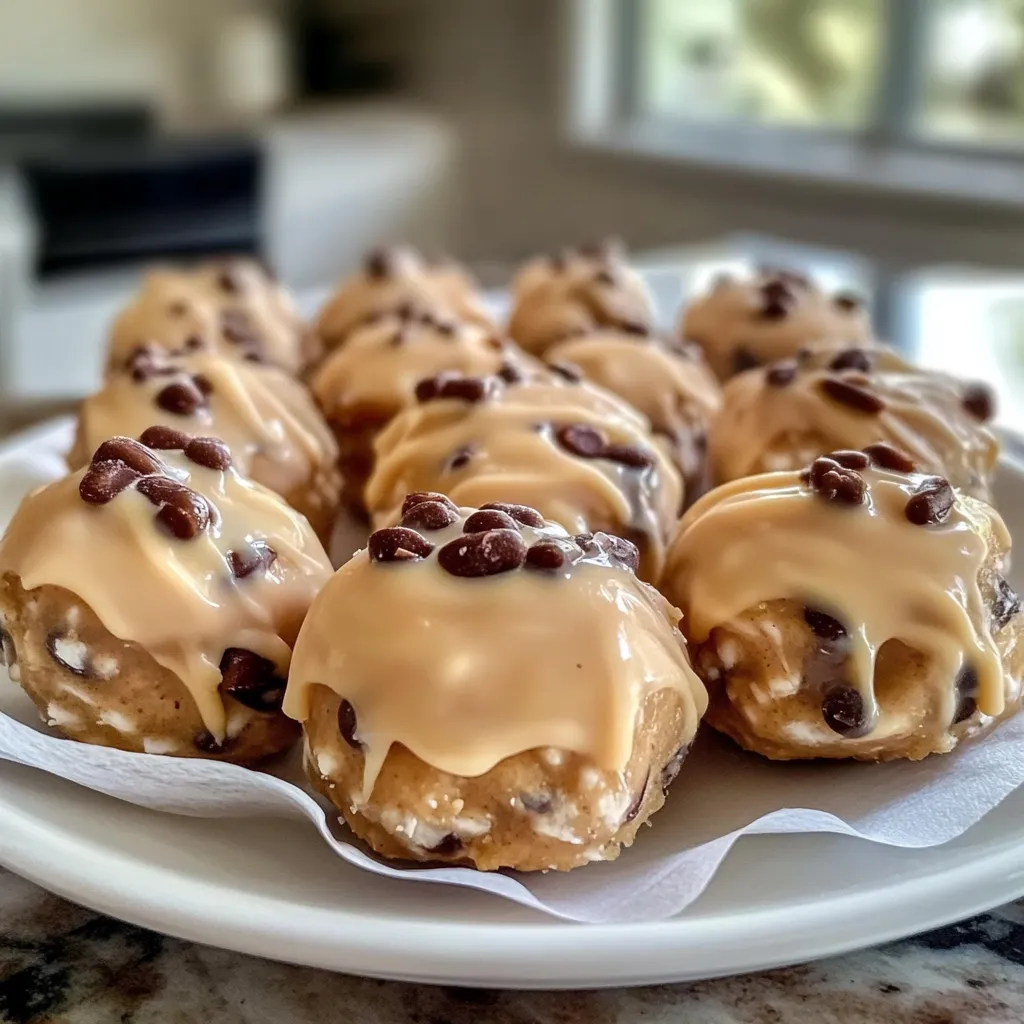
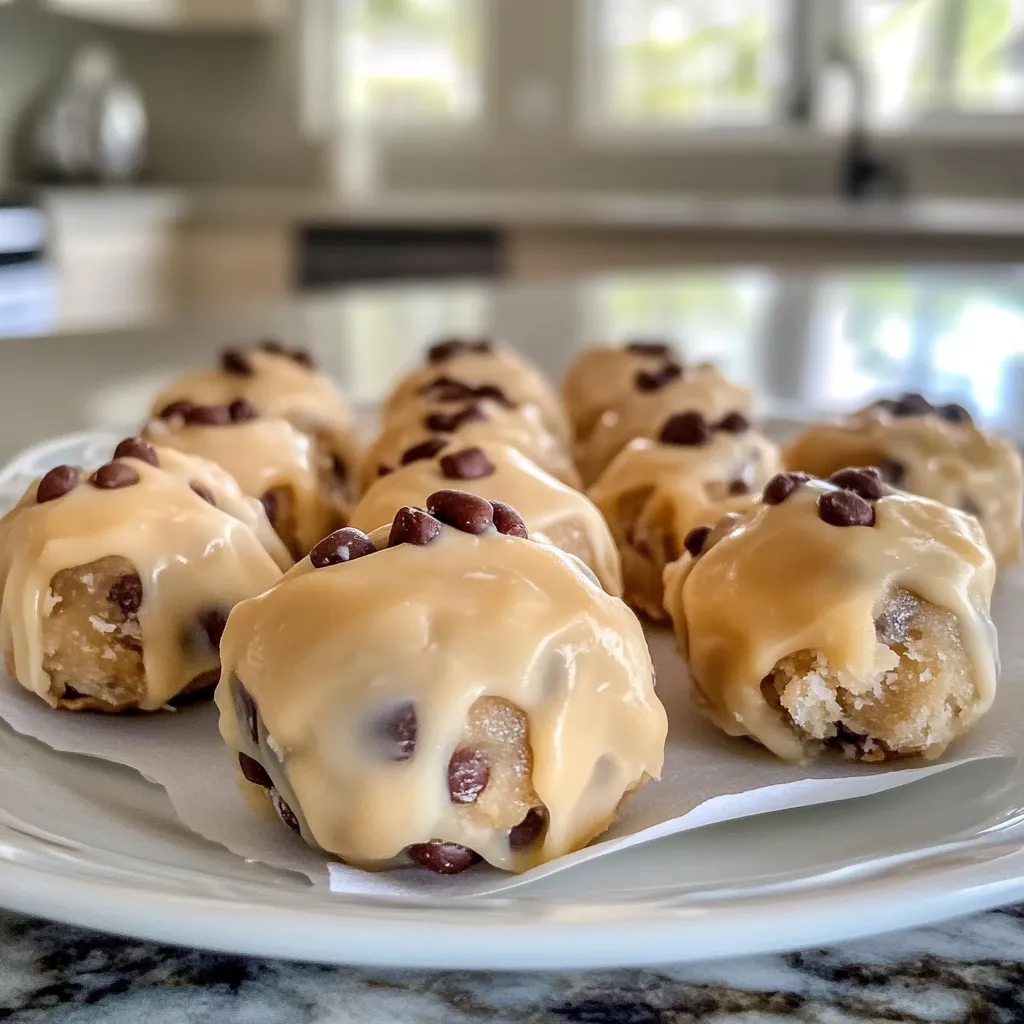
- Mix the Base: In a medium-sized bowl, combine the Greek yogurt, peanut butter, honey (or maple syrup), vanilla extract, and the pinch of sea salt. Use a whisk or a spatula to blend everything smoothly. It should be creamy and luscious. If you’re feeling adventurous, taste it and adjust the sweetness!
- Prepare the Molds: Grab a silicone mold or an ice cube tray. The silicone molds are fab because they make it easier to pop the bites out later!
- Fill the Molds: Spoon the creamy mixture into the prepared molds. Fill them about three-quarters full, leaving a little space for toppings if you choose to add them. You want some wiggle room for when they freeze!
- Add the Toppings: This step is entirely optional but oh-so-fun! Sprinkle with crushed nuts, mini chocolate chips, or even a tiny slice of banana for that extra flair. Feel free to get creative!
- Freeze: Place the filled molds into the freezer for about 2 to 3 hours, or until they are completely frozen. If you’re in a rush, you may even check after 1.5 hours, but watch out for those tempting little bites!
- Enjoy: Pop out your frozen yogurt bites and get ready to enjoy! They make a fantastic snack that you can feel good about munching on.
A little secret tip from my kitchen: while filling the molds, you can use a mini spatula or the back of a spoon to really pack down the mix and make sure they’re nice and compact. Trust me, small details like this lead to a more delightful bite!
Pro Tips & Variations
If you’re looking to switch things up or add your own flair, here are some fun variations:
- Cocoa Delight: Mix in a tablespoon of cocoa powder for a chocolatey twist!
- Fruity Fusion: Add a layer of blended strawberries or raspberries at the bottom of your molds before spooning in the peanut butter mixture.
- Spiced Up: For a hint of warmth, try adding a dash of cinnamon or nutmeg to the mix. It’ll warm your heart!
And if you’re exploring dietary swaps, you can always swap out Greek yogurt for a dairy-free option like coconut yogurt or soy yogurt. There’s something for everyone here!

Serving Suggestions
These creamy frozen delights are perfect for so many occasions! Serve them up in a snack bowl during a movie night, or pop a few in your lunch for a special treat. Hey, they’re even a fun addition to a brunch table alongside fresh fruit and granola. The possibilities are endless! Pair them with a warm cup of chai tea or an iced latte to elevate your snacking experience.
Picture this: you’re lounging on a warm summer day, an ice-cold drink in one hand and one of these little bites in the other. Pure bliss!
Storage Tips
These little gems can last in the freezer for up to 2 months! Just make sure you pop them into an airtight container or a ziplock bag after they’ve frozen solid. Trust me; they taste best when they’re fresh, but they still hold their deliciousness for a good while. If you want to avoid frostbite (and we all do!), it’s wise to use parchment paper between layers whenever possible.
To thaw, simply leave them out at room temperature for a few minutes, or you can microwave them for about 10 seconds if you’re in a real rush. Just don’t forget to keep an eye on them – nobody wants a melted mass!
Can I use flavored yogurt?
Absolutely! Flavored yogurt will infuse your bites with extra taste, making them even yummier. Just remember to adjust the sweetness if needed, as the flavored yogurts often contain added sugar. You can also play around with fruity flavors like peach or mixed berry.
Are these snacks kid-friendly?
Definitely! My kids love them, and I love that they’re packed with protein and goodness. They’re a great way to introduce healthier snacking habits, plus kids love the fun shapes!
What if I don’t have honey or maple syrup?
No worries at all! You can replace honey or maple syrup with agave nectar or even a mashed banana for sweetness. Just keep in mind that using a ripe banana will also add a slight banana flavor, which could be delicious!
Can I make these nut-free?
Of course! Swap out the peanut butter for sun butter or a seed butter of your choice. They’ll still be creamy and delightful without the nuts!
Conclusion
I hope you get a chance to make these Creamy Frozen Peanut Butter Yogurt Bites and treat yourself (and maybe your loved ones!) to something special. They are so easy to make, and each bite is pure joy! Don’t forget to let me know how yours turned out in the comments below or share your own flavor variations. Happy snacking, friends!


Leave a Comment