
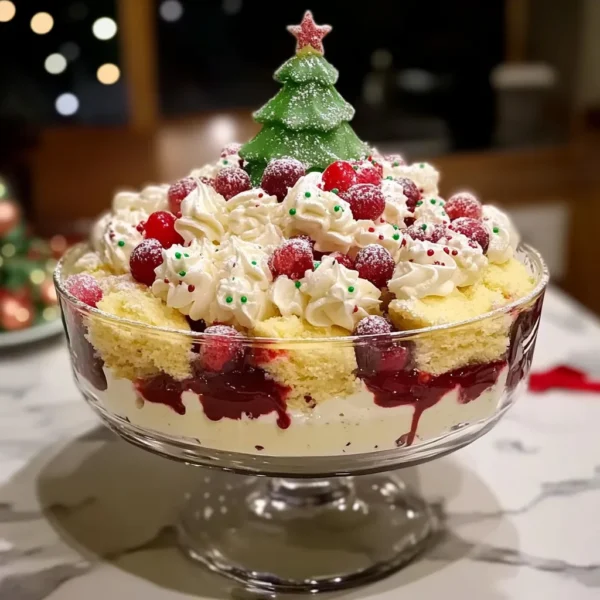
Ah, the holidays! That magical time of year filled with twinkling lights, the scent of pine, and the joyous sounds of laughter echoing through the house. One memory that always brings a smile to my face is baking with my grandmother, who had a delightful knack for turning simple ingredients into extraordinary treats. Among her many specialties was a beloved Christmas trifle that looked like a festive Christmas tree, and oh, how we eagerly awaited each bite! Today, I’m thrilled to share my version of this cherished dish: the Christmas Tree Cake Trifle. This recipe encapsulates the warmth and cheer of the season while being remarkably easy to prepare. It’s a festive showstopper that’s perfect for holiday gatherings and will surely become a cherished part of your holiday traditions too!
Why You’ll Love This Recipe
- Visually stunning – it’ll wow your guests!
- Easy to make ahead, freeing up your time on the big day.
- Layers of delightful flavors and textures – creamy, crunchy, and fruity!
- Customizable: add your favorite candies, fruits, or flavors!
- Great for using up leftover cake or holiday sweets.
Ingredients
Let’s gather the ingredients! Here’s what you’ll need for a festive and delicious Christmas Tree Cake Trifle:
- 1 box of vanilla cake mix (plus ingredients required to prepare it)
- 1 cup of heavy cream
- 1 cup of powdered sugar
- 1 teaspoon of vanilla extract (for that homemade flavor)
- 2 cups of mixed berries (strawberries, blueberries, raspberries – fresh is best!)
- 1/2 cup of green-tinted whipped frosting or green icing (for decoration)
- 1/2 cup of crushed graham crackers (for that crunchy layer)
- Red and gold sprinkles (to add a little holiday sparkle)
- Optional: chocolate or peppermint candies for extra flair!
Tip: Using fresh berries adds a burst of flavor and color, while the cake can even be a day-old—just make sure it’s stored properly to keep it moist!
Step-by-Step Instructions
Ready to make some holiday magic? Let’s jump right in with these easy steps:
- Prepare the Cake: Start by following the directions on the box for the vanilla cake mix. Bake it in a 9×13 inch pan and let it cool completely. The smell of vanilla wafting through your kitchen is the first taste of holiday cheer!
- Make the Whipped Cream: In a mixing bowl, combine the heavy cream, powdered sugar, and vanilla extract. Whip until soft peaks form. Be careful not to over-whip; otherwise, you’ll end up with butter!
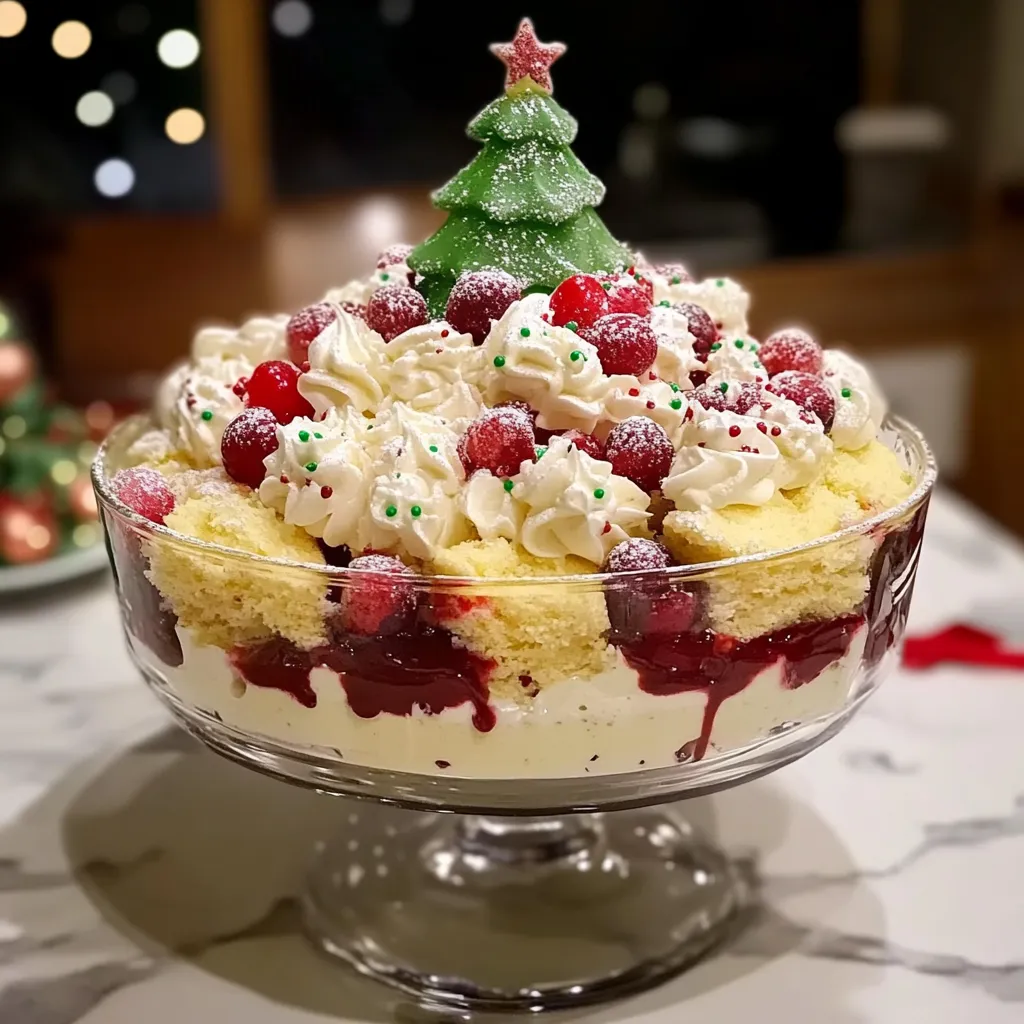
- Assemble the Trifle: Once the cake has cooled, cut it into cubes. In a large trifle dish or individual serving cups, start layering your dessert. Begin with a layer of cake cubes, followed by some whipped cream, a handful of berries, and a sprinkle of crushed graham crackers.
- Repeat: Continue layering until you’ve used up all the ingredients. Aim for at least three layers to create a beautiful visual effect. Don’t forget to reserve some whipped cream for the final top layer!
- Decorate: Spread a generous layer of whipped cream on the top. Use the green-tinted frosting or icing to pipe swirls resembling a Christmas tree. Finish off by decorating with red and gold sprinkles, and perhaps a few candies for extra festivity!
- Chill: Place the trifle in the refrigerator for at least an hour before serving. This gives the flavors time to meld beautifully.
Watch-out: Make sure to chill your trifle; it enhances the flavor and texture!
Pro Tips & Variations
Let’s get a little creative! Here are some fun twists to make your Christmas Tree Cake Trifle uniquely yours:
- Flavorful Additions: Consider adding a dash of mint extract to the whipped cream or layers of chocolate pudding for a rich twist.
- Fruit Options: Swap the mixed berries for diced apples or pears for a delightful autumn and winter vibe, or even use citrus for a zesty kick.
- Graham Cracker Alternatives: Try using crushed cookies like Oreos for a deeper flavor or replace them with granola for added crunch.
- Boost the Festivity: Top with mini marshmallows or edible glitter to bring that holiday sparkle to life!

Serving Suggestions
When it comes to serving your Christmas Tree Cake Trifle, think cozy and festive! I love to present it in a clear glass bowl so that everyone can admire those beautiful layers. You could serve it as a grand centerpiece for your holiday dessert table, or style it in individual cups for a delightful personal touch.
Pair it with a warm cup of spiced cider or hot chocolate to complement the sweetness of your trifle. For an extra layer of comfort, why not whip up some peppermint bark to enjoy alongside? It’s a feast for both the eyes and the belly!

Storage Tips
Got leftovers? No problem! Here’s how to store your trifle properly:
- Refrigerating: Cover your trifle with plastic wrap or a lid. It will last for 3 to 4 days in the fridge, though the whipped cream might lose a bit of its fluffiness.
- Freezing: I wouldn’t recommend freezing it because the texture of the whipped cream can change upon thawing, but the cake itself can be frozen separately.
- Reheating: You don’t need to reheat the trifle since it’s served cold. Just grab it from the fridge and enjoy!
FAQs
Can I use store-bought cake instead of making my own?
Absolutely! Store-bought cakes work wonderfully. Just ensure it’s a flavor you love, and you’re good to go!
How do I make this gluten-free?
No worries! You can swap in a gluten-free cake mix and ensure the other ingredients are also gluten-free. It’ll be just as festive!
Can I prepare this trifle a day in advance?
You bet! Assembling it a day ahead allows those flavors to meld beautifully. Just hold off on decorating until right before serving for that fresh look!
What can I substitute for whipping cream if I want a lighter option?
Try using Greek yogurt or whipped coconut cream for a lighter but equally delicious alternative!
Conclusion
So there you have it, friends! The Christmas Tree Cake Trifle is not only a nod to the memories of our holiday baking but also a delightful treat to share with loved ones. I’d love to hear how your trifle turns out, or if you add your own twist to it! Drop me a comment below and take joy in making this festive dessert a new holiday tradition. Happy baking, and may your season be filled with love and sweetness!
Leave a Comment