
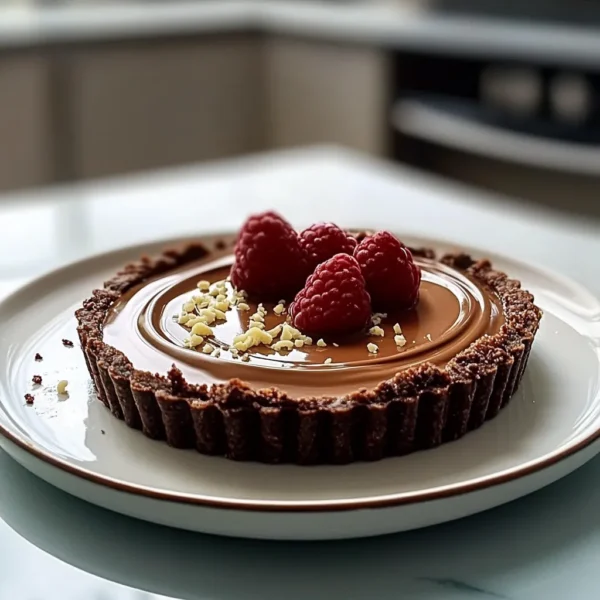
There’s something incredibly special about a rich chocolate dessert, isn’t there? I remember the first time I tasted a chocolate truffle tart. It was during one of those cozy winter evenings when snowflakes danced outside, and the warmth of the kitchen created the perfect backdrop for indulging in something decadent. The first bite was pure bliss—the velvety chocolate melting in my mouth, paired with a buttery, crumbly crust that practically cradled the rich filling. It felt like a warm hug on a cold day. Since then, this chocolate truffle tart has become my go-to recipe for gatherings, celebrations, or just a little self-care at home. Trust me, once you whip this up, you’ll want to keep it in your repertoire forever!
Why You’ll Love This Recipe
- Decadent chocolate flavor that satisfies any sweet tooth.
- Simple to make with only a handful of ingredients.
- Perfect for impressing guests at dinner parties or cozy family nights.
- Make ahead and store for a delightful treat anytime.
- Customizable with fun toppings or flavor twists!
Ingredients
Gather your ingredients, and let’s get started! Here’s what you’ll need:
- For the crust:
- 1 ½ cups all-purpose flour
- ¾ cup unsweetened cocoa powder
- ½ cup powdered sugar
- ½ teaspoon salt
- ¾ cup unsalted butter, cold and cubed
- 1 large egg yolk
- 2 to 4 tablespoons ice water
- For the filling:
- 8 ounces bittersweet or semisweet chocolate, chopped (quality matters here!)
- 1 cup heavy cream
- ¼ cup granulated sugar
- 1 teaspoon vanilla extract
- Pinch of salt
Note: Using fresh high-quality chocolate will enhance the taste tremendously, so splurge a little on the chocolate if you can—the result will be worth every cent!
Step-by-Step Instructions
Ready to dive into the world of chocolate euphoria? Let’s get baking!
- Make the crust: In a large bowl, whisk together the flour, cocoa powder, powdered sugar, and salt until well combined. This will be the base of your tart and will add a delightful chocolatey crunch.
- Cut in the butter: Add the cold, cubed butter to the flour mixture. Using a pastry cutter or your fingertips, work the butter into the flour until the mixture resembles coarse crumbs. It should feel like sandy goodness in your hands.
- Add the egg yolk: Mix in the egg yolk. Then, gradually add the ice water, one tablespoon at a time, using just enough to bring the dough together. You want it to hold together without being sticky.
- Chill the dough: Shape the dough into a flat disk, wrap it in plastic wrap, and refrigerate for at least 30 minutes. This helps it firm up and makes it easier to roll out.
- Preheat the oven: Preheat your oven to 350°F (175°C). A warm kitchen is about to get even warmer with delicious smells!
- Roll out the dough: Once chilled, remove the dough from the fridge. On a lightly floured surface, roll it out to fit your tart pan (about 12 inches in diameter). Don’t stress about making it perfect; rustic is totally okay!
- Transfer to the pan: Carefully place the rolled-out dough into your tart pan, pressing it into the edges and trimming any excess. Poke a few holes in the bottom with a fork to prevent bubbling.
- Bake the crust: Place the tart pan in the preheated oven and bake for about 15-20 minutes, or until set. Let it cool completely before adding the filling.
- Prepare the filling: In a heatproof bowl, combine the chopped chocolate. In a small saucepan, heat the cream and sugar over medium heat until just simmering, stirring to dissolve the sugar. Pour this over the chocolate and let it sit for a minute to melt the chocolate.
- Mix it up: Add the vanilla and a pinch of salt, then whisk until smooth and glossy. This step is truly magical; the aroma of rich chocolate wafts through the air, and you can hardly resist sipping a spoonful of this chocolate goodness.
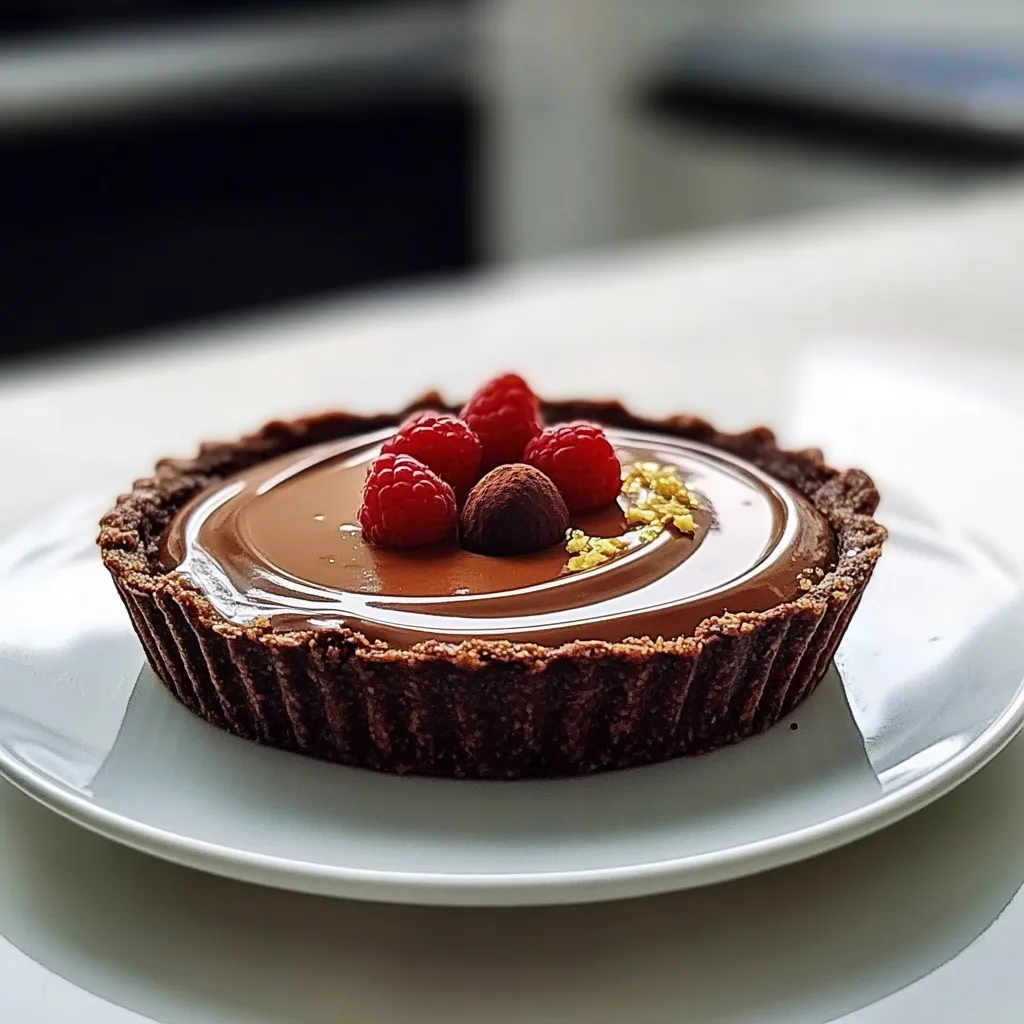
- Fill the crust: Pour the chocolate filling into the cooled tart crust and smooth the top with a spatula. You’re almost there!
- Chill: Refrigerate the tart for at least 2 hours or until set. If you’re impatient like me, don’t worry; it still tastes delicious even if it’s not fully set!
Pro Tips & Variations
Here are some fun ways to make this chocolate truffle tart uniquely yours:
- Make it minty: Add a few drops of peppermint extract to the filling for a fresh twist.
- Nutty flavor: Incorporate crushed nuts like hazelnuts or pistachios into the crust for added crunch.
- Top it off: Get creative with toppings! Try fresh berries, whipped cream, or even a drizzle of caramel.
- Diet swaps: For a gluten-free version, use gluten-free flour in the crust. The taste may vary slightly, but it will still be delectable!
- Make mini tarts: Use a muffin tin to create individual chocolate truffle tarts, perfect for small gatherings!
Serving Suggestions
Serving this Chocolate Truffle Tart is all about the presentation! Here are a few cozy ways to enjoy it:
- Classic pairings: A dollop of freshly whipped cream or a scoop of vanilla ice cream balances the richness beautifully.
- Fruit addition: Accompany with fresh strawberries or raspberries to brighten up the flavors. The tartness of the berries perfectly complements the sweetness.
- Hot beverage: Enjoy it next to a steaming cup of coffee or a decadent hot chocolate to immerse yourself in chocolate heaven!
Storage Tips
Leftovers? Yes, please! Here’s how to keep your tart delicious:
- Refrigerate: Store leftovers covered in the fridge for up to 5 days. It might even taste better the next day as the flavors deepen!
- Freeze: You can freeze the baked tart for up to 3 months. Wrap it securely in plastic wrap, followed by aluminum foil to prevent freezer burn.
- Reheat: If you want to enjoy it warm, pop it in a preheated oven at 300°F (150°C) for about 10-15 minutes until warmed through.
FAQs
Can I use milk chocolate instead of bittersweet chocolate?
Absolutely! Just keep in mind that milk chocolate is sweeter and will give a different flavor. If you prefer it sweet, go for it!
What if my crust cracks when I roll it out?
Don’t sweat it! Just patch the cracks with your fingers; it’ll all come together once baked, and the filling will cover any imperfections.
How do I know when the filling is set?
The filling should be firm to the touch but still slightly jiggly in the center when you gently shake the pan. It’ll continue to set as it cools!
Can I make the tart ahead of time?
Yes! This tart is perfect for making ahead. Just prepare it the day before, and you’ll have an easy treat ready for any occasion!
Can I add liqueur to the filling?
Definitely! A splash of coffee liqueur or orange liqueur can add a lovely dimension to the flavor. Just be careful not to overdo it!

Conclusion
So, there you have it—a rich and indulgent Chocolate Truffle Tart that’s bound to impress not just your taste buds but everyone who gets a slice! I can’t wait for you to try this recipe and experience the joy it brings! Feel free to share your thoughts, variations, or even that scrumptious first bite experience in the comments. Happy baking, my friend! 🍫❤️
Leave a Comment