
Cherry Crisp Recipe
Introduction
Hey there, lovely friends! As the warm sun starts stretching its rays over the days, cherry season always brings a bit of magic into my kitchen. Can you remember the first time you plucked a cherry right off the tree? That sweet, juicy burst of flavor as the bright red fruit meets your taste buds is something I’ll never forget. When cherries start showing up at the markets or in our backyards, I can’t help but whip up a batch of my favorite Cherry Crisp. It’s the ultimate comforting dessert, perfect for a cozy night in or a cheerful gathering. I promise, every bite feels like a warm hug!
Why You’ll Love This Recipe
- Simple to make — no complicated techniques here, just deliciousness!
- Perfectly sweet and tart — cherries dance with a crispy topping for the best textures!
- Great for any occasion — whether it’s a weeknight treat or a festive gathering!
- Budget-friendly — fresh cherries give you that summer vibe without breaking the bank!
Ingredients
Here’s everything you’ll need for this comforting Cherry Crisp:
- 4 cups fresh cherries, pitted (feel free to use frozen if you have to!)
- ¾ cup granulated sugar (you can adjust based on how sweet your cherries are!)
- 1 tablespoon cornstarch (this helps thicken the filling)
- 1 teaspoon vanilla extract (the secret ingredient for a warm flavor)
- 1 cup rolled oats (for that crispy topping!)
- 1 cup all-purpose flour (choose whole wheat for a nutty twist)
- ½ cup brown sugar (because who doesn’t love that caramel flavor?)
- ¼ teaspoon salt (to balance the sweetness)
- ½ cup unsalted butter, melted (or coconut oil if you prefer a dairy-free option)
- 1 teaspoon cinnamon (optional, but it adds a lovely warmth! I can’t resist!)
Step-by-Step Instructions
Alright, let’s jump right into creating this delicious Cherry Crisp! It’s so easy, you’ll wonder why you didn’t try it sooner.
- Preheat your oven: Start by preheating your oven to 350°F (175°C). This ensures it’s nice and hot for that crisp topping!
- Prepare the cherries: In a large mixing bowl, combine the pitted cherries, granulated sugar, cornstarch, and vanilla extract. Toss them gently until the cherries are beautifully coated. Let them sit for about 5 minutes and release their juices — trust me, this makes all the difference!
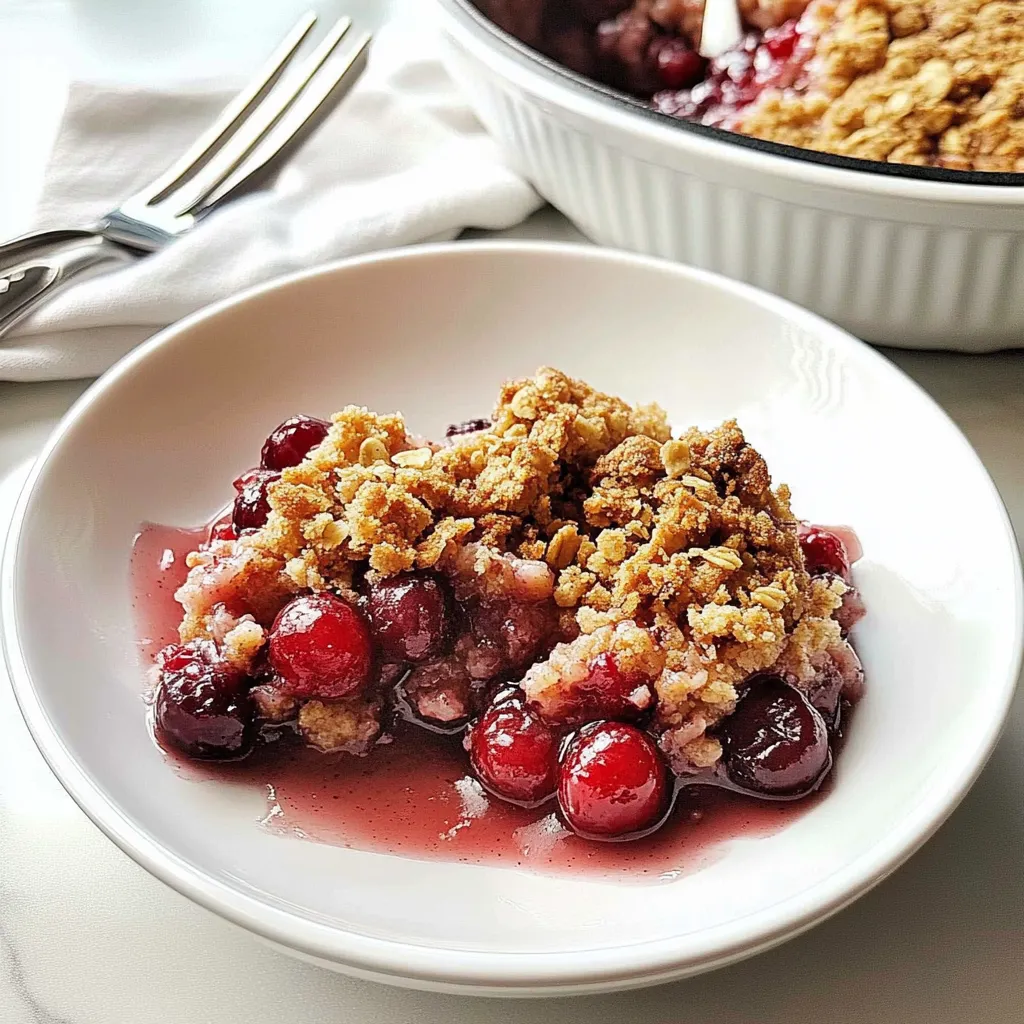
- Transfer to a baking dish: Pour the cherry mixture into a greased 9×13-inch baking dish, spreading them evenly so that every bite is packed with that sweet cherry goodness.
- Make the topping: In another bowl, mix together the rolled oats, flour, brown sugar, salt, melted butter, and cinnamon until it’s all combined. You’ll want to have a crumbly texture, perfect for the topping. Pro tip: if it’s too dry, add a teaspoon of water, but not too much! We don’t want mush!
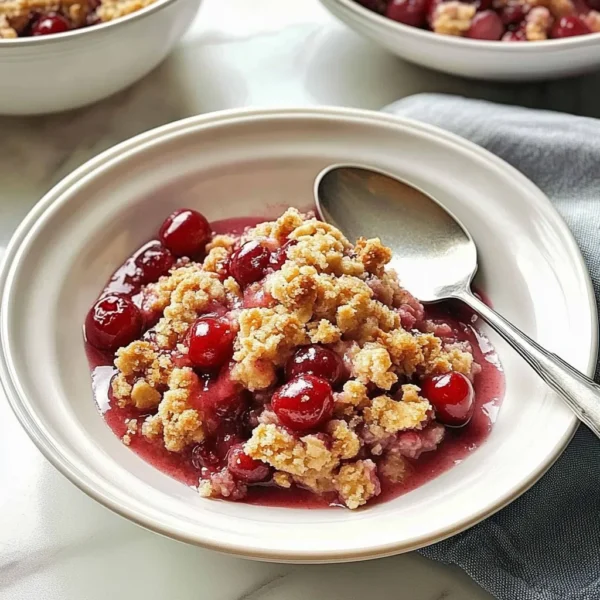
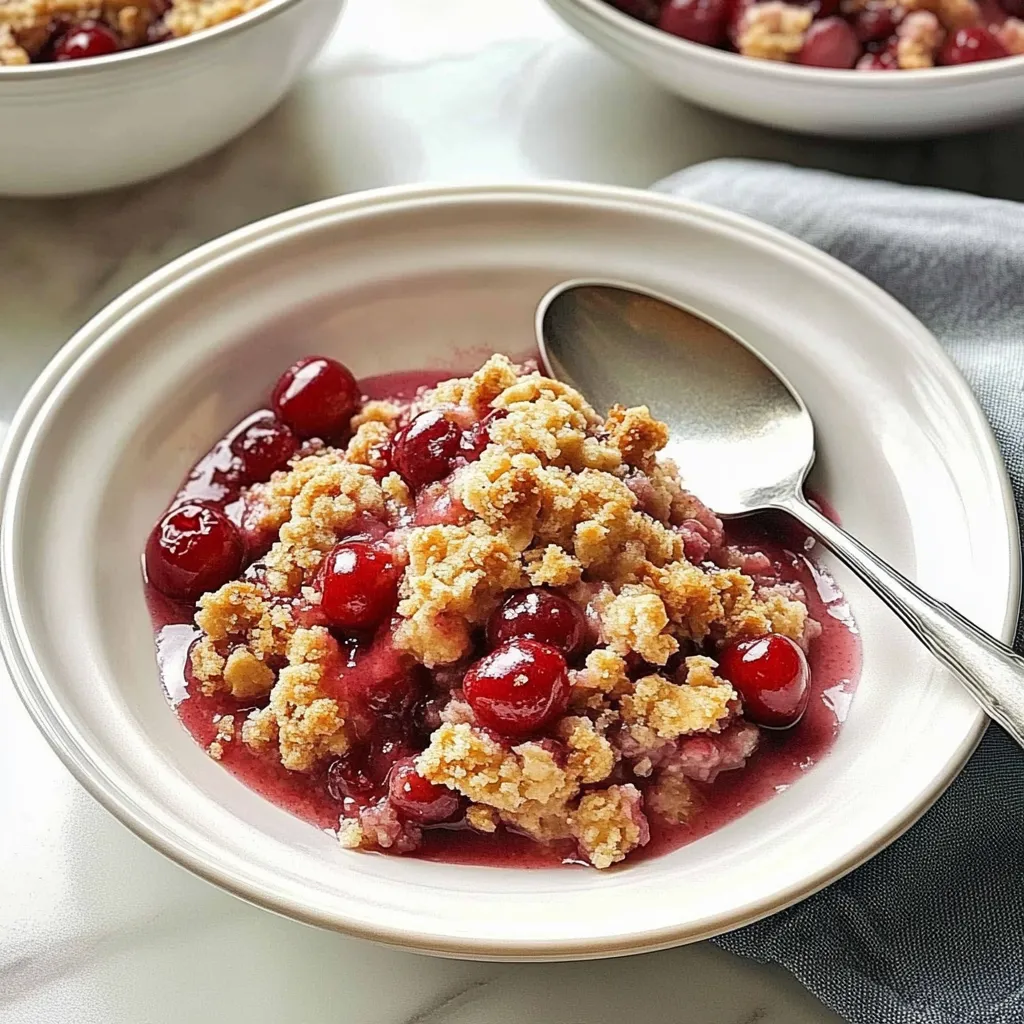
- Top those cherries: Spread the oat mixture over the cherries, ensuring it’s evenly distributed. Go ahead, take a moment to admire your handiwork. The golden brown crumble is so inviting!
- Bake: Pop that beauty in the oven for about 45 minutes, or until the topping is golden and the cherries are bubbly. You’ll start to smell it wafting through your home — trust me, it’s a heavenly aroma!
- Cool slightly: Once out of the oven, let the Cherry Crisp cool for about 10-15 minutes. This helps the juices thicken up a bit more, and gives you a chance to drool over it!
Pro Tips & Variations
Feeling adventurous? Here are a few fun ideas to switch things up!
- Spices galore: Add a pinch of nutmeg or ginger for an unexpected kick of flavor!
- Mix up the fruits: Try mixing in some blueberries or raspberries for more berry goodness!
- Nutty topping: Toss in some chopped nuts — walnut or pecan bits add an extra crunch, and they’re packed with healthy goodies.
- Sweeteners swap: Experiment with maple syrup or honey instead of granulated sugar — yum!
- Dairy-free option: Use coconut oil instead of butter and non-dairy yogurt as a topping for serving!
Serving Suggestions
Eager to dig in? I suggest serving this Cherry Crisp warm, right from the oven. But let’s not stop there! A scoop of vanilla ice cream or a dollop of whipped cream elevates it to dessert heaven. I love to serve it with a steaming cup of coffee — it’s the perfect pairing for a cozy night in. Imagine curling up on the couch, spoons in hand, as you dig into this cherry delight. It’s a little slice of happiness on a plate!
Storage Tips
So, you’ve made a big batch (or just have some leftovers, which is a triumph in itself!). Here’s how to store it:
- Refrigerate: If you have any left, let it cool completely and cover it with plastic wrap or foil before popping it in the fridge. It’ll last about 3-4 days. The flavors get even better the next day!
- Freeze: You can freeze it baked! Just cover it well in a freezer-safe container and it’ll be good for up to 3 months. When you’re ready to enjoy, thaw it overnight in the fridge and reheat in the oven until warm and bubbly!
- Reheat: Pop individual servings in the microwave for a quick warm-up, or place the entire dish back in the oven at 350°F (175°C) for about 15 minutes. Enjoy that fresh-out-of-the-oven flavor!
FAQs
Can I use frozen cherries instead of fresh?
Absolutely! Just make sure to let them thaw and drain any excess liquid before mixing them with the sugar and cornstarch. It works like a charm!
What if I don’t have granulated sugar?
No worries! You can replace it with brown sugar, coconut sugar, or even maple syrup if you want to get a little wild and adventurous!
How do I know when it’s done baking?
You’re looking for that golden topping, and you should see bubbles around the edges of the baking dish. A gentle press on the topping should feel crunchy but not overly hard. You want that contrast of crunch and juicy cherry goodness!
Can I make it ahead of time?
You can! Prepare it up to the point of baking, cover it, and stick it in the fridge for a day. When you’re ready, just bake it right before serving. Easy-peasy!
Conclusion
And there you have it! Your very own Cherry Crisp, a dessert that’s so simple yet so utterly satisfying. I hope you find joy in every bite, just as I do. If you try it out, share your thoughts in the comments or tag me in your photos! I can’t wait to hear all about your cherry adventures in the kitchen. Happy baking, my friends!


Leave a Comment