
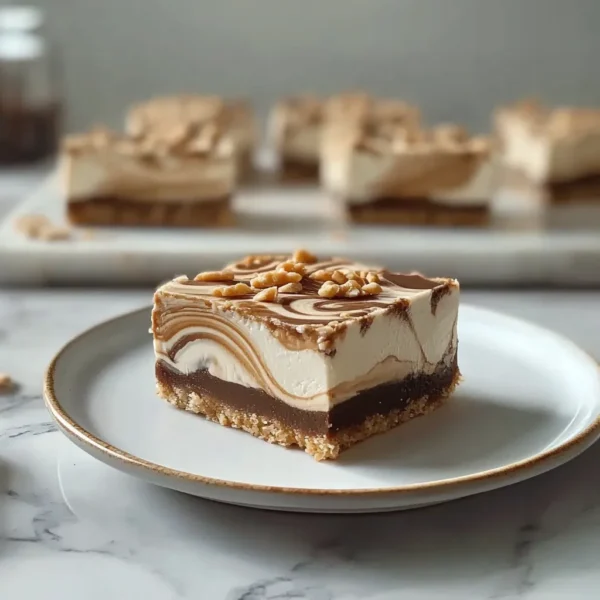
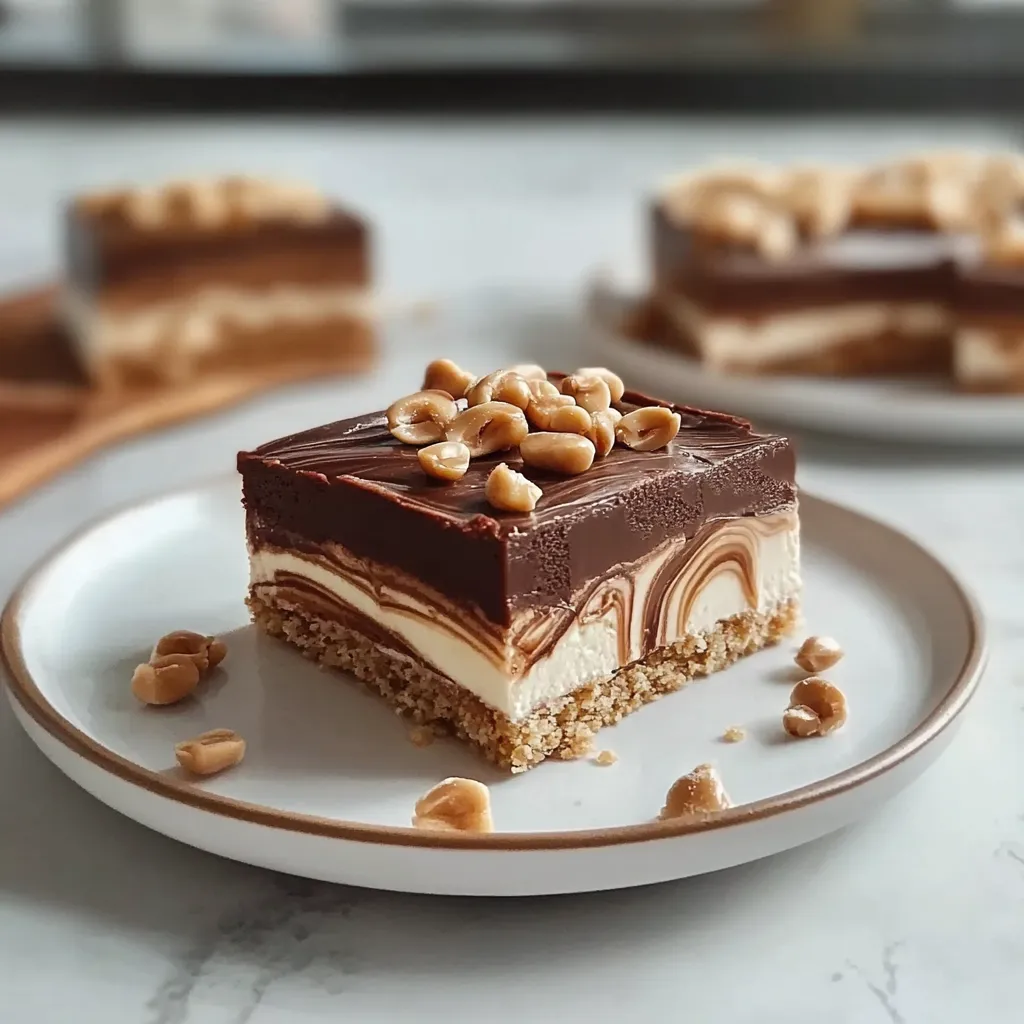
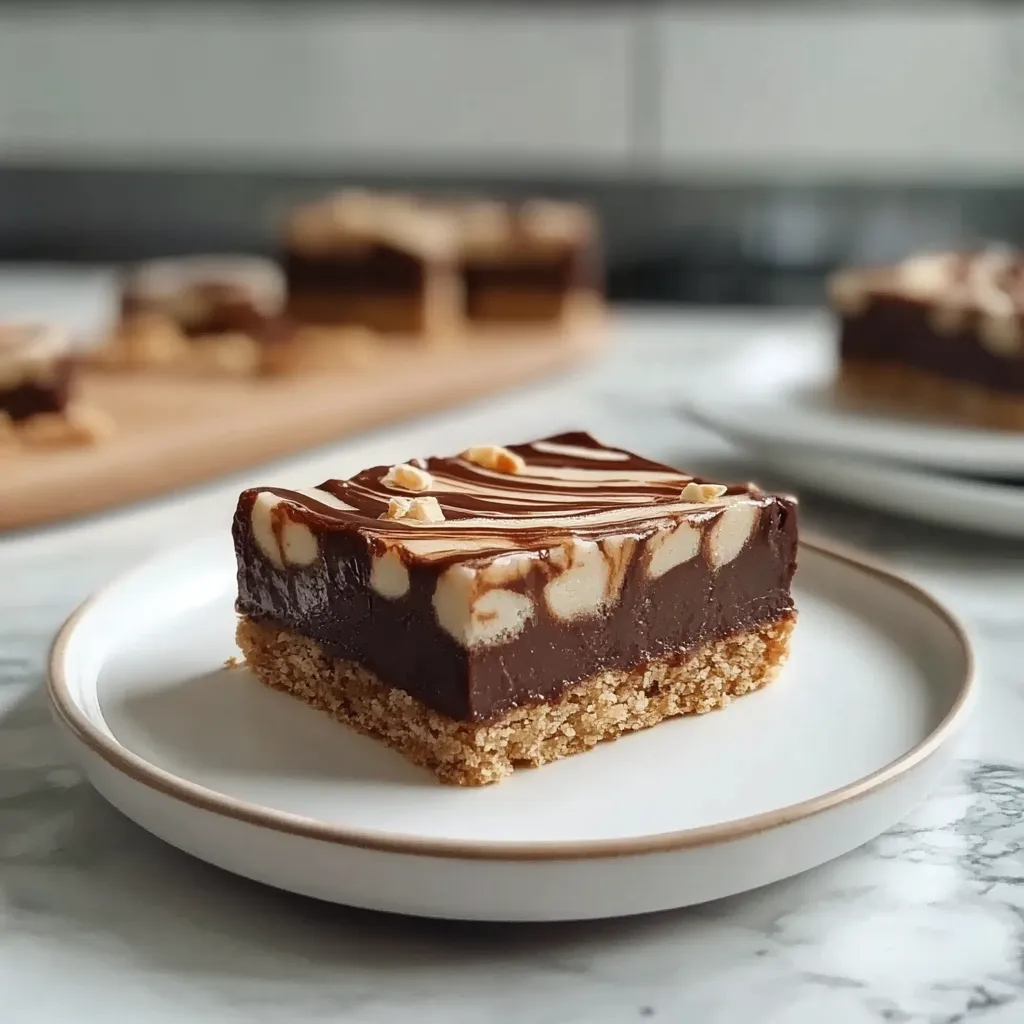
There’s something utterly nostalgic about sinking my teeth into a Buster Bar Dessert. This delightful frozen treat takes me back to summers spent lounging by the pool, and visits to the local ice cream shop where every moment felt like a sweet delight. It’s a dessert that promises the comforting taste of vanilla, chocolate, and a surprise crunch, all layered together to create a bite so dreamy, it will have you reaching for seconds (and thirds!). Today, I’m excited to share my Buster Bar Dessert recipe, perfect for warm days or anytime you need a sweet pick-me-up!
Why You’ll Love This Recipe
- Easy to Make: Layering and freezing allows you to prepare it ahead, with little hands-on time.
- Impressive Presentation: This dessert looks as good as it tastes, making it a showstopper for gatherings.
- Customizable: You can switch up the toppings and layers to suit your personal taste!
- Perfect for Hot Days: Serve it straight from the freezer for a cool, refreshing treat.
Ingredients
Here’s what you’ll need to create this delicious Buster Bar Dessert:
- 1 package of chocolate sandwich cookies (like Oreos), crushed (about 20 cookies)
- ½ cup unsalted butter, melted
- 1 quart vanilla ice cream, softened
- 1 cup hot fudge sauce, warmed
- 1 cup creamy peanut butter
- 1 cup whipped topping (like Cool Whip)
- 1 cup chopped peanuts (optional)
- Extra chocolate syrup for drizzling (optional)
Tip: If you want a richer flavor, try using chocolate ice cream instead of vanilla for added depth.
Step-by-Step Instructions
- Prepare the Crust: In a mixing bowl, combine the crushed chocolate cookies with melted butter. Stir until the crumbs are well coated and the mixture resembles wet sand.
- Press the Crust: Spread the crumb mixture evenly into the bottom of a 9×13-inch baking dish. Use the back of a measuring cup to pack it down tightly. This will be the delicious base of your dessert!
- Layer with Ice Cream: Next, scoop the softened vanilla ice cream onto the crust. Spread it gently to create an even layer, then pop it in the freezer for about 30 minutes to firm up.
- Add the Fudge Layer: After the ice cream has set, take it out of the freezer and pour the warm hot fudge sauce over the ice cream. Make sure to spread it nice and even!
- Pear the Peanut Butter Layer: In a small bowl, mix the peanut butter with whipped topping until smooth. Spread this creamy concoction over the fudge layer.
- Add the Peanuts (Optional): If you’re feeling nutty, sprinkle the chopped peanuts on top of the peanut butter layer for an extra crunch.
- Finish with a Frosting Layer: Pour a final layer of whipped topping over the peanuts, smoothing it with a spatula for an even finish.
- Freeze and Serve: Cover the dish with plastic wrap or aluminum foil and place it in the freezer for at least 4 hours, or overnight for best results. When you’re ready to serve, take it out and let it sit for about 10 minutes before slicing—this helps with cutting those neat squares!
Watch-out: Don’t let it melt too long or it will lose its lovely structure!
Pro Tips & Variations
This dessert is all about creativity! Here are some fun twists to consider:
- Flavor Swaps: Try using mint chocolate chip ice cream for a refreshing take! Or swap in your favorite ice cream flavors.
- Add Some Joy: Drizzle some extra chocolate syrup over the top before serving, or add a sprinkle of mini chocolate chips for added texture.
- Healthier Version: Want to cut down on calories? Use low-fat yogurt instead of whipped topping and choose a reduced-sugar ice cream.
- Make It a Brownie Delight: Instead of cookie crumbs, use crumbled brownies for a fudgier base that’s to die for!
So many options, right? Don’t hesitate to play around!
Serving Suggestions
When serving this delightful Buster Bar Dessert, think about how you want to elevate the experience:
- Serve it alongside a hot cup of coffee; the contrast is divine!
- Pair it with fresh berries for a pop of color and a tart contrast.
- For a festive touch, garnish each serving with a sprig of mint or a sprinkling of colored sprinkles.
Imagine everyone gathered around the table, smiles all around as you serve up this show-stopping dessert—it’s just the kind of memories we cherish!
Storage Tips
Want to make this treat ahead? Here’s how to store it:
- Refrigeration: If you have any leftovers (which is rare!), cover it tightly with plastic wrap and keep it in the freezer for up to 2 weeks.
- Freezing: You can make this dessert in advance. Just be sure to store it well to prevent freezer burn!
- Reheating: It’s best served cold, so there’s no need to reheat. Just let it sit at room temperature for a few minutes before slicing.
FAQs
Can I use gluten-free cookies for the crust?
Absolutely! Using gluten-free cookies is a fantastic way to make this dessert accessible to everyone. Just look for those with a similar texture and flavor!
How long does it take to prepare?
The active preparation time is about 30-40 minutes, but keep in mind that you’ll need to let it freeze for at least 4 hours or overnight before serving.
Can I make this without peanut butter?
Of course! If you or someone you’re serving has a peanut allergy, you can simply omit the peanut butter or replace it with a nut-free alternative like sun butter or almond butter.
What if I don’t have hot fudge sauce?
No worries! You can use melted dark chocolate or chocolate ganache as a substitute. It’ll lend that rich, chocolatey flavor you love!
Can I add fruits to the layers?
Definitely! Sliced bananas or strawberries would be a delicious addition—just be sure to arrange them gently on top of the peanut layer for a pretty presentation!

Conclusion
I hope you’re as excited to make this Buster Bar Dessert as I am to share it with you! It’s a recipe bursting with nostalgia and flavor, perfect for any gathering or simply to enjoy on a hot summer day. I’d love to hear from you once you give this a try—let me know how it comes out in the comments! Get ready to savor every last bite!
Leave a Comment