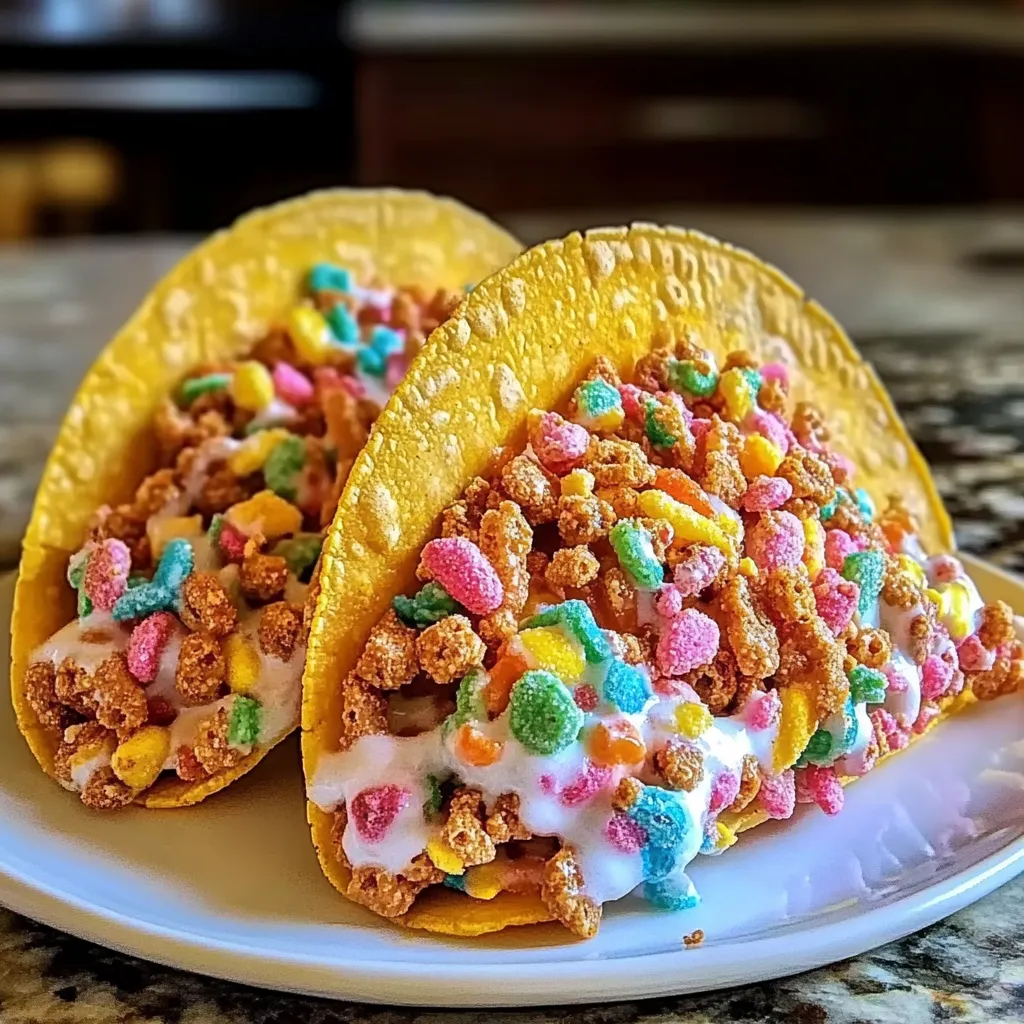
Are you ready to embark on a delightful culinary adventure that combines whimsy with indulgence? Say hello to the mouthwatering world of Fruity Pebbles Cheesecake Tacos! This unique dessert marries the creamy richness of cheesecake with the playful crunch of taco shells, creating a treat that appeals to both the young and the young-at-heart. The vibrant colors and fruity flavors of the iconic cereal add a joyful pop, making these tacos a show-stopping centerpiece for any celebration or casual get-together.
But why stop at the traditional? You can easily customize your creation by incorporating flavors like chocolate or vanilla, or even experimenting with different toppings, such as whipped cream or fresh fruit. For the best results, ensure that your cheesecake filling is perfectly chilled before assembly, as this makes for a refreshing bite. Use baked taco shells for added structure, ensuring they hold their delightful contents. Let your creativity shine as you explore the endless possibilities of this fun dessert!
Ingredients for Fruity Pebbles Cheesecake Tacos:
For the Taco Shells:
- 1 ½ cups all-purpose flour
- ½ cup unsweetened cocoa powder
- 1 tablespoon granulated sugar
- ½ teaspoon salt
- ½ cup unsalted butter, chilled and cubed
- 1 large egg
- 3-4 tablespoons ice water
For the Cheesecake Filling:
- 16 ounces cream cheese, softened
- 1 cup powdered sugar
- 1 teaspoon vanilla extract
- ½ cup sour cream
- 1 cup whipped cream (or 1 ½ cups Cool Whip for a no-bake option)
- 1 cup Fruity Pebbles cereal, plus more for topping
For the Toppings:
- 1 cup whipped cream (for garnish)
- ½ cup Fruity Pebbles cereal (for garnish)
- Chocolate sauce (for drizzling)
- Fresh fruit (like strawberries or bananas, optional for added flavor)
Optional Variations:
- Add a splash of almond extract for a nutty touch in the cheesecake filling.
- You can experiment by using different flavored cereals, such as Cap’n Crunch or Trix, for a fun twist on flavors.
- For a tropical version, consider mixing in ¼ cup of crushed pineapple into the cheesecake filling.
- If you’re looking for a lower-calorie option, substitute the cream cheese with a light cream cheese alternative and reduce the sugar accordingly.
Special Tools You Might Need:
- Cookie cutter or taco mold for shaping the taco shells
- Electric mixer for the cheesecake filling
- Baking sheet for baking taco shells
- Mixing bowls in various sizes
Now that you have gathered all the ingredients for your delicious Fruity Pebbles Cheesecake Tacos, it’s time to move on to the preparation and assembly. Enjoy the vibrant flavors and fun textures!
How to prepare Fruity Pebbles Cheesecake Tacos:
Creating these delightful Fruity Pebbles Cheesecake Tacos is a fun and simple process. Follow these easy steps to ensure a successful and tasty result.
Step 1: Gather Your Ingredients
Start by collecting all your required ingredients. You’ll need a package of cream cheese, granulated sugar, vanilla extract, sour cream, heavy cream, and a box of Fruity Pebbles cereal. Additionally, you’ll need taco-shaped waffle cones, mini marshmallows, and melted butter.
Step 2: Make the Cheesecake Filling
In a mixing bowl, combine the cream cheese and granulated sugar. Use a hand mixer to blend until smooth and creamy. This step is crucial for creating a fluffy texture.
Step 3: Add Flavor and Creaminess
Add the vanilla extract and sour cream to your mixture. Continue mixing until all ingredients are well incorporated. This adds a rich flavor to the cheesecake.
Step 4: Whisk the Heavy Cream
In a separate bowl, pour in the heavy cream. Use a whisk or mixer to whip it until stiff peaks form. This whipping will make your cheesecake light and airy.
Step 5: Combine Mixtures
Gently fold the whipped heavy cream into the cheesecake filling. Use a spatula and a gentle hand to preserve the airiness of the mixture. This folding technique ensures a smooth filling texture.
Step 6: Incorporate Fruity Pebbles
Add in 1 cup of Fruity Pebbles cereal to the mixture. Stir until they are evenly distributed throughout the cheesecake filling. This will enhance the flavor and add a fun crunch.
Step 7: Prepare the Taco Shells
Brush the taco-shaped waffle cones with melted butter. This will help them to become crispy and flavorful when baked. You may also choose to add some crushed Fruity Pebbles for extra sweetness.
Step 8: Assemble the Tacos
Fill each taco shell with the creamy cheesecake filling using a piping bag or a spoon. Be generous to ensure they are packed with flavor. Top each with additional Fruity Pebbles and mini marshmallows for a delicious finish.
With these easy steps, you’ll create the most delightful fruity treats perfect for any occasion! Enjoy!
Tips for the Perfect Fruity Pebbles Cheesecake Tacos
Making delightful Fruity Pebbles Cheesecake Tacos requires attention to detail and quality ingredients. Here are some tips to help ensure your creation is a sweet success.
Maintain the Correct Temperature
Temperature plays a key role in achieving the right consistency for the cheesecake filling. Start by using cream cheese that is at room temperature; this prevents lumps and ensures a smooth mixture. You should leave the cream cheese out for about an hour before mixing. If you accidentally chill the filling after it’s made, allow it to sit at room temperature for a few minutes to soften before using it. This way, spreading it into the taco shells becomes much easier.
Utilize Quality Ingredients
The flavor of your Fruity Pebbles Cheesecake Tacos will largely depend on the quality of your ingredients. Choose a good brand of cream cheese and vanilla extract for the best flavor. Fresh, crunchy taco shells make a significant difference too. You can find premade shells in stores, but for an even more special touch, try baking your own. If you want them more crispy, lightly bake the shells at 350°F for about 5–7 minutes and allow them to cool before filling them.
Suitable Substitutions for Dietary Restrictions
Everyone loves dessert, but not everyone can enjoy the same kind of sweets. If gluten is a concern, consider using gluten-free taco shells. For a dairy-free option, look for vegan cream cheese and coconut whipped cream to achieve a similar creamy texture. You can also replace sugar with plant-based sweeteners like agave syrup or maple syrup. These can add unique flavors while catering to specific dietary needs.
Play with Flavor Variations
Don’t hesitate to experiment! You can add flavor extracts, such as almond or lemon, to the cheesecake filling for an interesting twist. Mixing in pureed fruit like strawberries or raspberries can also enhance the flavor profile. Another fun option is to use different cereals instead of Fruity Pebbles, like Cocoa Pebbles or even a mixed berry granola. Just keep in mind to adjust the sweetness accordingly.
By following these tips, your Fruity Pebbles Cheesecake Tacos can be a show-stopping sweet treat that everyone will enjoy!
Storage Tips for Fruity Pebbles Cheesecake Tacos:
Storing your delightful Fruity Pebbles Cheesecake Tacos properly helps maintain their flavor and texture. Follow these simple tips for best results.
Cooling and Initial Storage
After preparing your cheesecake tacos, let them cool at room temperature for about 30 minutes. This prevents condensation that can make the shells soggy. Once cooled, place them in an airtight container. Select a container that allows minimal empty space to limit air exposure, which can degrade freshness.
Refrigeration for Freshness
Store the cheesecake tacos in the refrigerator if you plan to eat them within a week. Keep them in the airtight container, separating layers with parchment paper to avoid sticking. The cold environment slows down spoilage and helps maintain texture. For the best experience, enjoy them within 4–5 days.
Freezing for Longer Storage
If you need to store them for an extended period, freezing is an excellent option. Wrap each taco individually in plastic wrap to protect against freezer burn. Alternatively, use parchment paper and then place them in a freezer-safe bag or container. Ensure the container is airtight to prevent moisture entry. These tacos can last for up to 2 months in the freezer without losing quality.
Thawing Instructions
To thaw, simply transfer the frozen tacos to the refrigerator overnight. For a quicker option, you can leave them at room temperature for about 1–2 hours until soft. Avoid using a microwave, as this may alter the texture and ruin the crispy shell. Once thawed, enjoy them cold or allow them to sit at room temperature for a few minutes for the best taste.
Maintaining Quality
To keep your tacos tasting fresh, avoid adding toppings until just before serving. This helps maintain both texture and flavor. Always check for any signs of spoilage before the planned consumption date. Indicators such as off smells, discoloration, or texture changes mean it’s time to discard them.
By following these storage tips, you can enjoy your Fruity Pebbles Cheesecake Tacos at their best quality for days to come!
Related Recipes
If you love the delightful crunch and sweetness of Fruity Pebbles Cheesecake Tacos, you’ll enjoy these similar recipes that capture the same fun flavors and textures.
- Cereal Milk Pudding: This dessert brings the nostalgic taste of your favorite childhood cereals into a creamy pudding. By using the milk left over from your Fruity Pebbles, you can create a sweet, rich base that pairs wonderfully with whipped cream. Both recipes celebrate the joy of cereal, making them a perfect match.
- Rainbow Fruit Parfaits: Colorful and vibrant, rainbow fruit parfaits offer a refreshing and fruity twist. Layer yogurt, assorted fresh fruits, and granola for crunch. The bright colors and fruity flavors complement the novelty of cheesecake tacos, making them a great addition to any dessert spread.
- Cookie Crust Cheesecake Bars: These bars feature a delicious cookie crust topped with creamy cheesecake. The cookie crust adds a satisfying crunch similar to the taco shell in cheesecake tacos. These intense flavors combine well, ensuring a decadent dessert experience.
- Rice Krispie Treats with Sprinkles: For a simple, whimsical treat, consider rice krispie treats showered with colorful sprinkles. The crunchy texture and sweet flavors mirror the essence of fruity tacos and create a playful vibe at any gathering.
Each of these recipes shares a common theme with Fruity Pebbles Cheesecake Tacos: they are colorful, fun, and packed with delightful flavors that revive childhood memories. Add them to your dessert table for a festive and delicious experience!
Frequently Asked Questions:
What are Fruity Pebbles Cheesecake Tacos?
Fruity Pebbles Cheesecake Tacos are a fun and whimsical dessert that combines the deliciousness of cheesecake filling with a taco shell made from sweet ingredients. The tacos are often coated with crushed Fruity Pebbles cereal, creating a colorful and crunchy exterior. Inside, the creamy cheesecake mixture can be infused with various flavors, making them a delightful treat loved by both kids and adults.
How do you make the taco shell for these desserts?
To create the taco shell for these delightful cheesecake treats, you can use a pliable tortilla or make a cookie-based shell. If you prefer a cookie shell, you can blend cookie dough with crushed Fruity Pebbles and shape it into taco forms, then bake until golden. Alternatively, you might opt for a traditional tortilla and fry or bake it until it becomes firm yet still maintains some flexibility.
Can I customize the filling for the cheesecake tacos?
Absolutely! While many people enjoy the classic cheesecake filling, you can customize it to suit your preferences. Consider adding flavors like vanilla, chocolate, or even fruit purees for a unique twist. You can also introduce mix-ins such as mini chocolate chips or other candies to enhance the overall flavor profile.
Are Fruity Pebbles Cheesecake Tacos suitable for special dietary needs?
Yes, these cheesecake tacos can be adapted to cater to various dietary requirements. For those looking for gluten-free options, you can use gluten-free cookies to create the shells. Moreover, you could whip up a dairy-free filling using non-dairy cream cheese or coconut cream, allowing everyone to indulge in this delectable dessert, regardless of their dietary restrictions.
How should I store leftover cheesecake tacos?
If you happen to have any leftover fruity tacos, it’s best to store them in an airtight container in the refrigerator. However, it is advisable to keep the taco shells separate from the filling to maintain their texture. When stored properly, they can last for up to 2-3 days, but enjoy them sooner for the best taste experience!
Can I serve these taco desserts for a special event?
Definitely! Fruity Pebbles Cheesecake Tacos are a vibrant and eye-catching dessert option perfect for parties, birthdays, or any festive gathering. Their playful presentation and delicious flavors make them a hit among guests of all ages. Serve them alongside other treats for a colorful dessert table that will impress everyone!
Conclusion:
In summary, creating Fruity Pebbles Cheesecake Tacos is an enjoyable experience that balances flavor and fun. This recipe highlights the simplicity of crafting a delightful dessert that can be whipped up in no time. The flexibility of the cheesecake filling allows you to personalize each taco, making it perfect for various occasions, from casual family gatherings to festive parties. By integrating your favorite toppings or experimenting with different cookie shells, these treats offer endless customization options. Whether you prefer a crunchy or creamy texture, the choice is yours. The vibrant colors and playful presentation will certainly impress guests of all ages. With this easy recipe in your toolkit, you can indulge in a unique treat that satisfies every sweet tooth. Enjoy crafting these delightful desserts and let your creativity shine!
Print
Fruity Pebbles Cheesecake Tacos: Delightful Dessert Treat
- Total Time: 25 minutes
- Yield: 6 dessert tacos 1x
Description
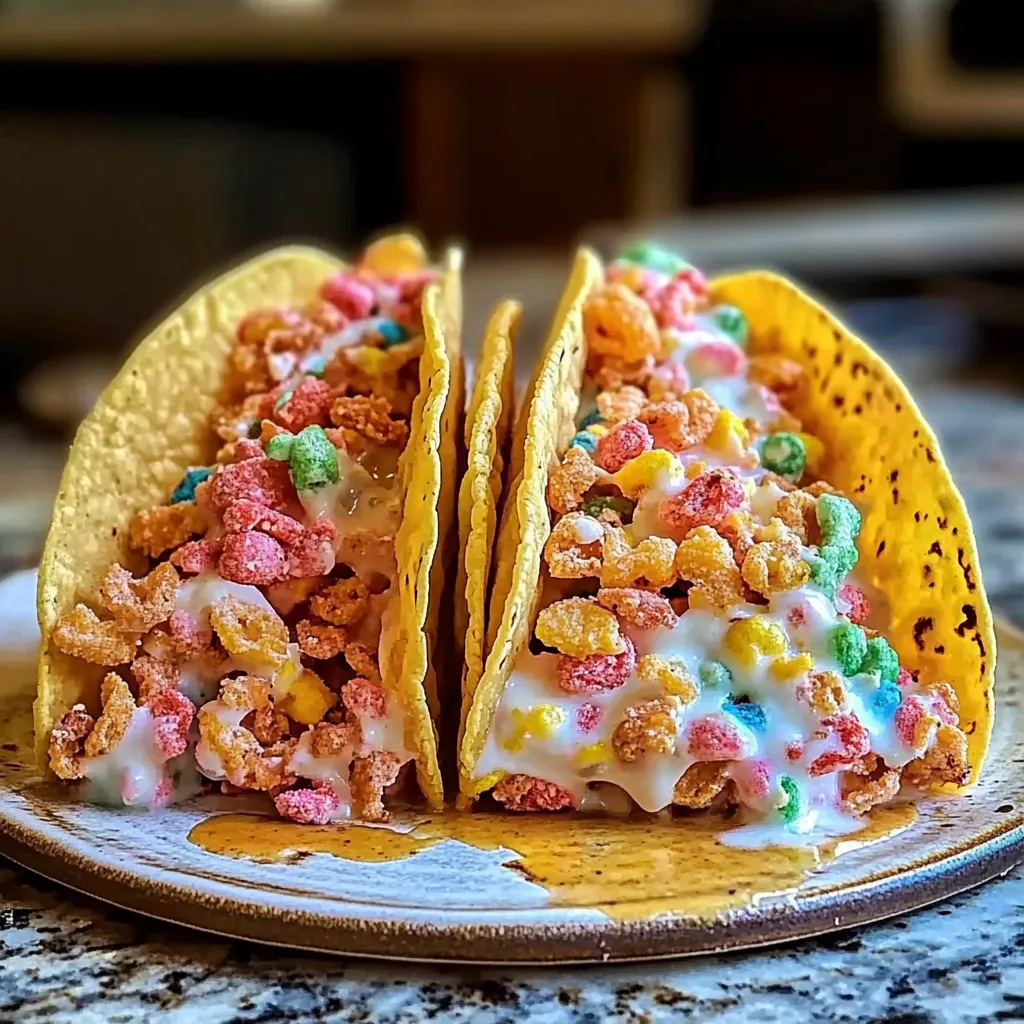
These Fruity Pebbles Cheesecake Tacos are a whimsical and colorful dessert that combines crunchy cereal taco shells with rich, creamy cheesecake filling. Fun to make and even more fun to eat—perfect for parties, kids, or just when you’re craving something sweet and unique!
Ingredients
-
2 cups Fruity Pebbles cereal
-
2 cups mini marshmallows
-
2 tbsp unsalted butter
-
1 (8 oz) package cream cheese, softened
-
1/2 cup powdered sugar
-
1 tsp vanilla extract
-
1 cup whipped topping (or whipped cream)
-
Optional toppings: sprinkles, fresh fruit, melted white chocolate
Instructions
-
Make Cereal Shells: In a saucepan, melt butter over low heat. Add marshmallows and stir until smooth. Mix in Fruity Pebbles until coated.
-
Form Taco Shells: Quickly press mixture into small taco shapes using the back of a spoon and a rolling pin or curved mold. Let set.
-
Prepare Cheesecake Filling: Beat cream cheese until smooth. Mix in powdered sugar and vanilla. Fold in whipped topping.
-
Assemble Tacos: Spoon or pipe cheesecake filling into cooled cereal taco shells. Add toppings as desired.
-
Chill & Serve: Refrigerate for 15 minutes before serving for best texture.
Notes
-
Work quickly with the cereal mixture before it hardens.
-
For neat tacos, use a muffin pan turned upside down to help mold the shells.
-
Can be made a few hours ahead—just refrigerate until ready to serve.
- Prep Time: 20 minutes
- Cook Time: 5 minutes
Nutrition
- Calories: 270 kal
- Sugar: 23g
- Sodium: 125mg
- Fat: 14g
- Saturated Fat: 8g
- Carbohydrates: 32g
- Fiber: 0g
- Protein: 3g